Branding Guide
Poly Atlas features a step-by-step guide to the Branding process including practical tips, case studies, template files, and many other useful resources.
Getting Started
This framework can be a valuable resource for any person with an interest in Branding, whether you are a seasoned creative professional, a rookie design or marketing student, an entrepreneur or business owner, or simply a Branding enthusiast.
Each section of this platform breaks down the Branding process into individual goals along with: (1) a general description of each goal, (2) an account of whom in the Branding team should be appointed to perform each task, (3) a rough estimation of the hours of work allocated to each goal, and (4) further information, resources, and case studies.
Branding is a multidisciplinary process and hence it's best performed by a team of professionals who specialise on each discipline. However, whether you wish to design Brand Identities for clients as a part of a creative team or as a solo freelancer, following this framework —and, if necessary, adapting it to your specific needs— aims to (1) provide you with a better understanding of the Branding process, and (2) optimising and expediting your workflow, allowing you to fast-track all the minor administrative tasks and allowing you to focus your efforts on the creative output.
All along this workflow you will find entries titled "The Polyfen Group" which showcase how we, at The Polyfen Group, have performed each task.
However, bear in mind that every Branding or Brand Identity Design project is unique and can be vastly different depending on the specifics of the business, industry, budget, time frame, target public, and the skill level of the people involved, as well as their resources and preferred work methodology.
All authored content within this document is distributed for free by Boris Hrncic & The Polyfen Group under a Creative Commons Attribution 4.0 International License.
Furthermore, this is a collection of what we at The Polyfen Group consider to be the best practices in Branding, but other authors may digress.
You can be a part of the conversation and share your comments and questions in our online community Poly Forum, a place to discuss branding, share tips and resources, ask questions, request feedback, and connect with other creatives around the world.
Now, let's go ahead and get started!
Intro to Branding
Before jumping into the Brand Identity Design process, we must first ensure a common understanding of what a Brand is and how Branding works.
What is a Brand?

A Brand is a collective representation of an Entity. How people feel about something the interact with; What is that something; And, how is that something different from all other related things.

A Brand is made up of three inter-connected parts: (1) Brand Entity, or “how a business actually is”, (2) Brand Identity, “who the business says it is”, and (3) Brand Perception, “how the public feels the business is”.

A Brand Entity is the source of a Brand. “Something that has separate and distinct existence.” The Entity could be an individual, an institution, a non-profit organisation, a business, a division within a business, a service, or a product; But, most commonly, it’s a business. So, the term “Brand Entity” would entail how the business operates internally (how are the products made? how are the services performed? how is the company managed? what is the work culture like for the employees?).
“Brand Identity” or “Brand ID” refers to the distinguishing character or personality of a Brand. How a business chooses to communicate their products and services. The specific words they choose to use, the Brand Name and Logo they choose to differentiate themselves in the marketplace, the colours on their website, business cards, email signatures… These all are part of the Brand Identity.

The Brand Perception is the resulting emotional response of the public upon interacting with a Brand. How many people are aware of your business’ existence? Are prospective customers attracted by your product/service offer? After purchase, are customers satisfied? How would the general public describe your business?
It’s normal to find a discrepancy between the Brand Entity, the Brand Identity, and the Brand Perception. A business, naturally, wants their Brand Identity to represent their best aspirational ideals, perhaps you want to communicate only the best traits of your products and services, while hiding the flaws; perhaps, you might even be inclined to oversell your product and promise customers more than you will actually be able to deliver. Businesses are accountable for setting realistic expectations and being reliable about that Brand Promise. However, besides of being an ethical duty, the Brand Promise helps narrowing the gap between the Brand Entity, Identity, and Perception.
Brands are everywhere. Your personality, your signature (or logo), the way you choose to dress, and even the things you choose to say assign you with a personal Brand; a Brand which the people you interact with might like or dislike at different rates.
Even countries, social movements, and religious institutions, such as the catholic church have a Brand. Featuring a flag or a cross as a representative Logo, and taking a stance in different socio-political issues which people might agree or disagree with at different rates.

Every medium where the business interacts with its public is known as a Brand Touchpoint; This includes services, products, social media, emails, websites, customer support, sales, retail shops, and many more. The Touchpoints allow the Brand Identity to reach the public and therefore generate a Brand Perception in response.

While the Brand Touchpoints are the medium used to connect with the public, each connection can be called a “Brand Interaction”; This includes each time that a member of the public uses a product or service, or when they see a social media post from your business, or they read an email from your business, or when they write an email to your business.
A Brand is constantly evolving with each Interaction between the business, the public, and the cultural environment. For instance, people change the way they feel about a certain product once they have tried it and not liked it; However, they are also likely to change the way they perceive a Brand even if they haven't tried the product, but have heard that most people dislike it.
Or imagine, if you will, walking past a bakery and being attracted by the sweet smell of freshly baked artisanal pastries. Even smell can interact with the public and communicate the value of a Brand.
What is Branding?

Branding is the process of developing a Brand. In other words, it's the process of associating certain feelings and emotions with a business.
Branding is multisensory (this means that it can be prompted by something we see, hear, touch, smell, or taste), multidisciplinary (professionals from different disciplines are involved), continuous (it never stops), and collective (includes every member of the public).
It is important to note that designing a Logo for a business, for instance, is only a minuscule portion of the Branding process, which additionally includes how the business operates and interacts with its customers, and even how current and historical events may affect the image that the public has of such business.
The Branding process is not necessarily a conscious effort to actively design an appealing image for a business. Whenever a potential customer is talking to a sales person, for instance, the business is undergoing a Branding process.
The same can be said about any other situation where a person is exposed to information that would shape the way they think and feel about a business. If you hear on the local news that your favourite restaurant is under investigation for poor hygienic conditions, that restaurant won't be your first choice the next time you're planning to go out for dinner. That, is Branding. Even if the restaurant was really in excellent conditions, associating that business with a negative experience will affect the way you feel about their Brand.
The Branding process of a commercial Brand typically revolves around the following stages:
1. Business Development

Conforming a business usually comprehends performing a market research, writing a business plan, and developing the Business Touchpoints (services and products).
2. Brand Identity Design

Choosing a name for the Brand, defining a direction for the look-and-feel, designing a logo and a Visual Identity, and the basic Brand Identity Touchpoints (Email signature, Business cards, Letterhead, Presentation slides template, Parking page, Social media profiles).
3. Brand Activation

Launching the business with an offer of services and/or products, and reaching out to the target public through Promotional Touchpoints, which typically includes establishing an online presence (website and social media profiles) and advertising the brand through different promotional channels (online ads, print ads, merch, sponsoring events, networking, etc.).
4. Brand Iteration

Measuring and analysing the Brand Perception (how the audience perceives the brand). This can be done with different marketing research techniques including surveys and interviews, web analytics, user testing, focus groups, and even auditing the financial results of the business.
Fine-tuning the Business Development, Brand Identity Design, and Brand Activation, improving upon existing Touchpoints and developing new ones.
3. What is a Logo?
A Logo is a visual representation of the Brand Identity’s essence.
A Logo could be classified as an Ideogram, Wordmark, Emblem, or Signature.

Ideogram: A visual sign that represents the Brand Identity in its minimal form. “A graphic symbol that represents an idea or concept, independent of any particular language, and specific words or phrases.” An Ideograma could fall into one of the following categories: (1) Abstract mark, (2) Pictorial mark, or (3) Lettermark.

Wordmark: A distinct typographic treatment of the Brand Name in text only.

Emblem: A sign comprised of the Brand Name along with other visual elements.

Signature: An extension of the Emblem which also includes the Brand’s Slogan as a tagline.
Logo System: The Brand’s whole family of Logos including Ideograms, Wordmarks, Emblems, and Signatures set in all the applicable variations.
A Logo is a powerful visual sign that has the power to express ideas that people love or hate. But, a Logo is not a Brand, it’s a minuscule portion of the Visual Identity system that makes up a small part of a Brand.
Apart from Logos, there are other Trademarks which act as distinctive identifying traits of a Brand. These could include the Brand Name, Slogan, Logo, and Package Design amongst others.
4. Terminology
You may find that different sources and authors use a different terminology for some key concepts related to Branding. Here are some examples and the "why" we prefer to use some words over others.
Branding vs. Brand Identity Design: We believe that "Branding" includes every interaction between a business, its public, and its cultural context; While "Brand Identity Design" is only a small portion of the larger Branding process. For instance, if a person walks into a shop and talks to the sales-person, that is part of the Branding process, since it's directly connected to how that person feels about that Brand; However, Brand Identity Design is a conscious effort on behalf of the business to have an appealing image.
Corporate Identity vs. Brand Identity: "Corporate Identity" is a term often used when referring to the Branding process. However, Brands are not only for corporations; Brand Identities can for instance represent an individual person, a small business, a non-profit organisation, a social movement, or a religious or educational institution.
Audience vs. Public: The origin of the word "Audience" comes from audio listeners. Most authors refer to a Brand's Target Public as "Audience"; However, Brands communicate not only through audio, but also through visuals and other mediums.
Branding vs. CX: Customer Experience or “CX” is a popular term lately. Although, for us it’s mostly a synonym for Branding. So, we could say that a “CX Designer”, or “CX specialist”, is someone who focuses on Branding. Which is more commonly seen as a title, as opposed to “Brand Designer”.
Business Development
So you've decided to start a business. Odds are you're getting yourself into something much bigger and difficult that you might have first imagined. However, don't beat yourself down. The solution to facing the herculean task of starting a business is research, planning, executing, and continuously optimising step-by-step. The good thing, is that we've got you covered! Following this framework can be a helpful tool to guiding you through the process of business development.
1. Market Research
Exhaustive research is the cornerstone of a strong Brand; It bridges the gap between Business Goals and Brand Identity. Furthermore, the Market Research is not only useful for the Identity Design, but it's also useful for all marketing activities of the business.
The Polyfen Group
You can browse the Market Research we did for our business at thepolyfengroup.com/market-research
1.1. Business Analysis
TaskGather information about the business
RoleMarketing Analyst
Estimated Workload0.5 – 2 hours
DescriptionThe best place to start is to gather as much information as possible about the business by answering the following questions:
- Why does the business exists?
- Is it a new business or are they already operational? If it's an existing business, how long has it been operating?
- Does the business already have a name? Are the business owners willing to change the Brand Name?
- What products / services does the business offer?
- How many people work in the business?
- Where is the business geographically based?
- How are the product / services distinctively better than those of the competition?
- Does the business already have a Brand Identity? An existing website or social media presence? If so, why are they wanting to Rebrand?
- How are the business' products / services priced when compared to the competition?
- What would be the business' ideal customer?
- Where are there customers geographically located? Is the business planning to expand to other markets?
- What problem do the customers have that the business can solve?
The Polyfen Group incorporates multiple sub-brands segmenting different services, organisations, and products all related to the creative industry; especially to the Branding process.
Polyfen, a creative agency offering Brand Identity Design services for new and emerging businesses. polyfen.com
Poly Atlas, a web platform which features a guide of best practices in Branding. polyatlas.app
Poly Forum, an international community of creatives dedicated to discussing Branding. polyforum.org
The goal of The Polyfen Group is to serve integral Branding solutions for every step of the process while segmenting our subsidiary Brands each one tailored for a different target group.
Further information can be found on our Business Plan available at › thepolyfengroup.com/business-plan
1.2. Target Public Analysis
TaskIdentify the Target Public
RoleMarketing Analyst
Estimated Workload0.5 – 2 hours
DescriptionBy understanding the business and surveying the industry we can already intuitively narrow down some demographics of what an ideal customer should be like.
Furthermore, especially if you're designing a Brand Identity for a foreign market, it's very important to understand the cultural context. You can start by surveying the country's cultural background and demographics on Wikipedia or on Geography Now!.
However, it is possible for a Brand to have multiple Public Groups which serve different purposes. For instance, a creative agency might have a Public Group (A) which includes decision makers of other businesses needing creative services, and (B) people from the creative industry who would be interested in the content published by the Brand.
At this point we must identify the different possible Public Groups, breakdown their corresponding demographic characteristics, and make User Personas stereotyping the ideal Public member of each group.
Each User Persona can include traits like:
- Profile Picture
- Name / Pseudonym
- Age
- Gender
- Residence location
- Occupation
- Income
- Socio-economic class
- Interests
- Brands they trust
- Unsatisfied need / Problem
- Solution offered by the business
- Desired business goal
This is a good time for your business to follow your Persona's interests in social media as a reference for the content they are consuming.
The Polyfen GroupHere is an example of a User Persona.
| Profile Picture |  |
|---|---|
| Pseudonym | Business Brandon |
| Residence | Melbourne, Australia |
| Age | 43 yo. |
| Occupation | Founder & CEO |
| Income | $9.000USD |
| Socio-economic Class | High |
| Interests | Entrepreneurship, Business, Marketing, Finance, Technology, Advertising, News. |
| Brands he trusts | Forbes, Bloomberg, Business Insider, Inc., Ted Talks, Ideo, Deloitte, Accenture, The Wall Street Journal, The Economist, Harvard Business Review, Entrepreneur. |
| Problem | Is the Founder & CEO of an emerging company in the Business Consulting sector but their Brand Identity doesn’t reflect the high quality of their services. |
| Solution | Finding a reliable team of experts who can identify their branding needs and design a compelling brand identity which will guarantee better business results. |
| Goal | Getting him to contact us in search of our services. |
1.3. Industry Analysis
TaskList the Industry leaders and direct competitors
RoleMarketing Analyst
Estimated Workload0.5 – 2 hours
DescriptionBy now, based on the Business Analysis, we know the Industry and Niche it belongs to.
A quick Google search can help us identify the industry leaders worldwide, and by adding the location of the specific markets of the business to the Google search we can also find direct competitors operating in the same area.
Different tools can also be used to better understand the industry and Target Public, like (1) Who's using and following related social media hashtags, (2) Who's following your other brands from your industry on social media, and (3) Analytics tools (like SimilarWeb, Alexa, and Quantcast).
For more technical, complex industries, you may browse research publications on ResearchGate or Academia.edu.
Make a list of both the industry leaders and direct competitors considering (1) which traits are common in the industry's brands, (2) which traits can be used to differentiate the business' Brand over its competitors, and (3) which brand is closer to the business' aspirations.
While you survey the industry it would be useful to additionally list Keywords that you might find relatable to the industry.
The Polyfen GroupHere's a sample of the top ten industry leaders we've found for Polyfen's Industry Analysis.
| Brand | Bio |
|---|---|
| Pentagram | Pentagram is the world’s largest independently-owned design studio. |
| Interbrand | At Interbrand, we believe that growth is achieved when an organization has a clear strategy and delivers exceptional customer experiences. We do both, through a combination of strategy, creativity, and technology that helps drive growth for our clients’ brands and businesses. |
| Landor | Landor builds some of the world’s most agile brands—brands that thrive on change. |
| Lippincott | We are a creative consultancy specializing in brand, innovation and experience design |
| Superunion | We're a next-generation brand agency built on a spirit of creative optimism. |
| FutureBrand | We are the creative future company. |
| Blind | We Help Brands & Businesses Gain a Competitive Advantage in the Connected World. |
| Motto | A branding agency for game-changers + rule-breakers. |
| Basic | A design agency built to build modern brands… |
| Curious | We believe asking the right questions makes brand stronger. |
1.4. Research Conclusion
TaskSummarise key insights of the Brand Research
RoleMarketing Analyst
Estimated Workload0.5 – 1.5 hours
DescriptionAfter considering all the surveyed information summarise your key insights regarding the business and which direction would be most effective for the Brand Strategy.
The Polyfen GroupOur business model is a compelling take against our competition and has the potential to become a leader of the creative industry through attracting, engaging, and delighting our target public.
2. Business Plan
The Polyfen Group
You can browse the Business Plan we did for our business at thepolyfengroup.com/business-plan
3. Products & Services
Define what would be the best quality Product or Service that your business can offer to its customers; Then reverse engineer what would be the process for developing those Products or Services; Lastly, write down the workflow guidelines for your team-members to follow.
For us at The Polyfen Group for instance, this very platform, Poly Atlas, serves as an internal wiki referring to the workflow of the services we provide.
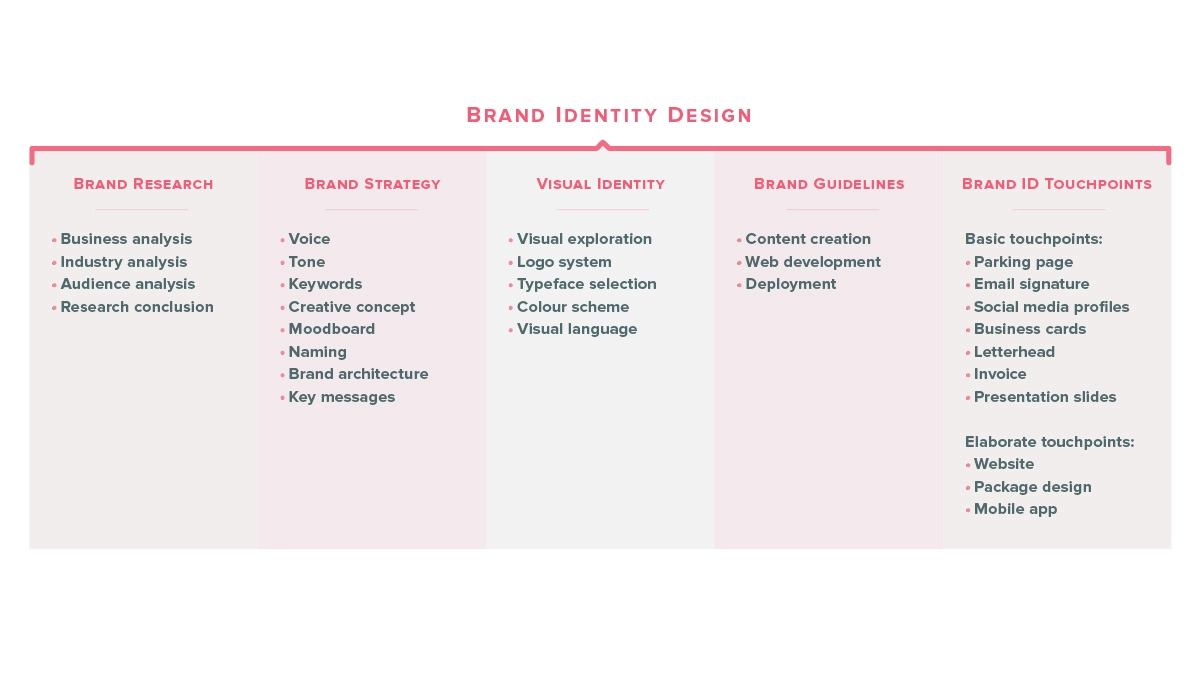
Brand Identity Design
The goal of a Brand Identity Design project is to translate the Business Strategy into a distinctive trademark which reflects the business goals and aspirations while appealing to the target public.
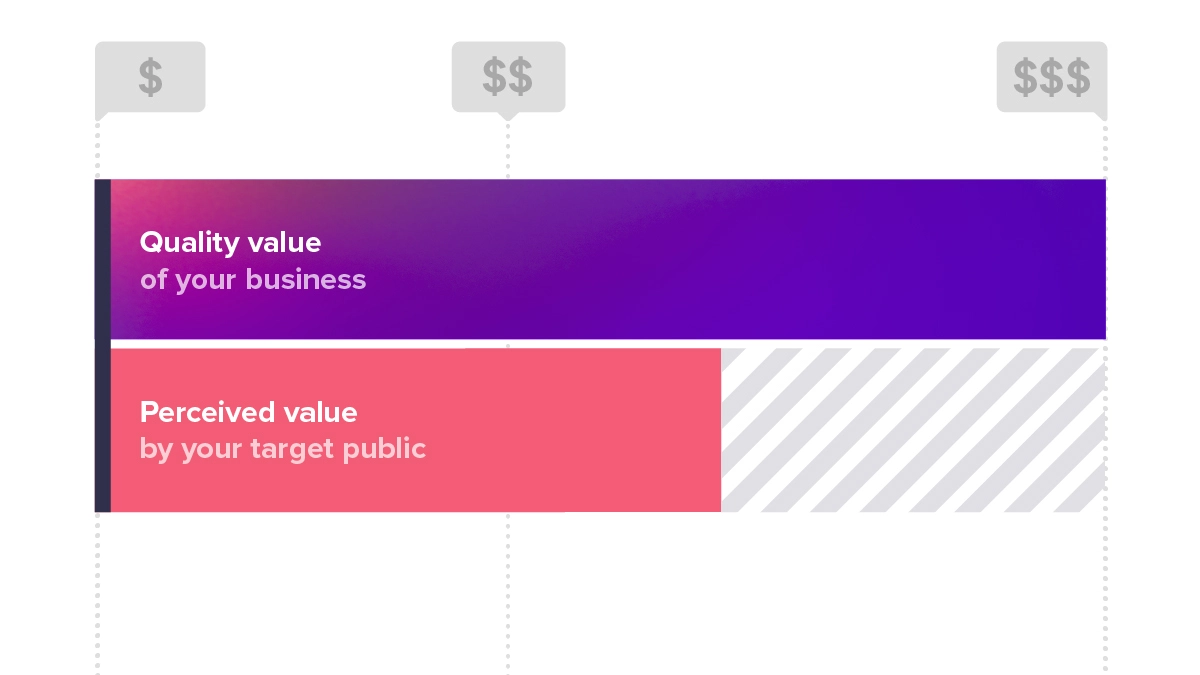
The Business Development process aims to increase the value of the business' products and services, while the aim of the Brand Identity Design is to reflect the Quality Value and increase the Perceived Value in order to attract potential customers.
1. Brand Strategy
Based on the information gathered from the Market Research, the Brand Strategy aims to define what’s the best possible way for the business to communicate its most appealing features to the target public and stand out over the competition.
The Polyfen Group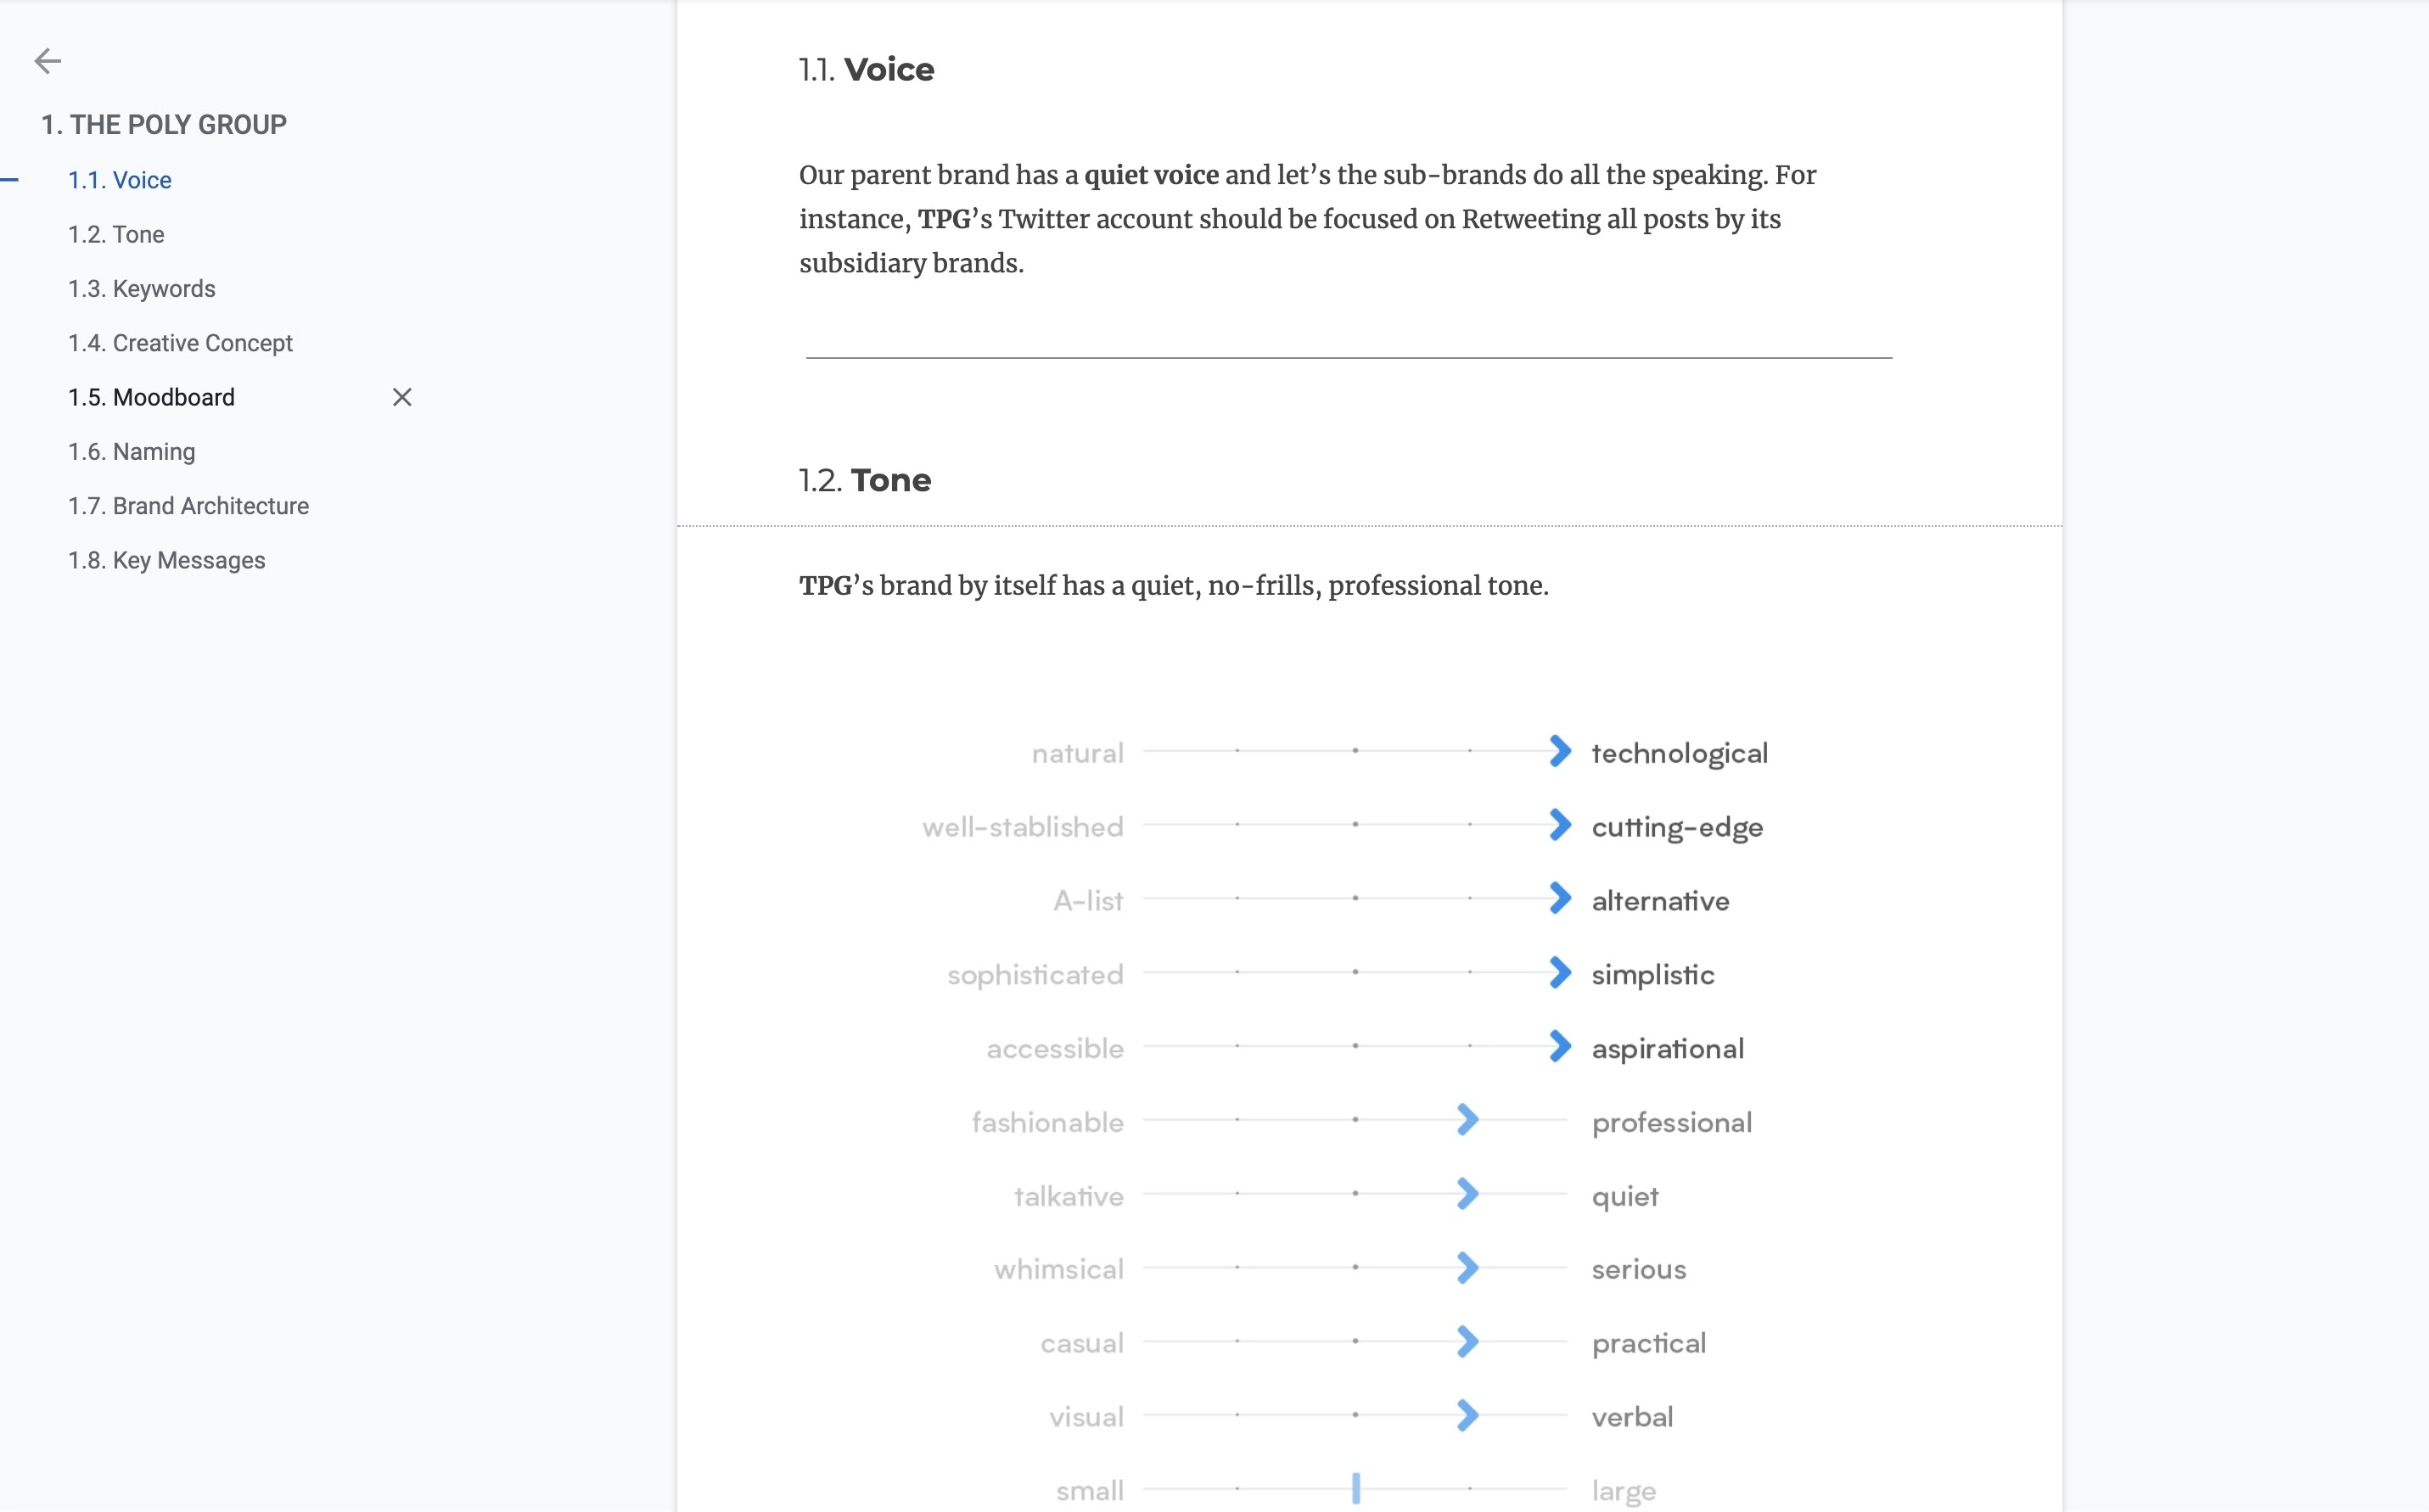 t
tYou can browse our Brand Strategy document at thepolyfengroup.com/strategy.
1.1. Voice
TaskDefine the brand's Voice
RoleMarketing Analyst
Estimated Workload0.5 – 1.5 hours
DescriptionThe best place to start choosing a direction for the Brand Identity would be to define what the Brand stands for at its core. What personality / mood / look-and-feel should identify the Brand Identity. What is the Brand going to be saying to its public.
The personality of a Brand can initially be defined by its Voice (what the Brand says) and Tone (how the Brand says it).
The Voice describes what type of content will be communicated by the Brand. The voice is what the Brand says, what type of information does the Brand offer to the public.
The most basic features of the Brand’s Voice are typically communicating the business’ services / products and its prices.
However, a Brand can also choose to publish educational content, or share curated links to relevant information on social media; Or perhaps the Brand’s Voice can focus on communicating the business’ mission and core values, or on promoting a humanitarian cause.
Case studies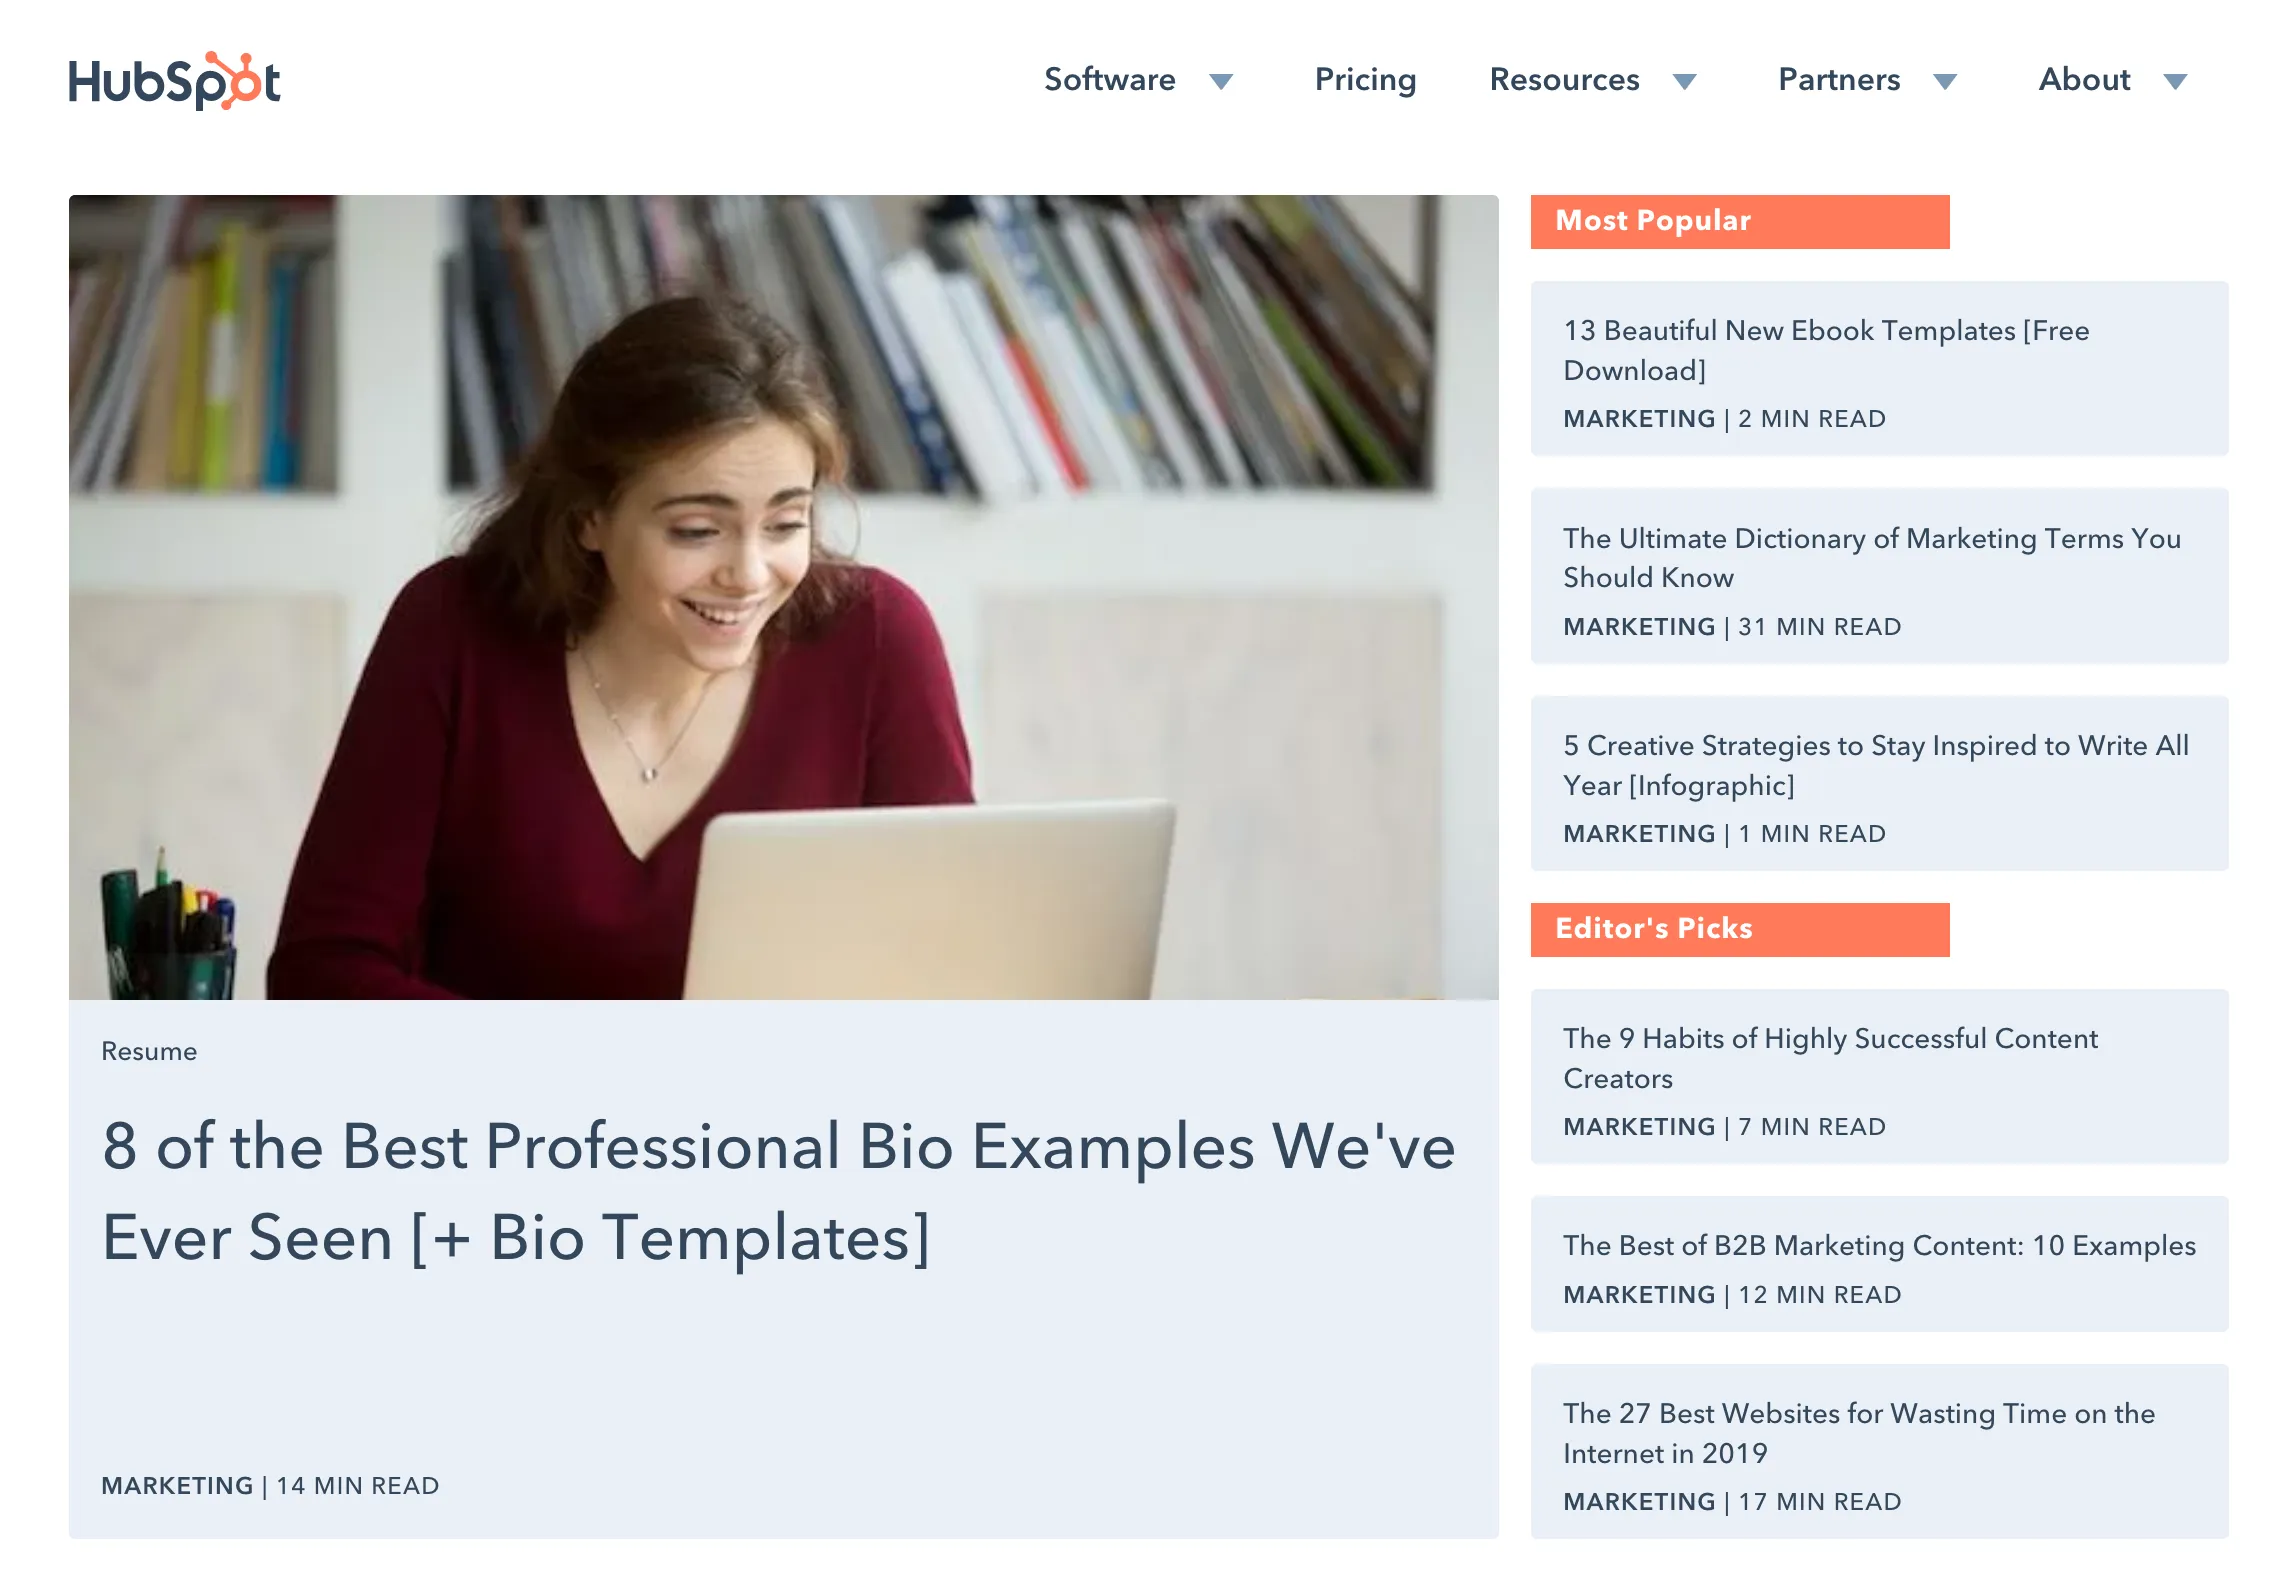
Hubspot offers a suite of CRM (Customer Relationship Management) and marketing tools. However, it has gained a reputable place in the marketing industry thanks to their regular and quality publications of original educational content through their blog, ebooks, and online courses.
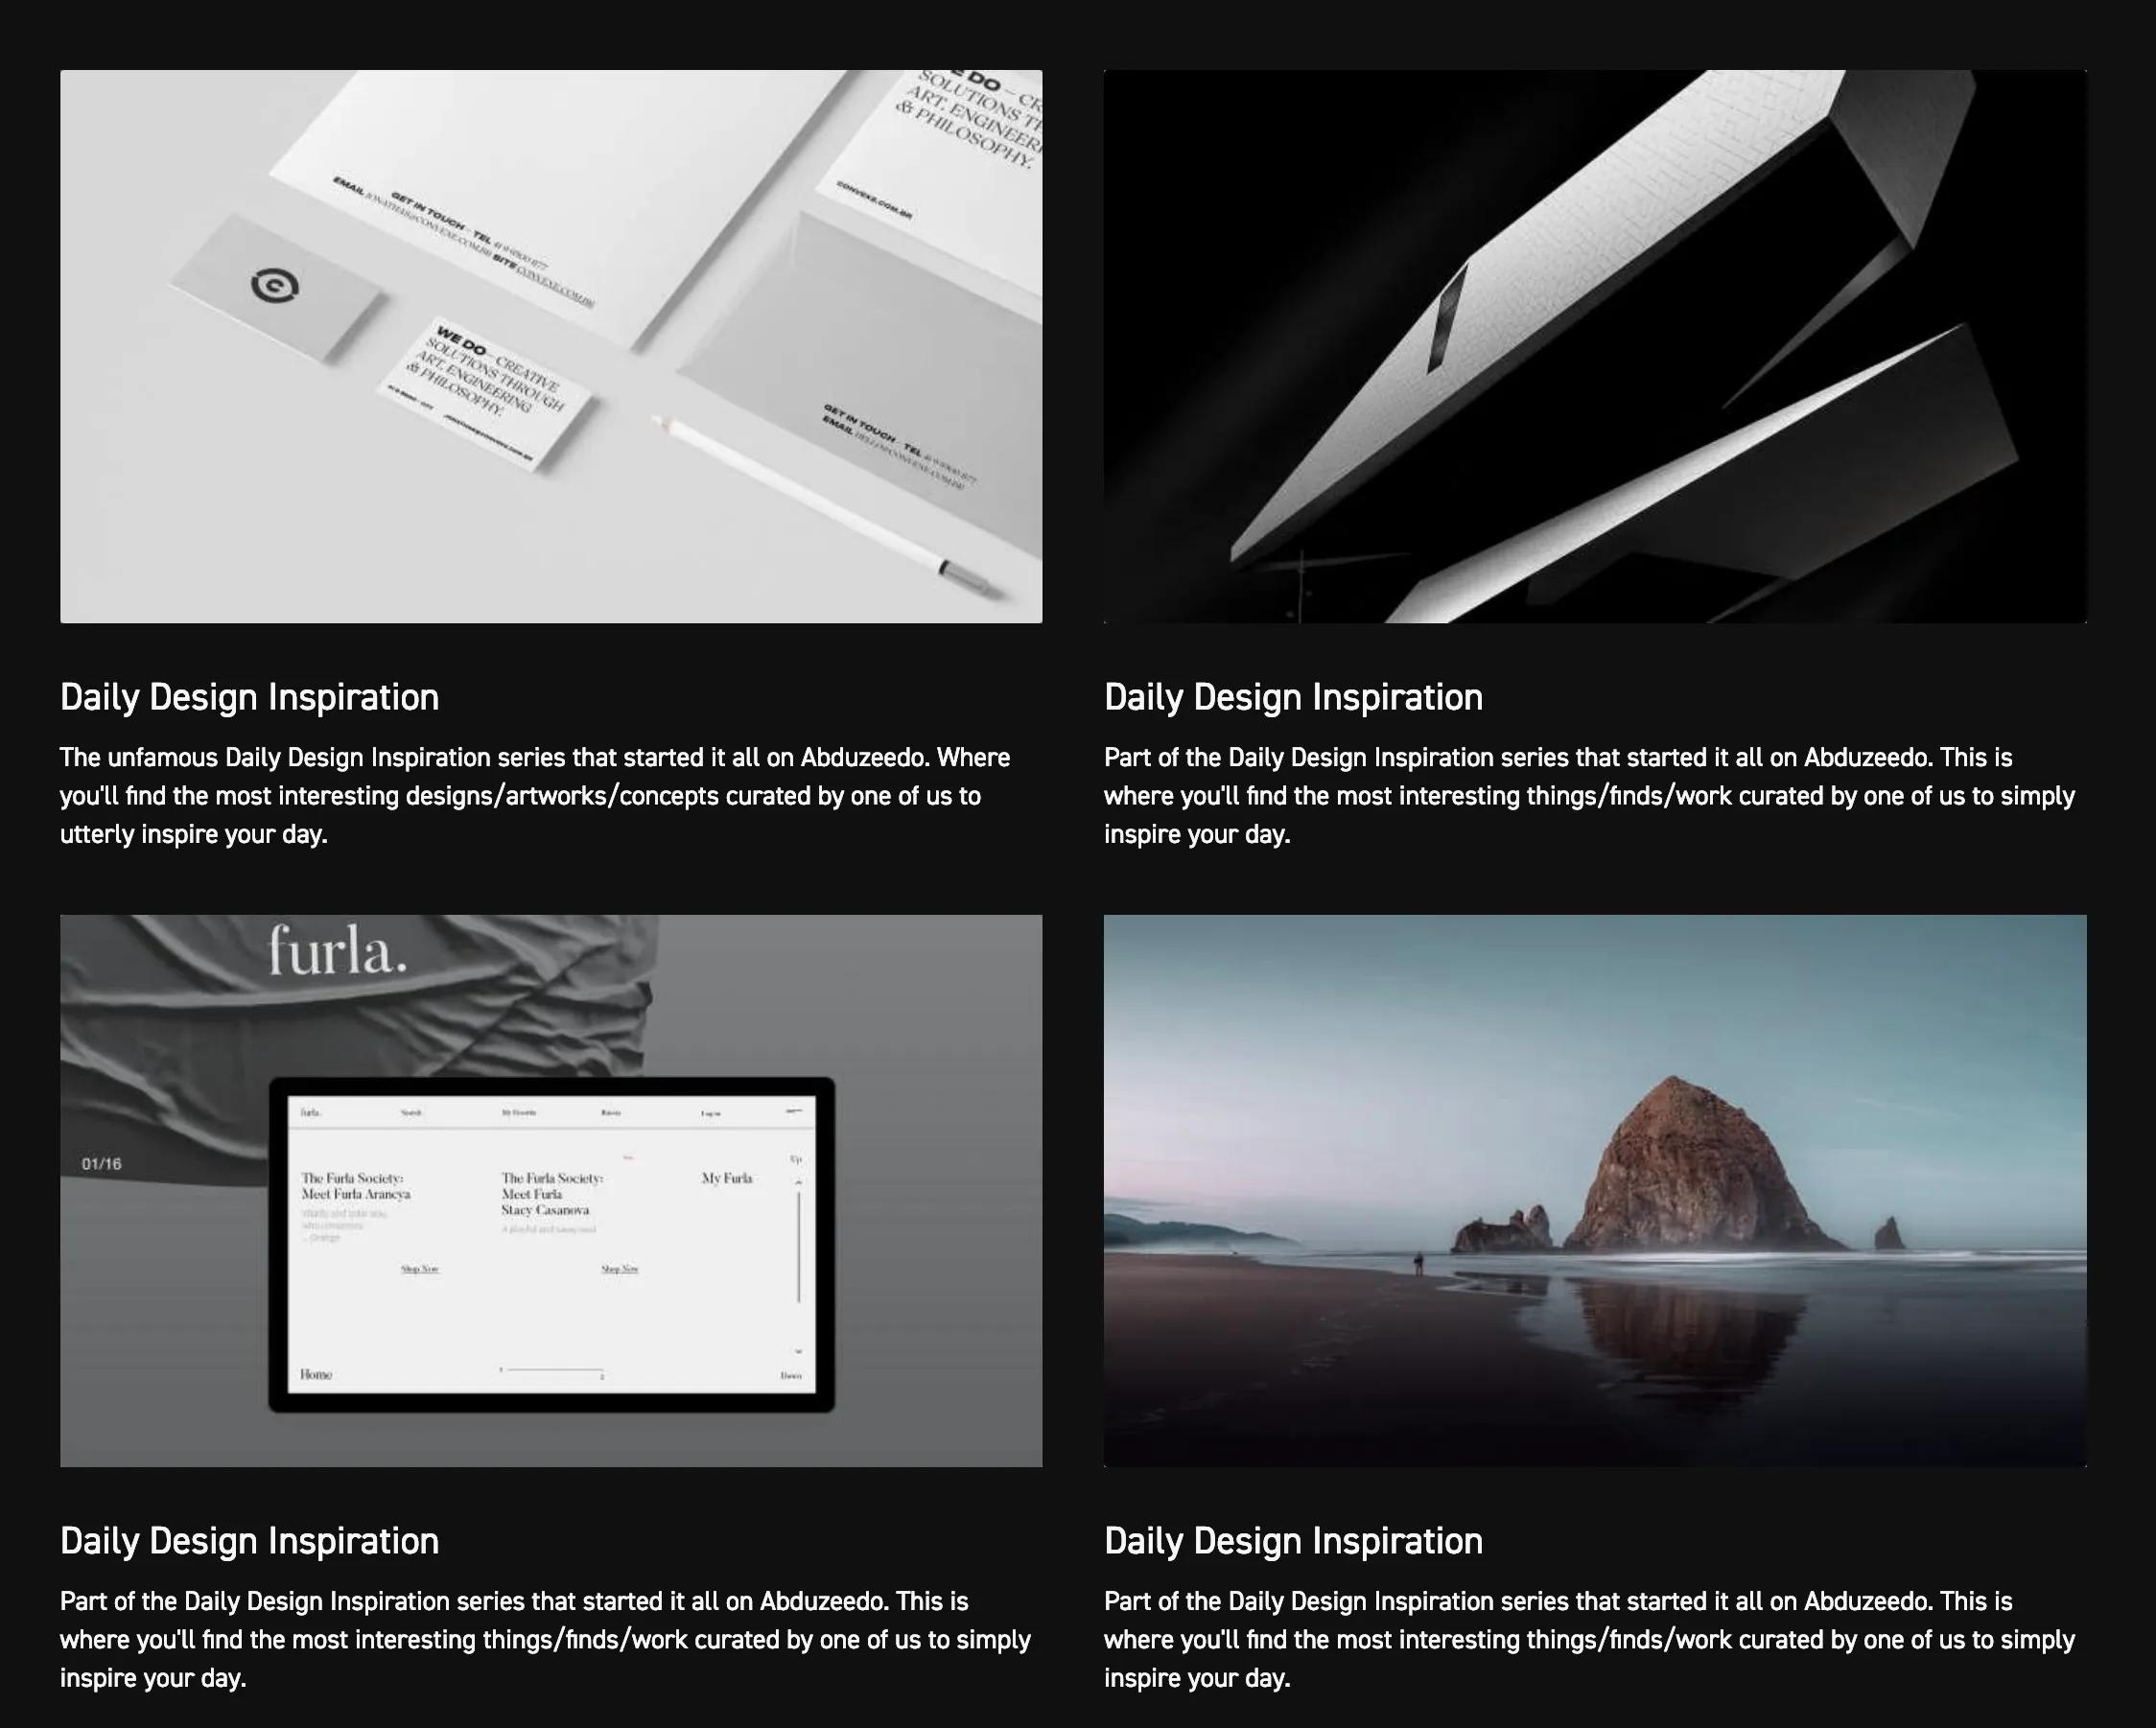
Abduzeedo is a long-time running blog publishing design related original content. However, most notoriously, their Brand’s voice relies on publishing curated content in their series of daily posts “Daily Design Inspiration”, which showcases artworks from any and all designers and visual artists.
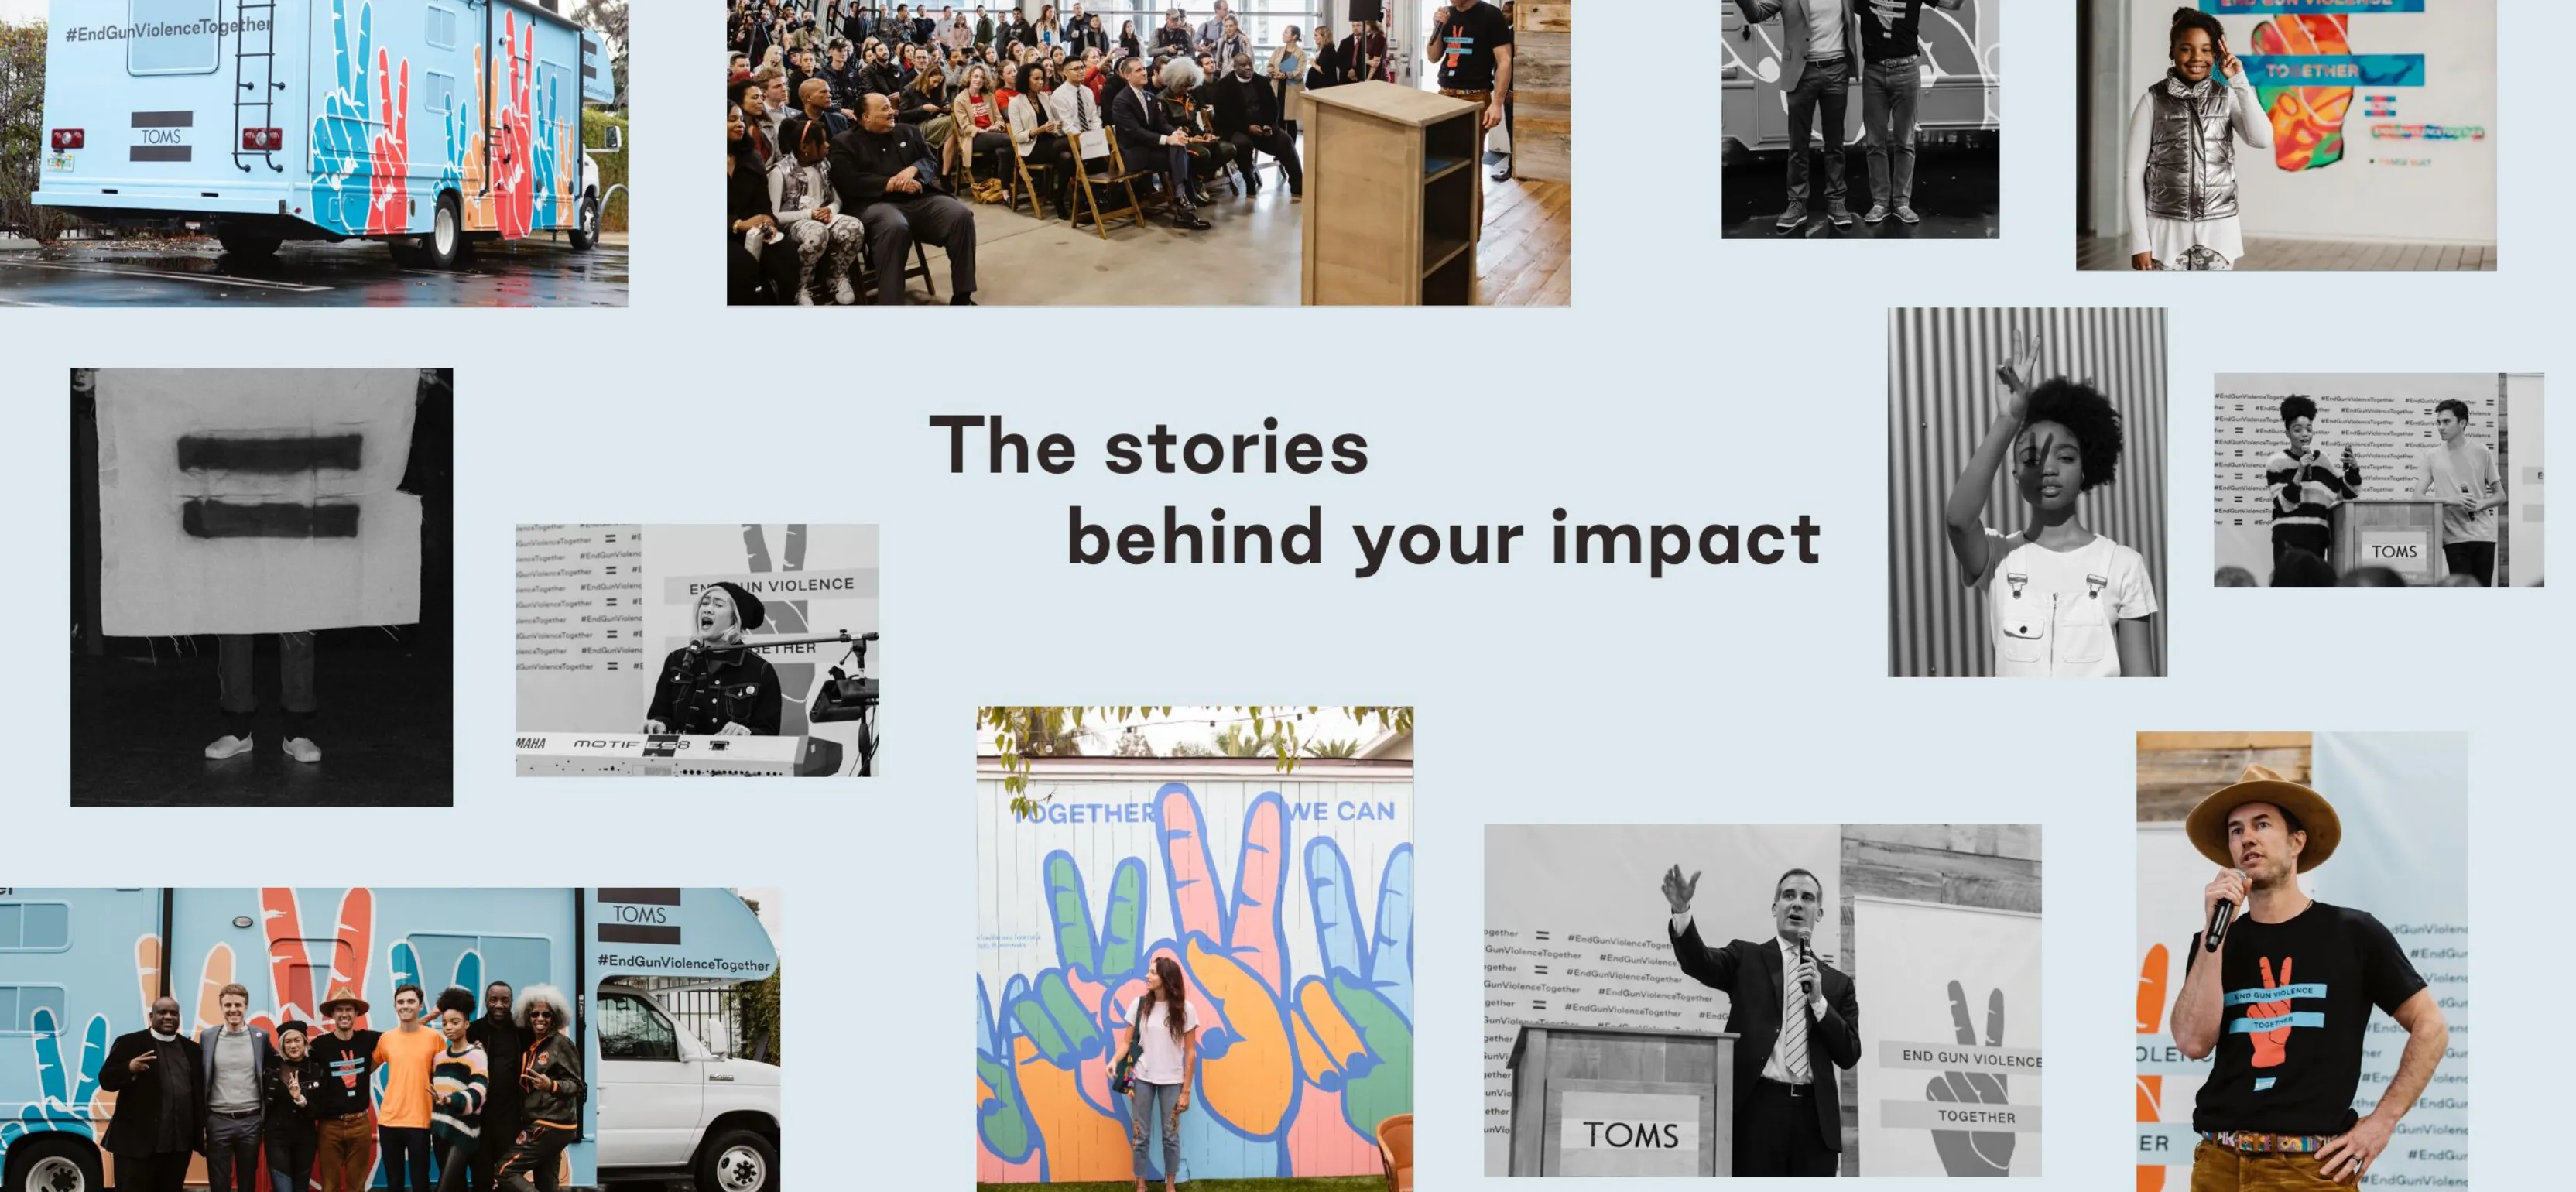
Toms is a for-profit footwear manufacturer who voices prominently their commitment to humanitarian causes. Most notably, with each pair of shoes sold, the company also gives a pair of shoes to a child in need.
In the digital age, more and more Brands are taking a stand to voice their opinions on socio-political matters. This is a risky and polarising move for Brands since they can gain the respect and loyalty of some Public Groups who share their socio-political views; However, on the other hand, they can also suddenly loose the support of long-time followers.
American Football player Colin Kaepernick was the first of many athletes to kneel during the national anthem played before each NFL game as a form of passive protest against police brutality and racial oppression. After Nike endorsed Kaepernick in a series of adverts, backlash ensued with a viral wave of conservative groups going so far as to burn their costly Nike shoes as a way to boycott the company.
The Polyfen GroupOur parent brand has a quiet voice and let’s the sub-brands do all the speaking. For instance, TPG’s Twitter account should be focused on Retweeting all posts by its subsidiary brands.
1.2. Tone
TaskDefine the brand's Tone
RoleMarketing Analyst
Estimated Workload0.5 – 1.5 hours
DescriptionWhile the Voice defines what a Brand says, the Tone determines how the Brand says it. Together, the Voice and the Tone make up the foundations of a Brand’s personality.
If the Brand should appeal to a younger, laid-back target public, for instance, a suitable tone would be casual and straight-forward; Whereas, if the Brand targets an older, more traditional target public, it would perhaps be more suitable to maintain a slightly more formal, conservative tone.
Case studies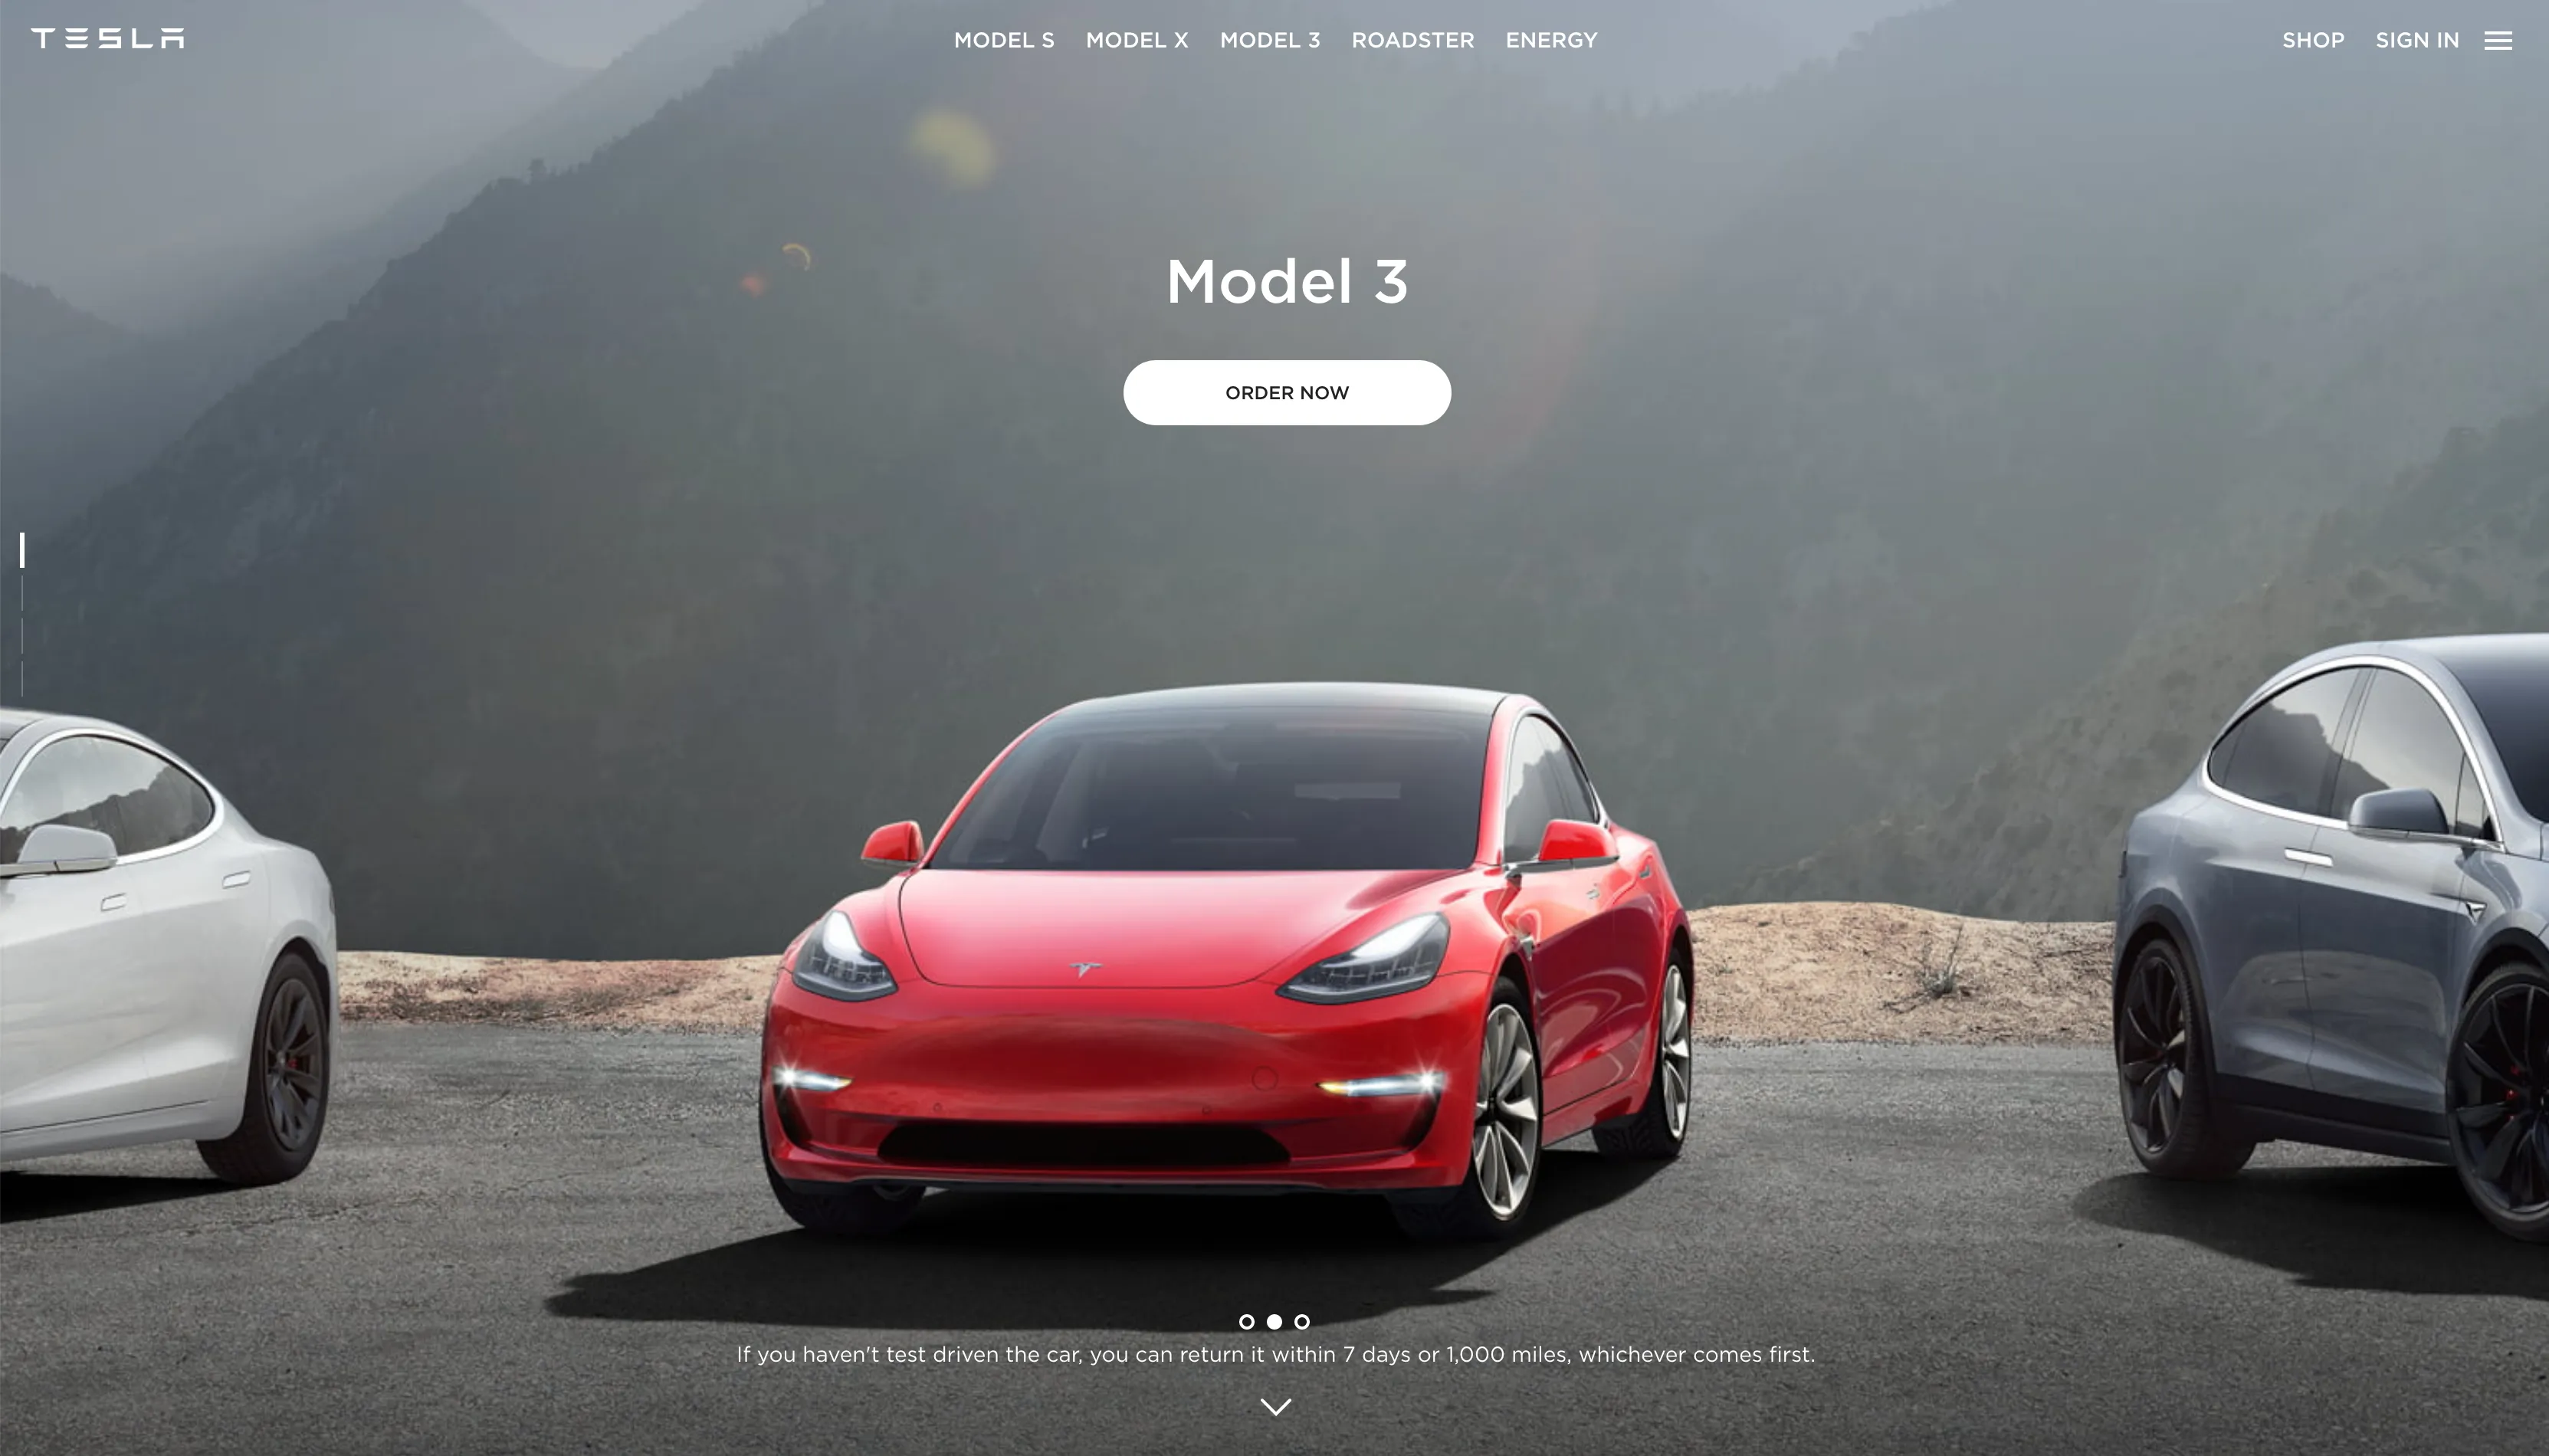
Tesla is a good example of Brands —especially those positioned in the higher-end— which maintain a professional, no-frills, quiet tone and let the sublime design of their products speak for itself.
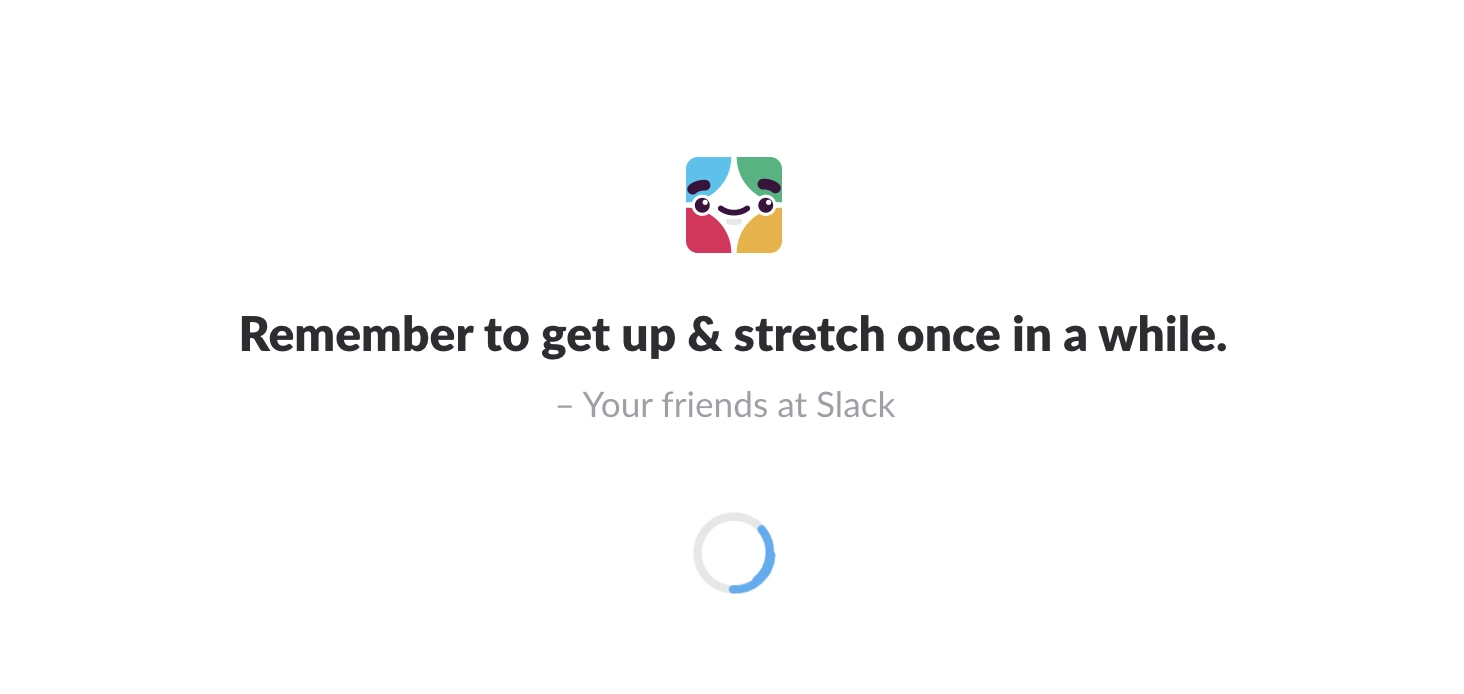
A loading screen could simply just say "Loading". However, Slack takes its loading screen as an opportunity to establish a friendly, casual, welcoming tone with whimsical messages.
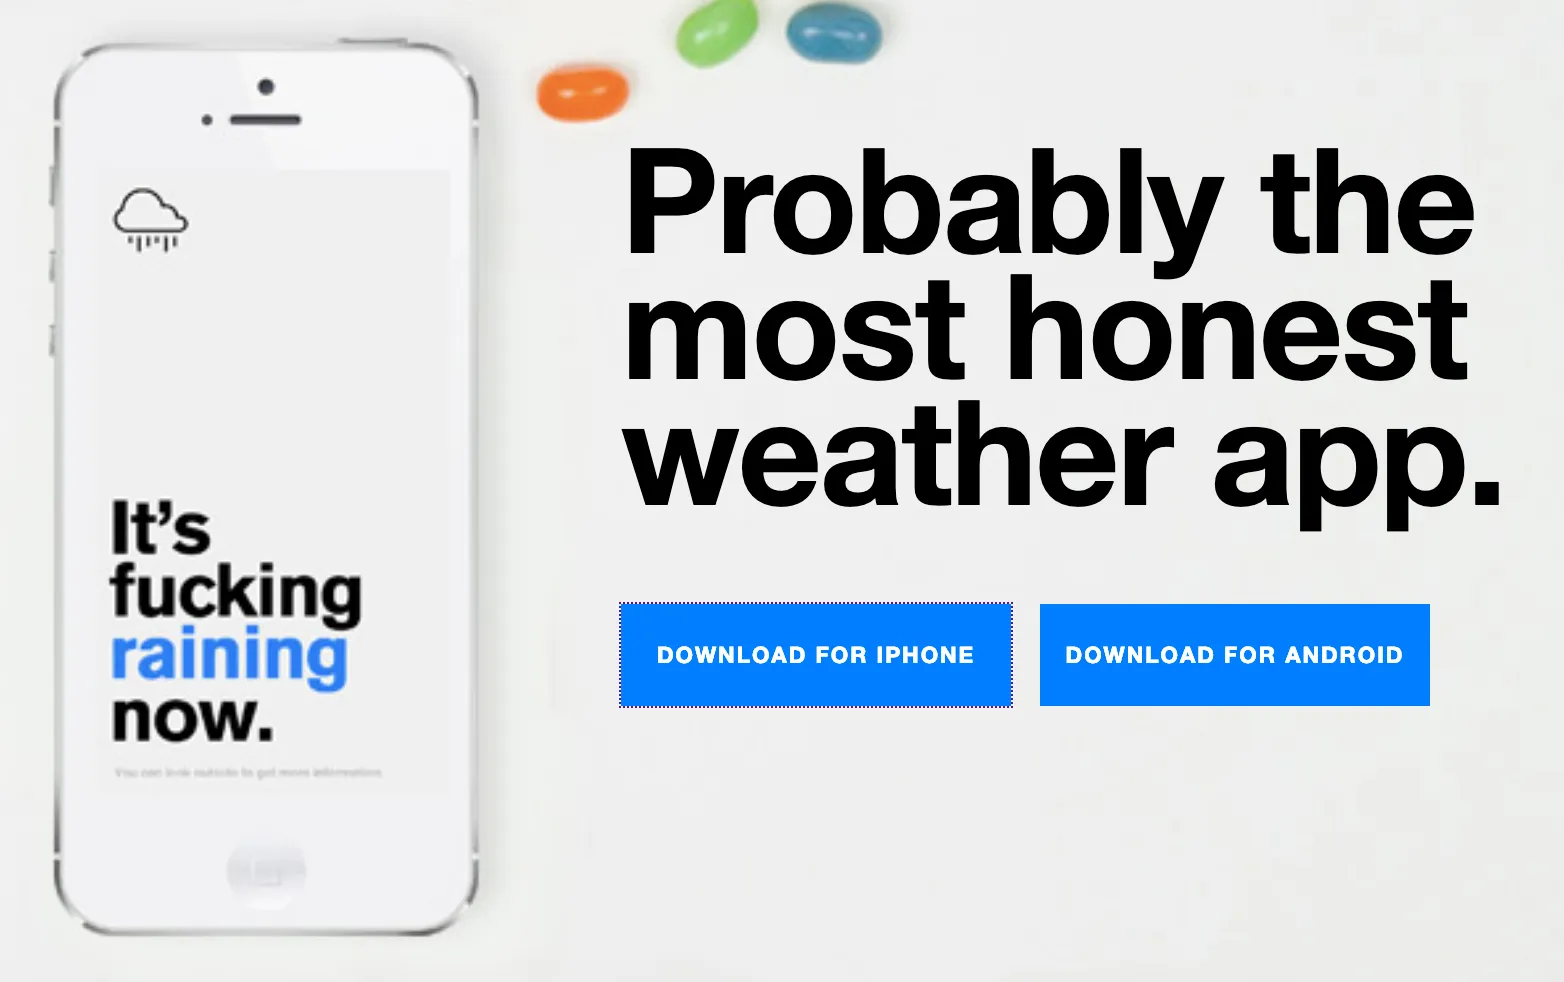
The Authentic Weather app takes an unexpected approach to communicating weather information along with profanity and crude humour. An original take on quirky, vulgar, colloquial tone.
Once the comedian Nathan Fielder found his favourite apparel company (Taiga) was endorsing a notorious holocaust denier, he was inspired to launch a competing Brand (Summit Ice) committed to (1) making great windbreaker jackets, and (2) educating people about the holocaust.
This is an example of a Brand voicing socio-political matters, however, with the distinctive controversial, cringy, humorous tone that one has come to expect from Nathan Fielder and his TV series “Nathan for you”.
TPG’s brand by itself has a quiet, no-frills, professional tone.
1.3. Keywords
TaskList the brand's Keywords
RoleMarketing Analyst
Estimated workload0.5 hours
DescriptionBased on personality devised for the Brand Identity, list of the most relevant keywords that should be associated with the Brand.
The Keywords identify the best features of the client’s business. A succinct list of the main qualities that the Brand should transmit to the target public upon the first impression.
Reinforced over time, each interaction should cultivate further an association between the keywords and the brand in the mind of the target public.
Avoid selecting generic, ambiguous, overused keywords such as “professional” or “excellent”; but, instead, seek to select specific, expressive, distinctive adjectives.
Keep the list concise and focused on a common theme. Ideally, approximately seven words.
The Polyfen GroupIn no particular order:
- Corporative
- Executive
- Business
- Administrative
- Trustworthy
- Advice
- Integral
- Digital
- Simplification
1.4. Creative concept
TaskBrainstorm Creative Concept alternatives
RoleMarketing Analyst
Estimated workload0.5 – 4 hours
DescriptionSimilar to the Keywords, but more concise and distinctive, the Creative Concept is a word or phrase that represents the desired emotional response from the target public when interacting with the Brand.
Unlike a Slogan, a Creative Concept is not necessarily developed for public use. Its primary purpose is to be used internally as a mantra to guide the creative process when sketching a Logo, copywriting a slogan, designing an ad, or when developing any other type of Brand Communication. This ensures that all elements of the Brand will convey a consistent message.
A distinctive, unifying concept is essential for building a strong Brand Identity.
Based on the List Keywords, brainstorm possible alternatives for the Creative Concept of the Brand, and finally select the most suitable alternative.
Case studiesThis is a very complicated world; it’s a very noisy world, and we’re not gonna get a chance to get people to remember much about us. No company is. And so we have to be really clear on what we want them to know about us. […] Our customers want to know who is Apple and what is it that we stand for, where do we fit in this world. [...] Apple at its core, its core value, is that we believe that people with passion can change the world for the better. [...] The theme of the campaign is “think different”. It’s honouring the people who think different and who move this world forward, and it is what we are about; it touches the soul of this company. —Steve Jobs
The Polyfen GroupYou must focus your Branding efforts on owning a word in the prospect’s mind. A word that no one else owns. What “prestige” is to Mercedes, “safety” is to Volvo. —Al & Laura Ries
Re-thinking Branding for the Internet Age
1.5. Moodboard
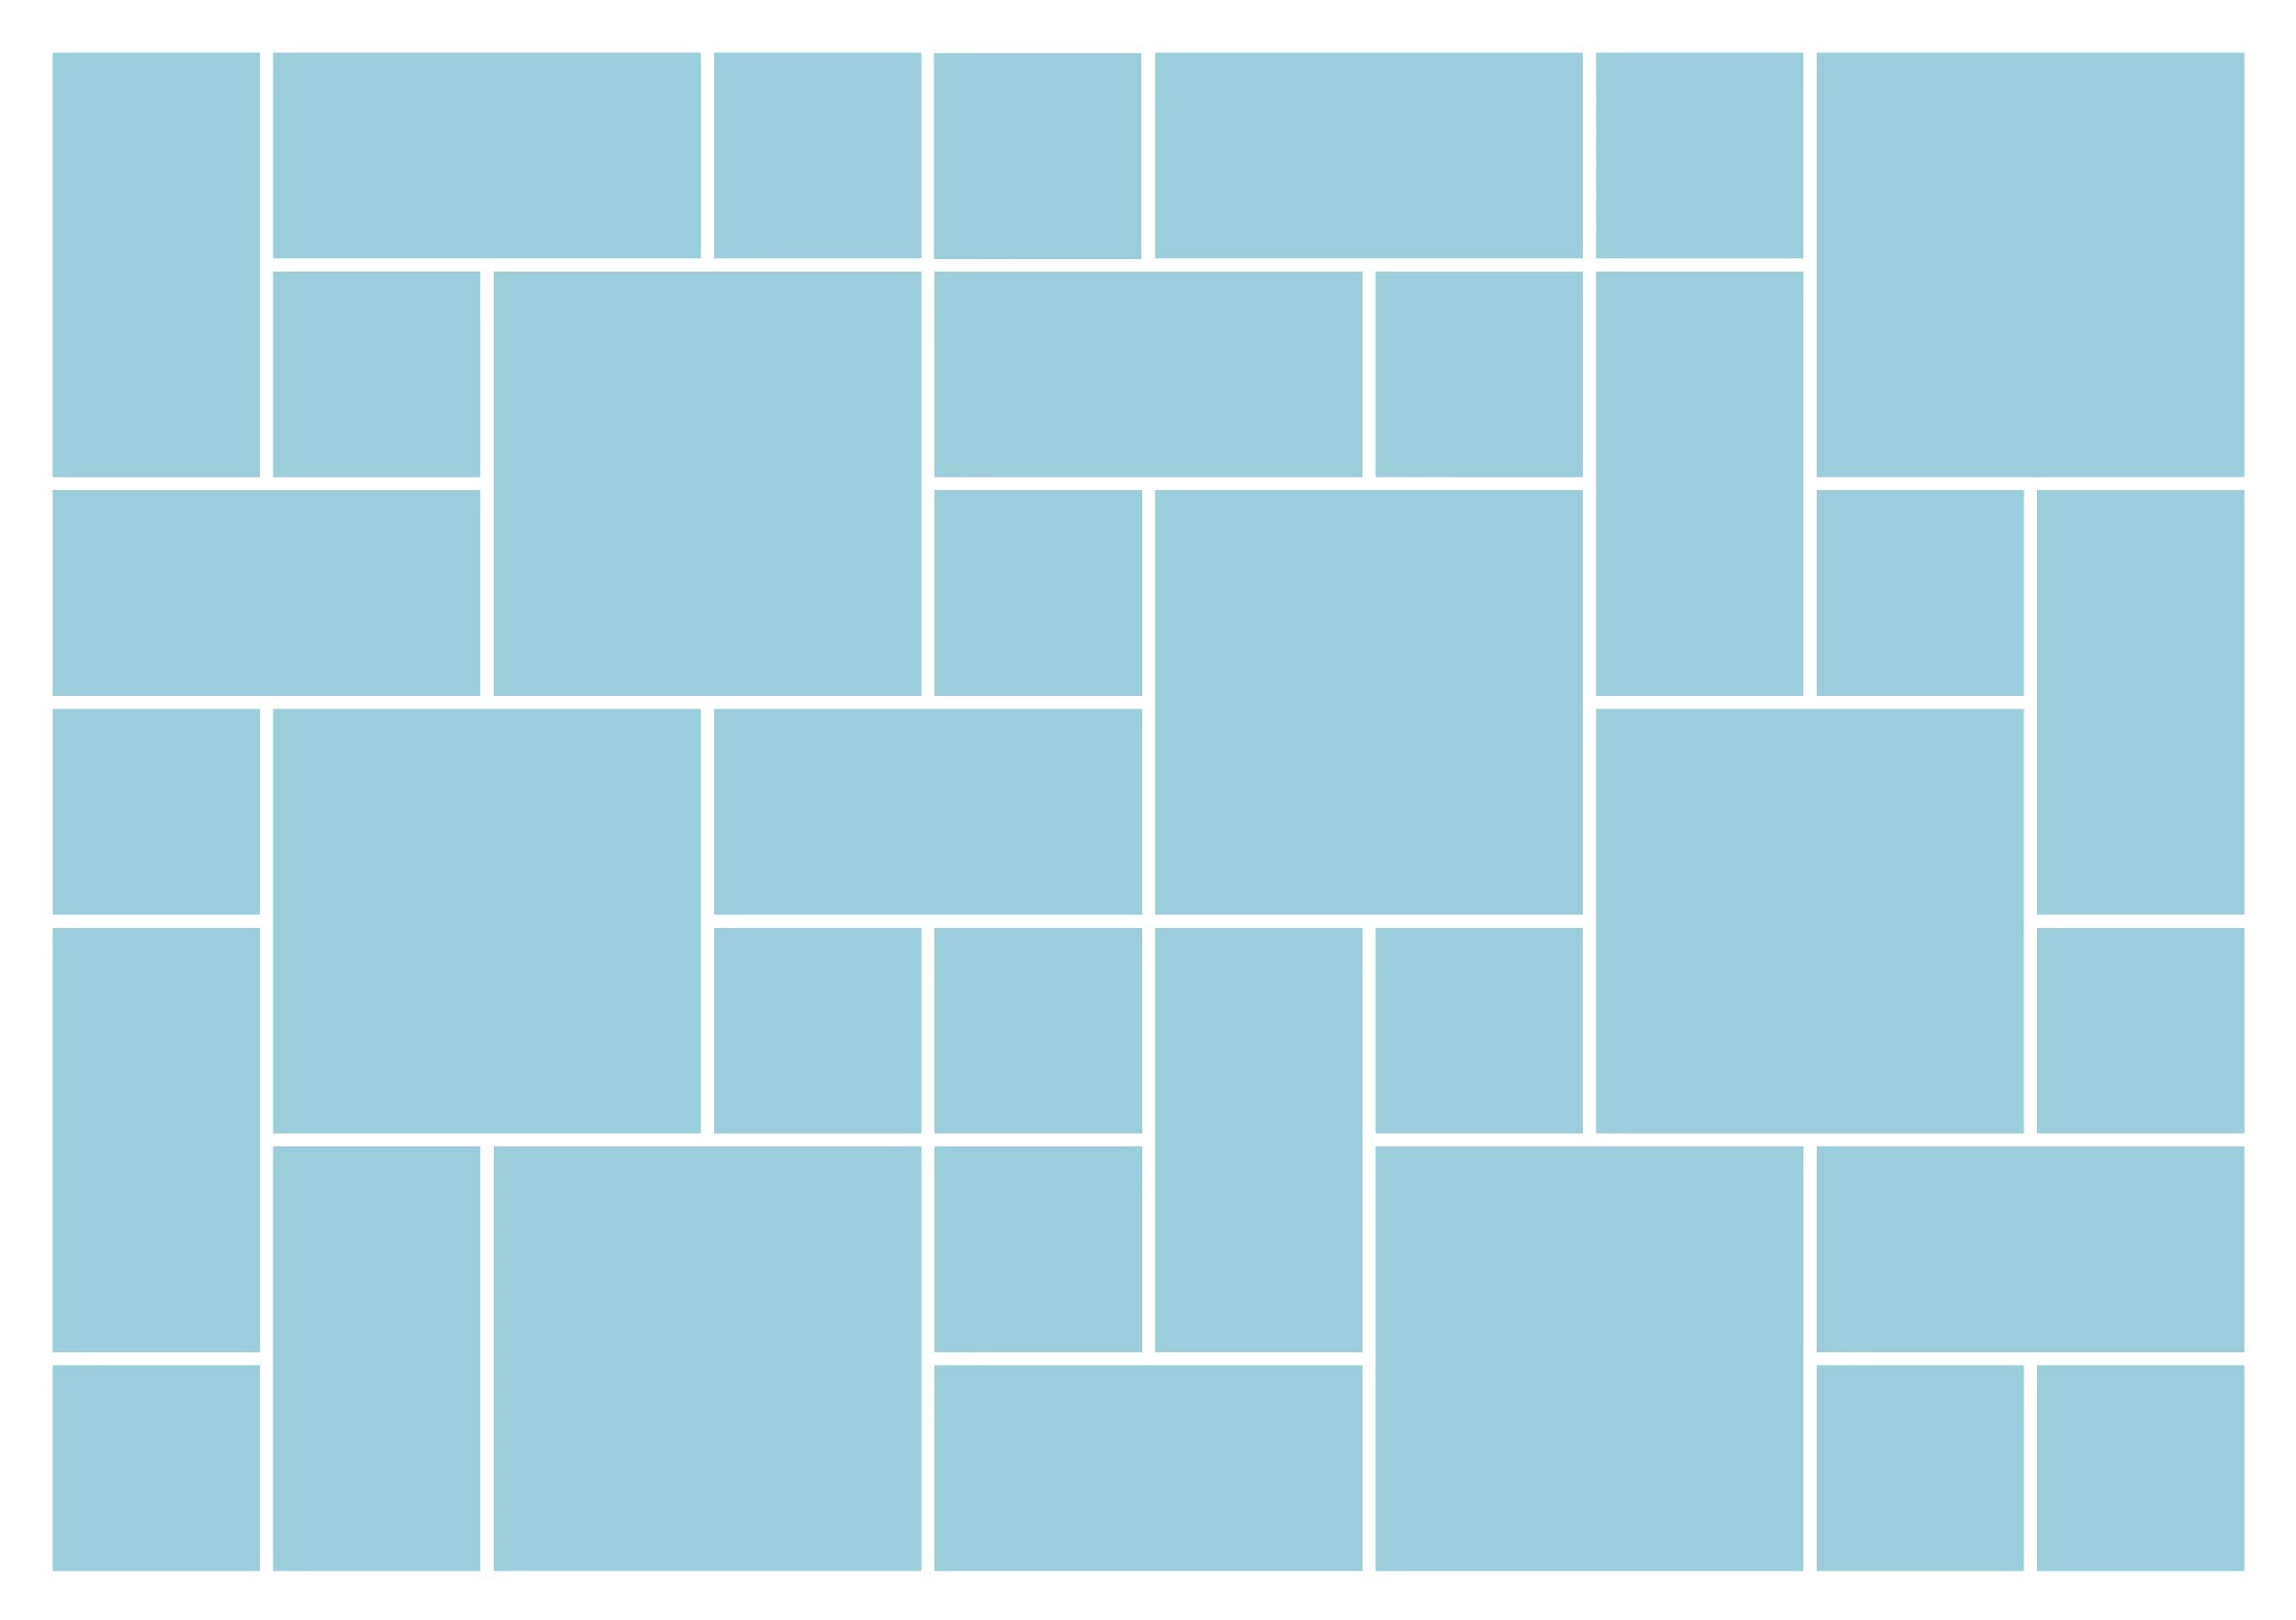
TaskCollect images for Moodboard
RoleBrand designer
Estimated workload1.5 hours
DescriptionA Moodboard is a collection of visual references including photography, illustration, architecture, design, and art. It serves as a source of inspiration during the creative process by identifying common colours and shapes associated with the desired mood of the Brand.
Some images might represent the lifestyle of a typical member of the target public; Others might represent the Brand’s Keywords or other qualities. Other images could include logos or graphics from other brands that can serve as inspiration. The representations can be quite subtle and abstract, or they can be descriptive and concrete.
Collect approximately 40 images which represent the chosen Creative Concept.
You can browse images on Unsplash, Dribbble, Behance, or Pinterest.
Task
Design Moodboard's layout
RoleBrand designer
Estimated workload1 hour
DescriptionAt this time, the images collected for the Moodboard should be tessellated into a single canvas.
It’s advisable to collect the images in an A3 paper format, which is large enough to appreciate each image individually, yet the whole is other than the mere sum of its parts. Furthermore, an A3 format can be printed and hanged on a wall, to look at from a close or farther distance. And it can also be seen in a screen as a whole, and zoomed into the different sections of it.
It is also advisable to feature the most relevant images more prominently, in a larger size, and adding the secondary images at a smaller scale.
Lastly, in order to make an homogeneous mix of images, avoid placing similar images close to each-other.
There are also tools like InVision boards which make this process easier.
The Polyfen Group Template Files
Download › IMG_PLAT_Moodboard-Template.ai
1.6. Naming
TaskBrainstorm potential brand names
RoleMarketing Analyst
Estimated workload4 – 12 hours
DescriptionConsidering that many linguists advocate for the theory that language is the basis of —or at least it deeply influences— complex thought; The Brand Name is one of the most —if not, the most— important elements to identify a Brand.
The Visual Identity of a Brand can be updated overtime, and there tends to be a certain backlash from the target public until they familiarise themselves enough with the new Visual Identity.
However, if you change the name of widely recognised Brand overnight, the target public will most likely be baffled by the change, as if the Brand would have to gain the target public’s trust all over again, as if they have just met a new person for the first time.
Therefore, it is important to invest the sufficient time to get the Brand Name right before gaining Brand awareness of a large public.
There are multiple parameters that weigh into the quality of a Brand Name. Namely:
1. Easy to pronounce correctly
Every member of the Target Public should be able to read the name for the first time, without having heard it before, and pronounce it correctly and with ease. This is a especially difficult task for Brands that might target public from different countries. And in today’s globalised world, it pays off to have a Brand Name consistently recognisable in the same way by public members who speak different languages.
Generally, if a Brand Name is pronounced in the same way in english and spanish, then it’s most likely pronounced somewhat similarly throughout the globe.
In order to ensure a universal pronunciation, avoid diphthong phonemes. Those are sounds formed by a combination of two vowels within a single syllable. For instance, the english word “eat” would be pronounced as /i:t/ in english, and it would be pronounced as /e:a:t/ in spanish and many other languages. In general, avoid the use of multiple vowels in any single syllable.
Diphthong phonemes can even be present in single-vowel single-syllable words. For instance, the word “oh” would be pronounced as /oʊ/ by native english speakers, while it would be pronounced as /o/ by native spanish, italian, portuguese, french speakers and many others.
For instance, a common misconception is that, the brand name “Nike”, which was originally meant to be pronounced as /ˈnaɪki/, it is more often pronounced as /ˈnaɪk/ in non-native english speaking countries.
When branding for Asian markets, it's also important to consider that most Asian languages don't differentiate "l" and "r" letters from each other. "Why some Asian accents swap Ls and Rs in English "
2. Easy to spell correctly
Every member of the target public should be able to spell the name correctly upon hearing the name for the first time, and without having read it before.
Avoid using numbers, hyphens, apostrophes, and other punctuation signs, and TLD (for instance, ".com") as a part of your Brand Name.
If possible, avoid unorthodox capitalisation or spacing. For instance, if you hear for the first time a brand name composed of two different, distinctive words, you would be most likely compelled to guess that the Brand Name is spelled with space in the middle.
Think about the first time that you have heard the name “Facebook”, you could have guessed to spell the brand name following the corresponding grammatical rules as “Face Book”. The same applies to “MySpace”, which could be spelled as “My Space”; “Coca-Cola”, which could be spelled “Coca Cola”; “PayPal”, is often misspelled as “Paypal”; or “NikePlus”, which could be misspelled as “Nike Plus”, “Nike+”, or “Nike +”. Furthermore, upon hearing the Brand Name “FedEx” for the first time, you might guess that it’s meant to be spelled as “Fedex”, “Fed Ex”, or even “Fed X” perhaps. Another case to consider is that just as upon hearing “3M” for the first time you might guess to spell the Brand Name as “three M” or “three m” or even “three em”, or “Six Flags” could be mistakenly spelled as “6 Flags”.
Likewise, avoid double letters, such as “Hennessy” could be spelled as “Henesy” by some public members.
In order to ensure a clear and consistent understanding of your Brand Name, you must avoid uncommon capitalisation and spacing.
Composite Brand Names, made out of two or more words, should be set with a grammatically correct capitalisation and spacing in order to avoid confusion from the public in regards to the correct spelling of the Brand Name.
Another matter to consider is the avoidance of ambiguous phonemes. For instance, upon hearing the phoneme /i/, an public member would guess that the syllable is spelled with either “i”, “y”, “e”, “ee”, “ea”, or “ie”. Just as the phoneme /ʊ/ could be spelled in english with an “u”, “oo”, or “w”. Furthermore, the letter “j” might be pronounced as /dʒ/ (as in “jump”) in some languages, as /h/ (as in “hot”) in others, and as /j/ (as in “yellow”) in other languages. Likewise, the letter “c” could be pronounced as /k/ in some cases, and as /s/ in others, and additionally as /ts/ in slavic languages.
The vowel “a”, and secondarily the vowels “o”, “u”, and “e” (in single-vowel syllables), seem to be the most accessible in regards to their universal pronounceability across different languages. And the consonants “b”, “d”, “f”, “k”, “l”, “m”, “n”, “p”, “r”, “s”, and “t” seem to be the more commonly pronounced across the most languages.
Leaving the letters “c”, “g”, “h”, “i”, “j”, “q”, “v”, “w”, “x”, “y”, and “z” as preferably avoidable.
It is of utmost importance that your target public knows what your brand name is, and how it’s meant to be spelled.
Consider that of course if a business is set on targeting exclusively a public of an specific language, then the universal pronounceability and spellabillity are not as important. However, it is always good to future-proof the Brand Name and give the business the option to expand to new markets without having to sacrifice the quality of their Brand Name.
3. Relatively short
A short name will be usually easier to pronounce and remember. The shorter, the better.
However, considering that nowadays most short Brand Names are already taken. An alternative is to come up with a compound Brand Name, made up of two or more words, or initialisms. For instance, SalesForce, Mastercard, Jack Daniels, Johnnie Walker, Land Rover, Harley-Davidson, H&M, BMW, UPS, IBM, HSBC.
4. Coherent
The name should fit the overall direction of the company, represent the Creative Concept, belong to the industry, and have an accepted connotation.
For instance, most brands would avoid using adjectives or nouns with a generally negative connotation such as “evil”, “hell”, or “satan”. Although, for a heavy-metal music band, those would make for a coherent Brand Name in regards to their industry and niche.
However, for most brand outside of those particular niches, it would be more suitable to avoid any words that could have a negative connotation altogether.
5. Adaptable
A modular name that is easy to abbreviate can be a tremendous advantage. When a Brand Name is mentioned over and over again, the target public will seek to replace it with an abbreviation. This is especially common amongst the employees of a company who need to mention the company's name on a daily basis.
For instance, Facebook is abbreviated as simply “fb” on a casual setting, just as Instagram is abbreviated as “Insta”.
Additionally, if the brand might branch out into different sub-brands, a modular, adaptable name can connect the sub-brands to the master-brand.
For instance, at The Polyfen Group, we internally refer to our company simply as "Poly"; and we've carried on the DNA of our master-brand to the names of our family of sub-brands "Polyfen", "Poly Atlas", and "Poly Forum".
6. Consistent
Even though you might abbreviate a brand's name internally, amongst the company's employees. It is important to maintain a consistent use of the name on all public Brand Communications. Otherwise, people might be confused in regards to how the band name is actually meant to be spelled.
Ensure that the brand name is always capitalised, spaced, and punctuated in the same way throughout all the brand communications, including the logo.
Unorthodox capitalisation, spacing, and punctuation can be an issue both for how easy it is to spell a brand name correctly upon hearing for the first time, and it additionally poses a problem for consistency.
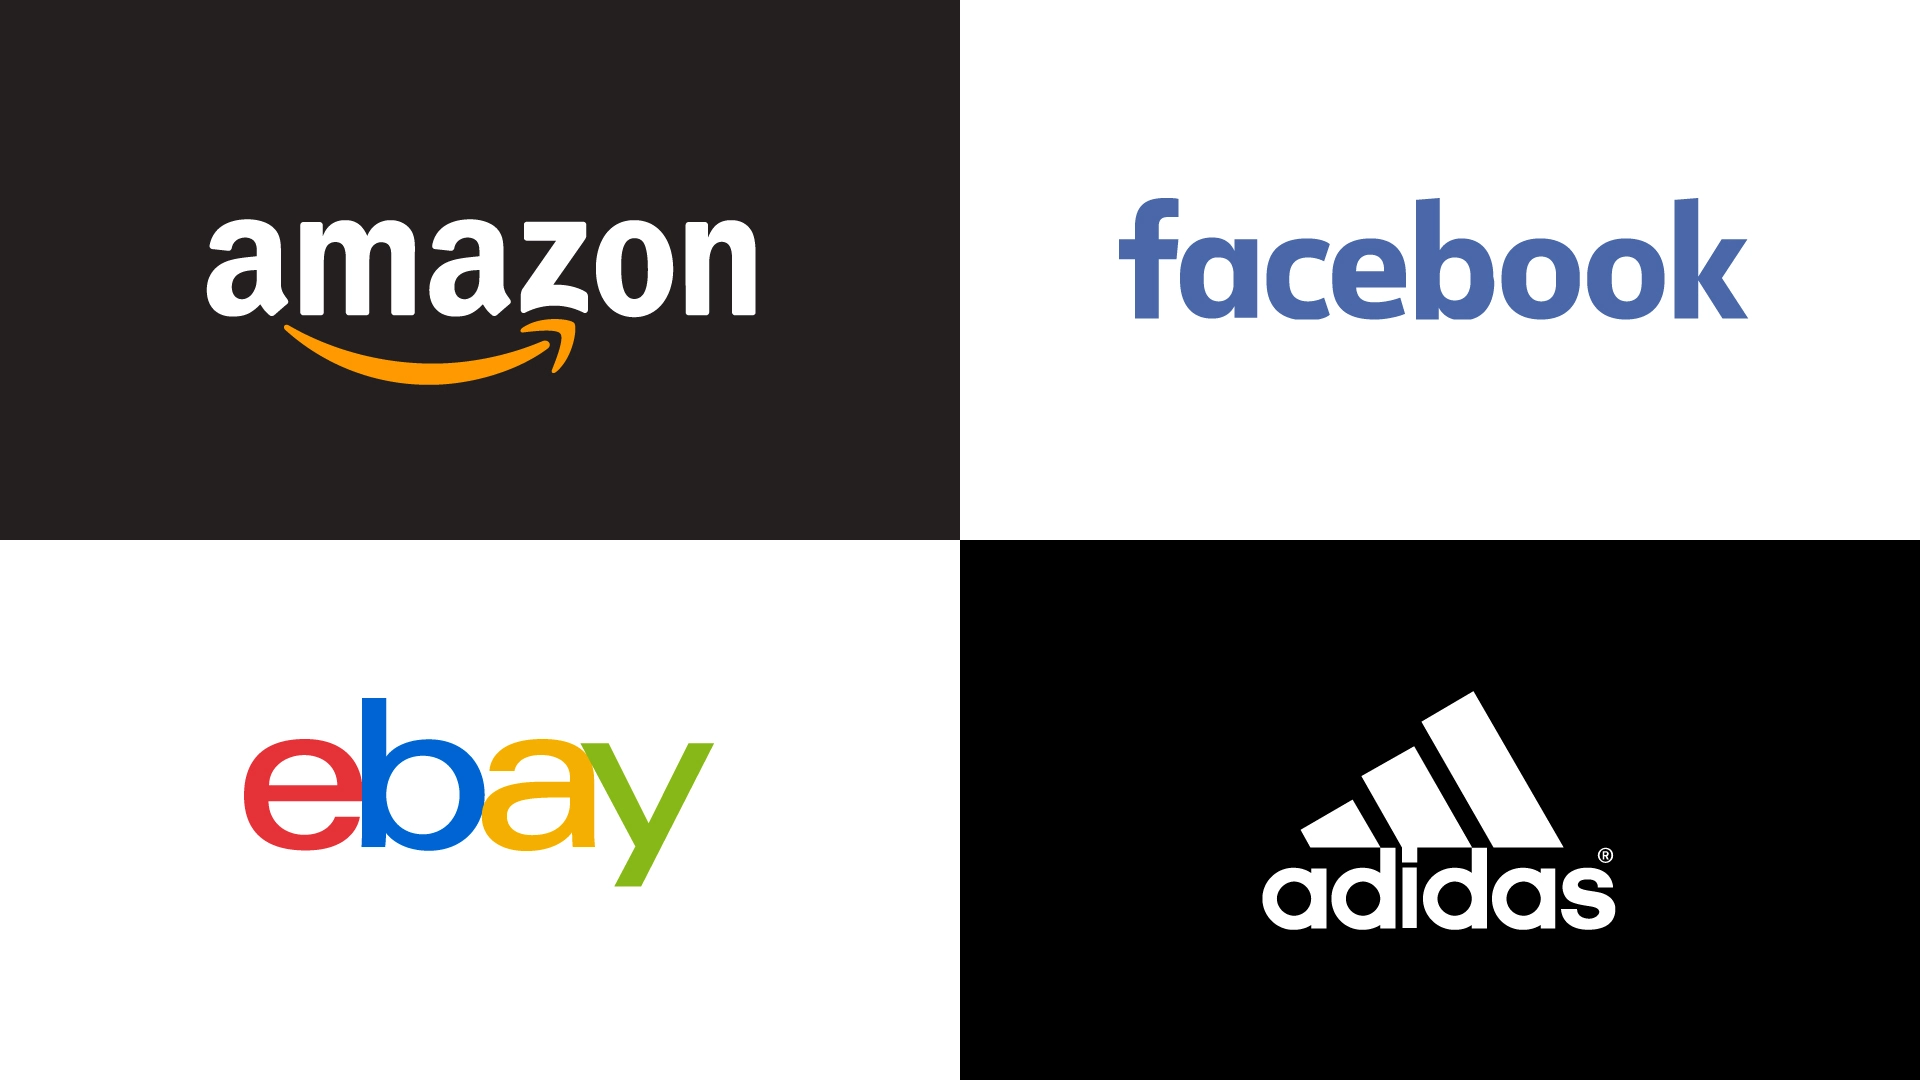
For instance, the use of the brand name on behalf of Facebook is inconsistent and can confuse the public as to how it is actually meant to be spelled, since in most brand communications the Brand Name is spelled as “Amazon”, while their logo, the centrepiece of their Brand, is set in all lower-case letters, as “amazon”. The same can be said of “Facebook”, whose logo spells “facebook”, “eBay” and its “ebay” logo, or “Adidas”, whose logo spells “adidas”. Other examples of all lower-case logos include “Intel”, “Accenture”, “Pepsi”, “Mastercard”, and many others.
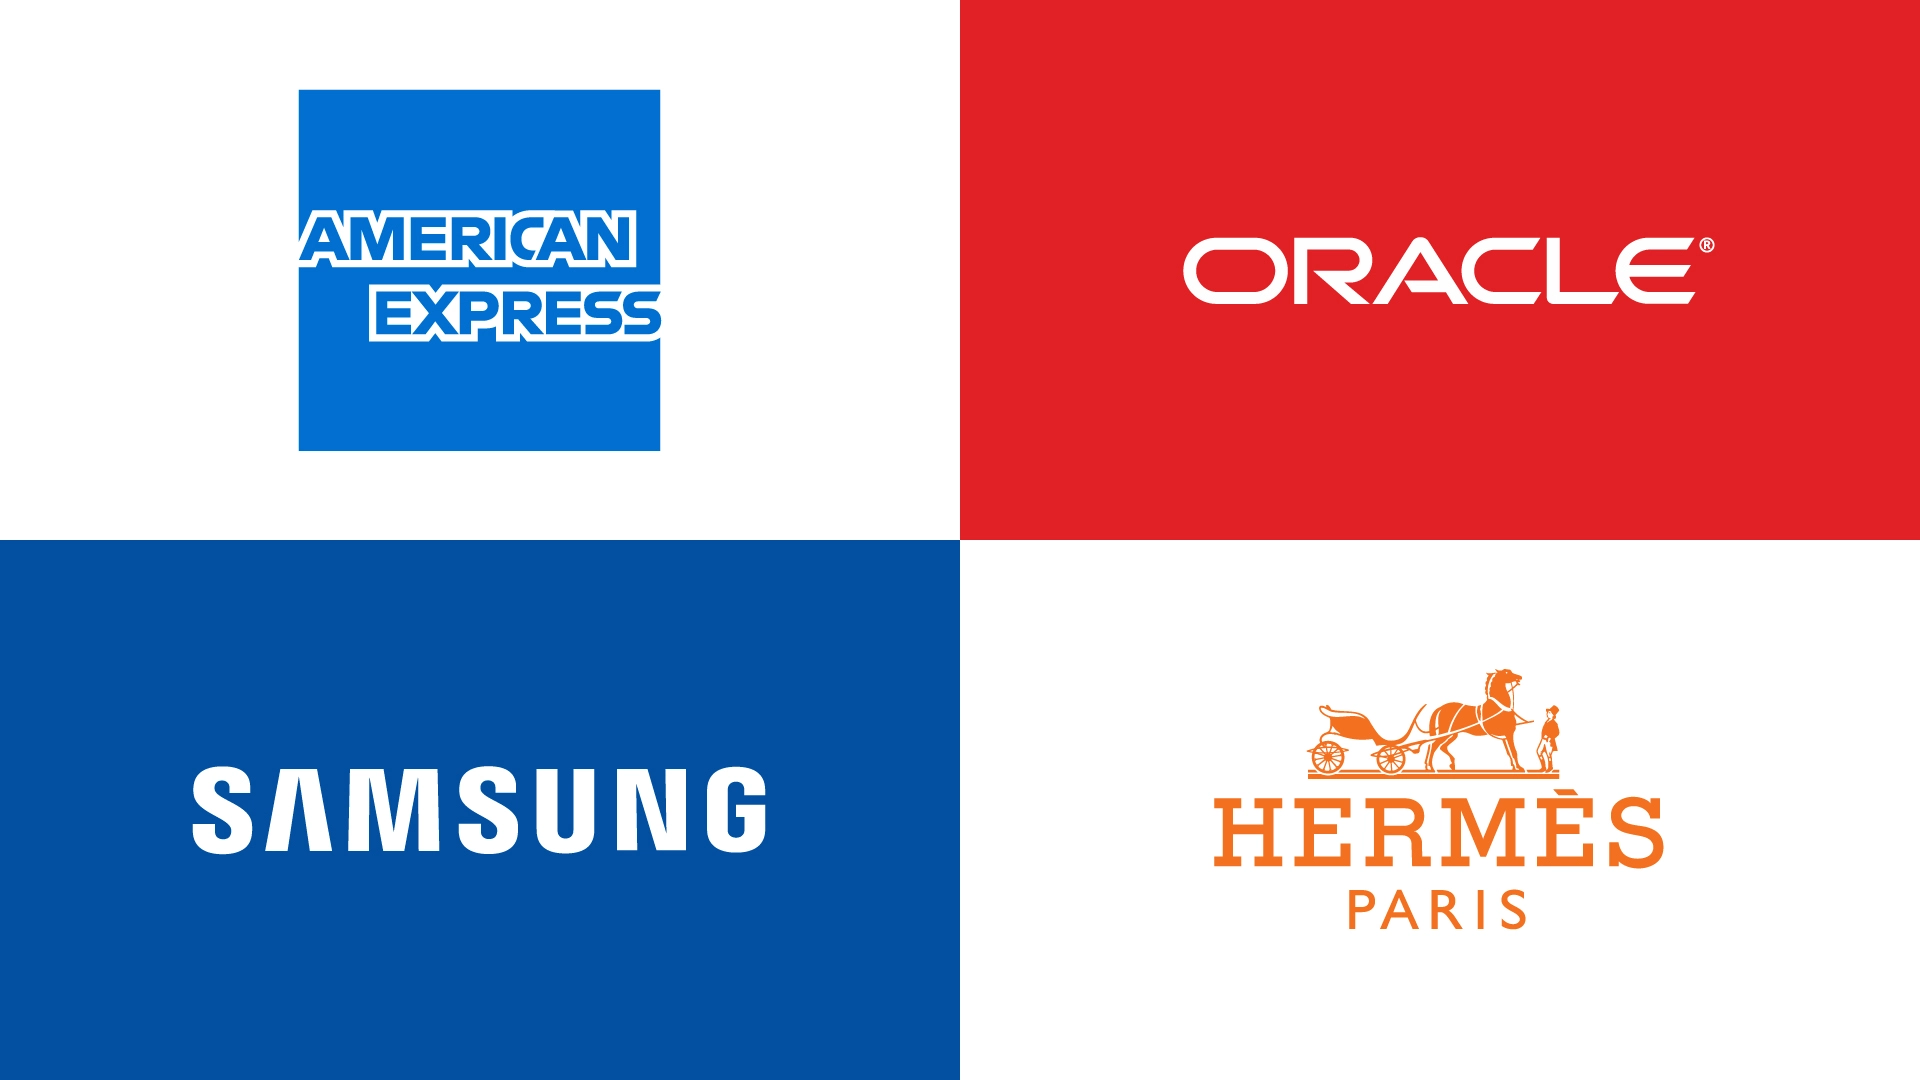
On the other hand, the same issue occurs when a logo is set in all upper-case letters. Such as “American Express”, whose logo spells “AMERICAN EXPRESS”, “Oracle”, whose logo spells “ORACLE”, “Samsung” and its “SAMSUNG” logo, or “Hermès” logo spelling “HERMÈS”. This is a very common tendency, which, besides of creating inconsistency in the use of the brand name, it also reduces the readability of the logo, especially in longer words set in all-uppercase, and especially if the word contains diacritic signs, like the “grave e accent” in “Hermès”. Other examples of all upper-case logos include “Siemens”, “Toyota”, “Honda”, “Kia”, “Chanel”, “Louis Vuitton”, and many others.
The particular practice of setting a brand name in all upper-case letters is not entirely unacceptable. However, the designer must be aware that readability and consistency are being sacrificed for the sake of aesthetics.
On the other hand, Brand Names including initialisms —such as “DHL”, “UPS”, “HSBC”, “BMW”, or “H&M”— , must be set in uppercase accordingly.
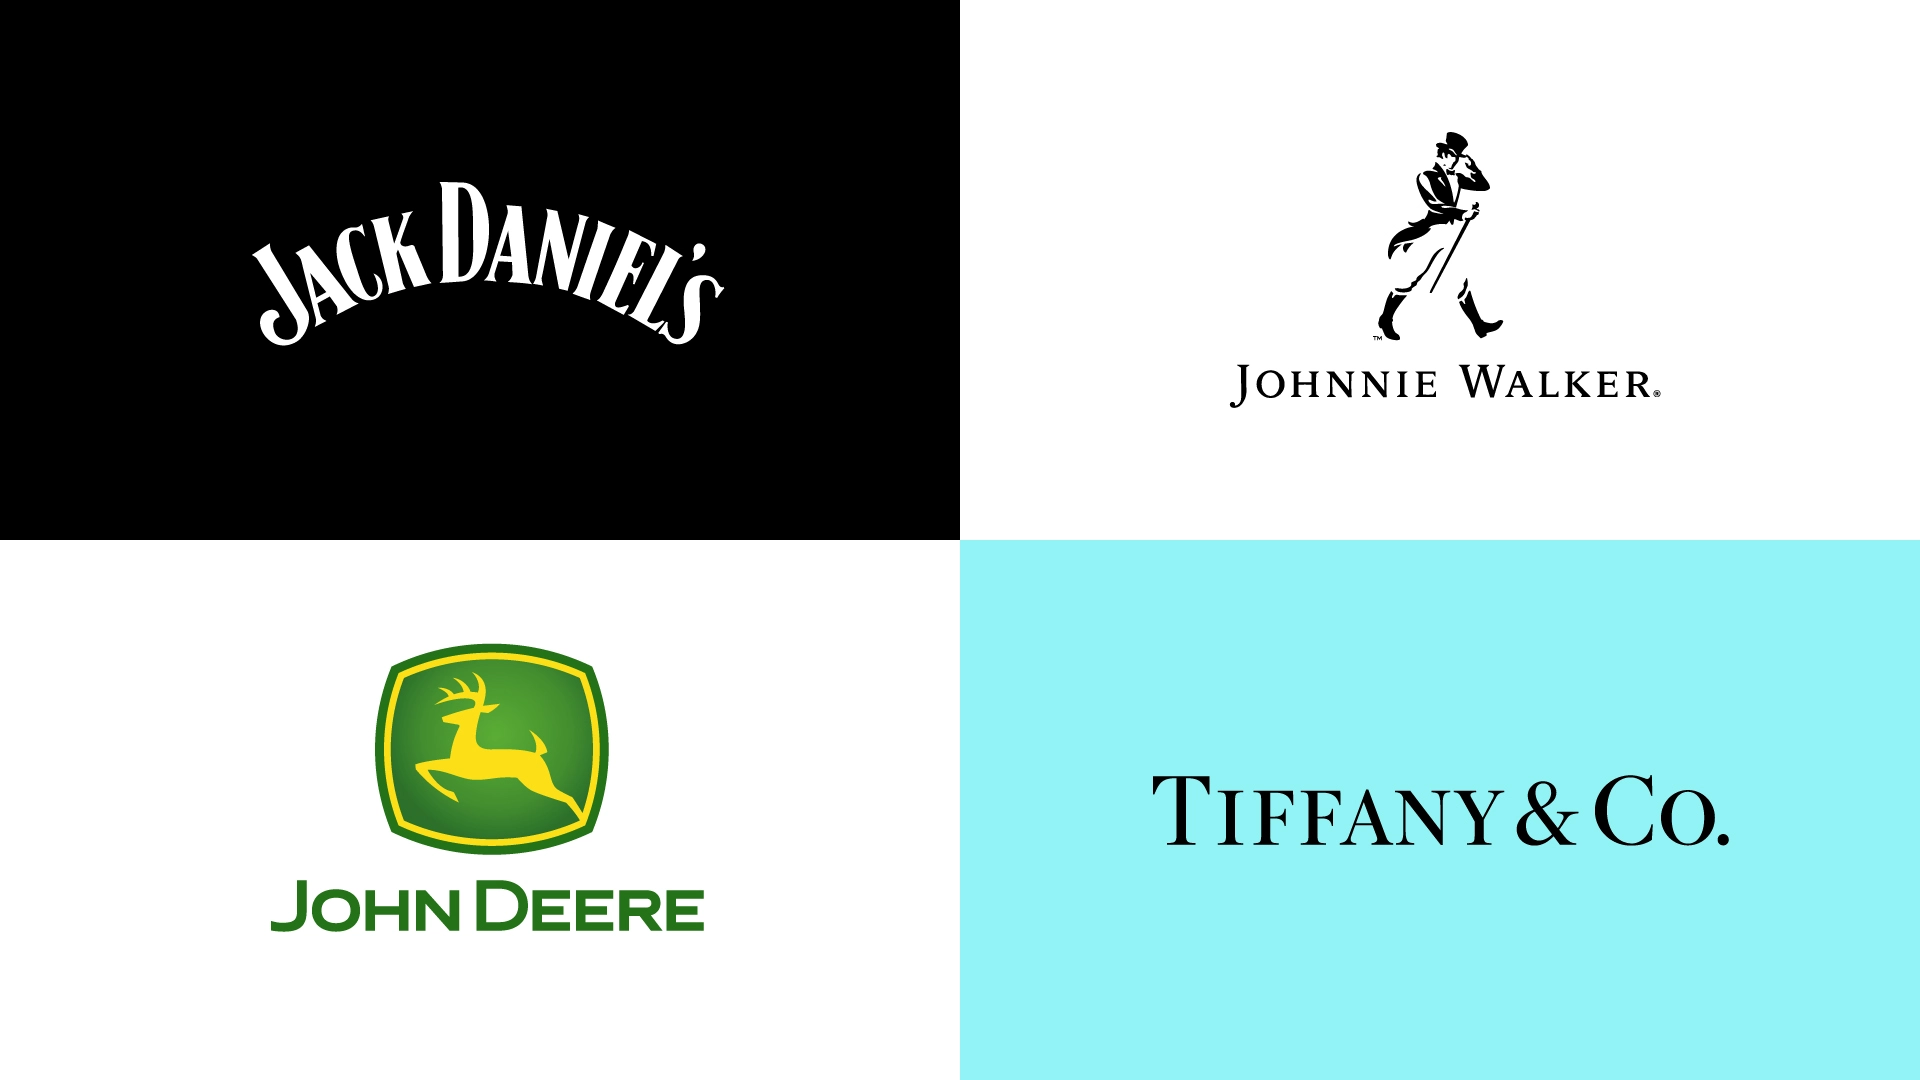
A suitable compromise that works around this issue is the use of small caps, which clearly distinguishes the correct capitalisation of the words, while featuring an uppercase alphabet. An example of this can be seen on the logos of “Jack Daniel’s”, “Johnnie Walker”, “John Deere”, and “Tiffany & Co.”.
As you can see, even some of the largest, most renowned Brands are guilty of using their Brand Name inconsistently. Admittedly, since the public is quite familiar with the brand names of these large brands, they are less likely to be confounded by the inconsistency use of their Brand Names. However, this issue especially poses a threat for new and emerging business who want to get their name out there. If the target public is not sure about what the actual name of your brand name is, then your brand is not communicating it clearly enough to the public. The Brand Name should be spelled in the Brand’s logo just as it’s meant to be spelled in any other form of communication.
7. Unique
All of the previous criteria (easy to spell, easy to pronounce, coherent, adaptable, and consistent) relies on the Brand Name actually not being already taken by a different business.
Checking if another company has registered the desired Brand Name as a trademark in the same industry and in the same country that the business will be operating can be a hassle; And registering a trademark, although useful for a legal dispute, doesn't necessarily grant exclusive ownership worldwide for perpetuity.
However, it is important to secure the Brand Name in as many mediums as possible to ensure that the target public will associate the desired brand name exclusively to the specific business being branded.
Leaving the trademarks right aside, the first step in claiming a brand name is buying a web domain and establishing an online presence in social media.
Nowadays, when people want to access a website of a brand they've just heard of, they will most likely type the Brand's name into Google. However, given that most websites use ".com" domains, a small minority of users might try typing "[yourbrandname].com" as a web address.
In any case, having a ".com" web domain might give a more reliable impression, since most people are used to ".com" domains. Although, in present times, it is incredibly hard to find good ".com" web domains available for purchase.
A possible solution would be registering a different TLD like ".co", ".io", ".org", or ".net". Another alternative, would be adding a prefix or suffix to your Brand Name, something like "weare[yourbrandname].com", or "[yourbrandname]team.com".
*Refer to Naming Architecture for further insight on this topic.
Naming is exhaustive and iterative process. All authorities in the Branding industry seem to agree on one thing in regards to naming: It is impossible to find the perfect name; be ready to compromise. However, it is important to consider all of this parameters when selecting a brand name so you have a clear idea of the pros and cons of each potential name before reaching a final decision.
It takes time to get used to a new name for a company. Although the owner/s of the company being branded might not love the top name choice at first, they will surely grow to love it as the name grows to be associated with the brand over time.
8. Compromise
The perfect Brand Name doesn't exist, it's a fallacy. Be ready to compromise and go for the most suitable direction you've surveyed, even if it's not perfect. The Brand Name will grow on the business owners and target public over time.
The Brand Name Prada is short, memorable, unique, and more importantly, it is unmistakably pronounced in the exact same way throughout most of the world. Making it one of the most recognisable Brand Names worldwide.
Intel, which is a conjunction of “Integrated Electronics”, is short, memorable, easy to pronounce and spell, and its meaning is related to the industry it belongs to.
The best thing about electric car manufacturer Tesla’s Brand Name is not only that is short, easy to pronounce, and easy to spell; but, it also has the added value of referencing an historical figure (Nikola Tesla) very much relevant to the vision and mission of the company.
The Polyfen GroupTo understand the name of The Polyfen Group’s brand we must first acknowledge that Polyfen was our original business unit, our first Brand. Once we expanded our business to include Poly Atlas we decided to maintain a certain consistency that binds all our portfolio of Brands together with the suffix “Poly”. Hence, we naturally came up with “The Polyfen Group” as the name of our parent, corporate-facing Brand.
Task
Define the Naming Architecture
RoleMarketing Analyst
Estimated workload0.5 – 1.5 hours
DescriptionIdeally, the chosen Brand Name should be available for purchase as a “.com” web domain, as well as available as a username in all the corresponding social networks.
However, considering lack of availability of brand names nowadays, it is advisable to list the diagram the different names that can identify the business in different use cases.
A Naming Architecture, would typically include the following variations:
1. Primary Brand Name:
The preferred Brand Name as should be communicated in all Brand Touchpoints. For instance, “Polyfen”. And it should be preferably spelled in the same way in the Brand’s logo, and all other Brand Communications.
2. Fallback Brand Name:
A fallback alternative for Touchpoints where the Brand Name is not available. For instance, “PolyfenTeam”. The fallback Brand Name should as well be preferably secured as a “.com” domain as well. Additionally, if the primary Brand Name is unavailable in different mediums, ensure that the fallback Brand Name is used consistently throughout those channels.
3. Judicial Business Name:
The official name under which the business behind the Brand is legally registered as a taxpayer. For instance “Facebook, Inc.” for “Facebook”, “The Polyfen Group Co LLC” for “The Polyfen Group”, "Polyfen", and all our family of Sub-Brands, “Alphabet Inc.” for “Google”, “Microsoft Corporation” for “Microsoft”.
4. Diminutive Brand Name:
A diminutive alternative for casual use, especially amongst the members of the business. For instance “Poly” for “Polyfen”, “fb” for “Facebook”, or “Insta” for “Instagram”.
Primary Brand Name: The Polyfen Group Fallback Brand Name: The Polyfen Group Co Judicial Business Name: The Polyfen Group Co LLC Diminutive Name: Poly
1.7. Brand architecture
TaskDefine the amount of brand identities corresponding to the business
RoleMarketing Analyst
Estimated workload0.5 – 1.5 hours
Description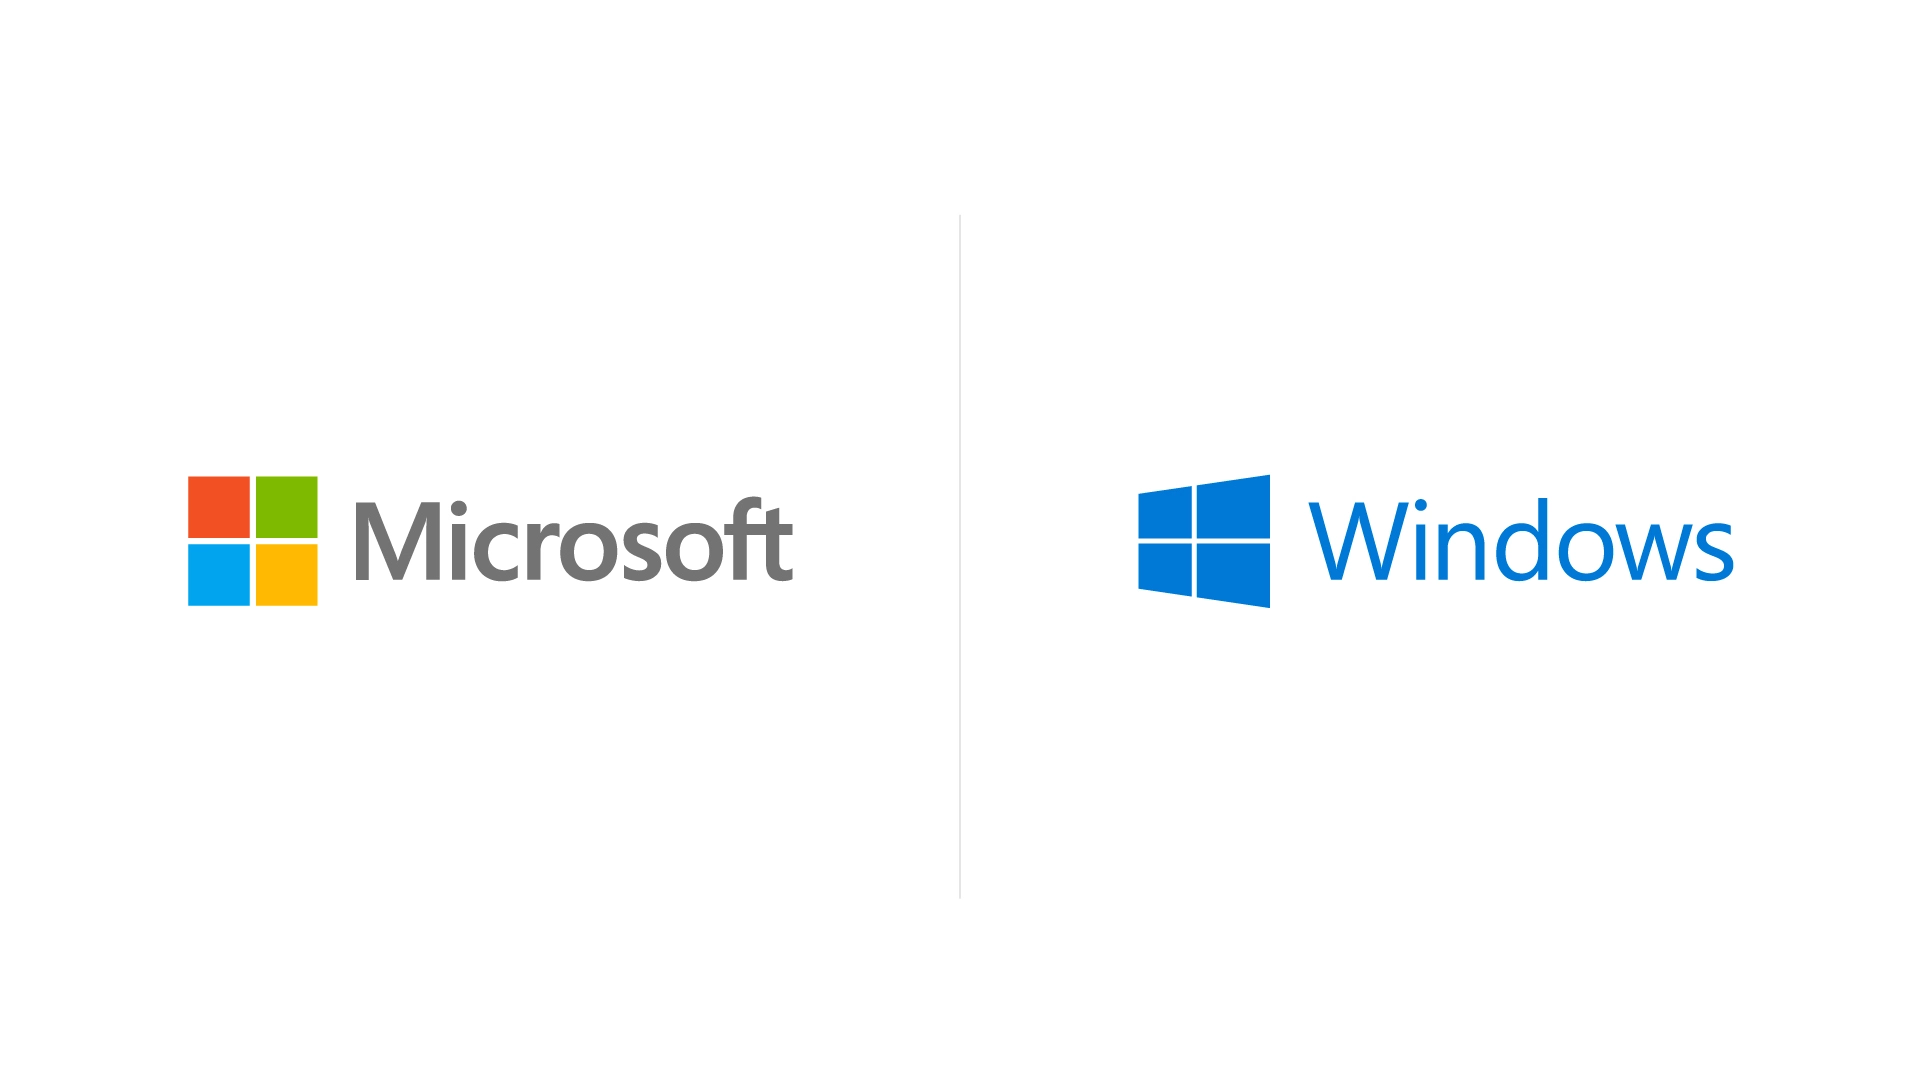
A business can use a single brand to identify all their Brand Communications. However, in some cases, it’s suitable to develop different Brand Identities for the products, services, divisions, or subsidiaries of a business. For instance, the business registered as “Microsoft Corporation” is identified with the “Microsoft” brand, which has a sub-brands for many products, most notably “Windows”, the operative system.
Before considering if a particular business needs to be identified with multiple Brands, one must understand that the marketing efforts of a business would have to be distributed amongst the different Brands. Hence, small businesses would likely struggle to spend the time and resources necessary to maintain multiple Brands and promote each separate Brand through different social media accounts.
Creating a separate brand for a product, service, division, or subsidiary of a business should be kept to a minimum and it should be only done when the Sub-Brand would communicate a distinctively different product, service, division, or subsidiary of the business.
Task
Define the relationship between the Brands
RoleMarketing Analyst
Estimated workload0.5 – 1.5 hours
DescriptionIf a business is to be associated with multiple Brands, we must then define and diagram the Brand Architecture, the type of relationship between the Brands.
Case studiesMonolithic brand Architecture
Characterised by a strong, single Master-Brand. Customers make choices based on Brand loyalty. Features and benefits matter less to the consumer than the Brand promise and persona. Brand extensions use the parent’s identity, and generic descriptors. — Alina Wheeler, “Designing Brand Identity”
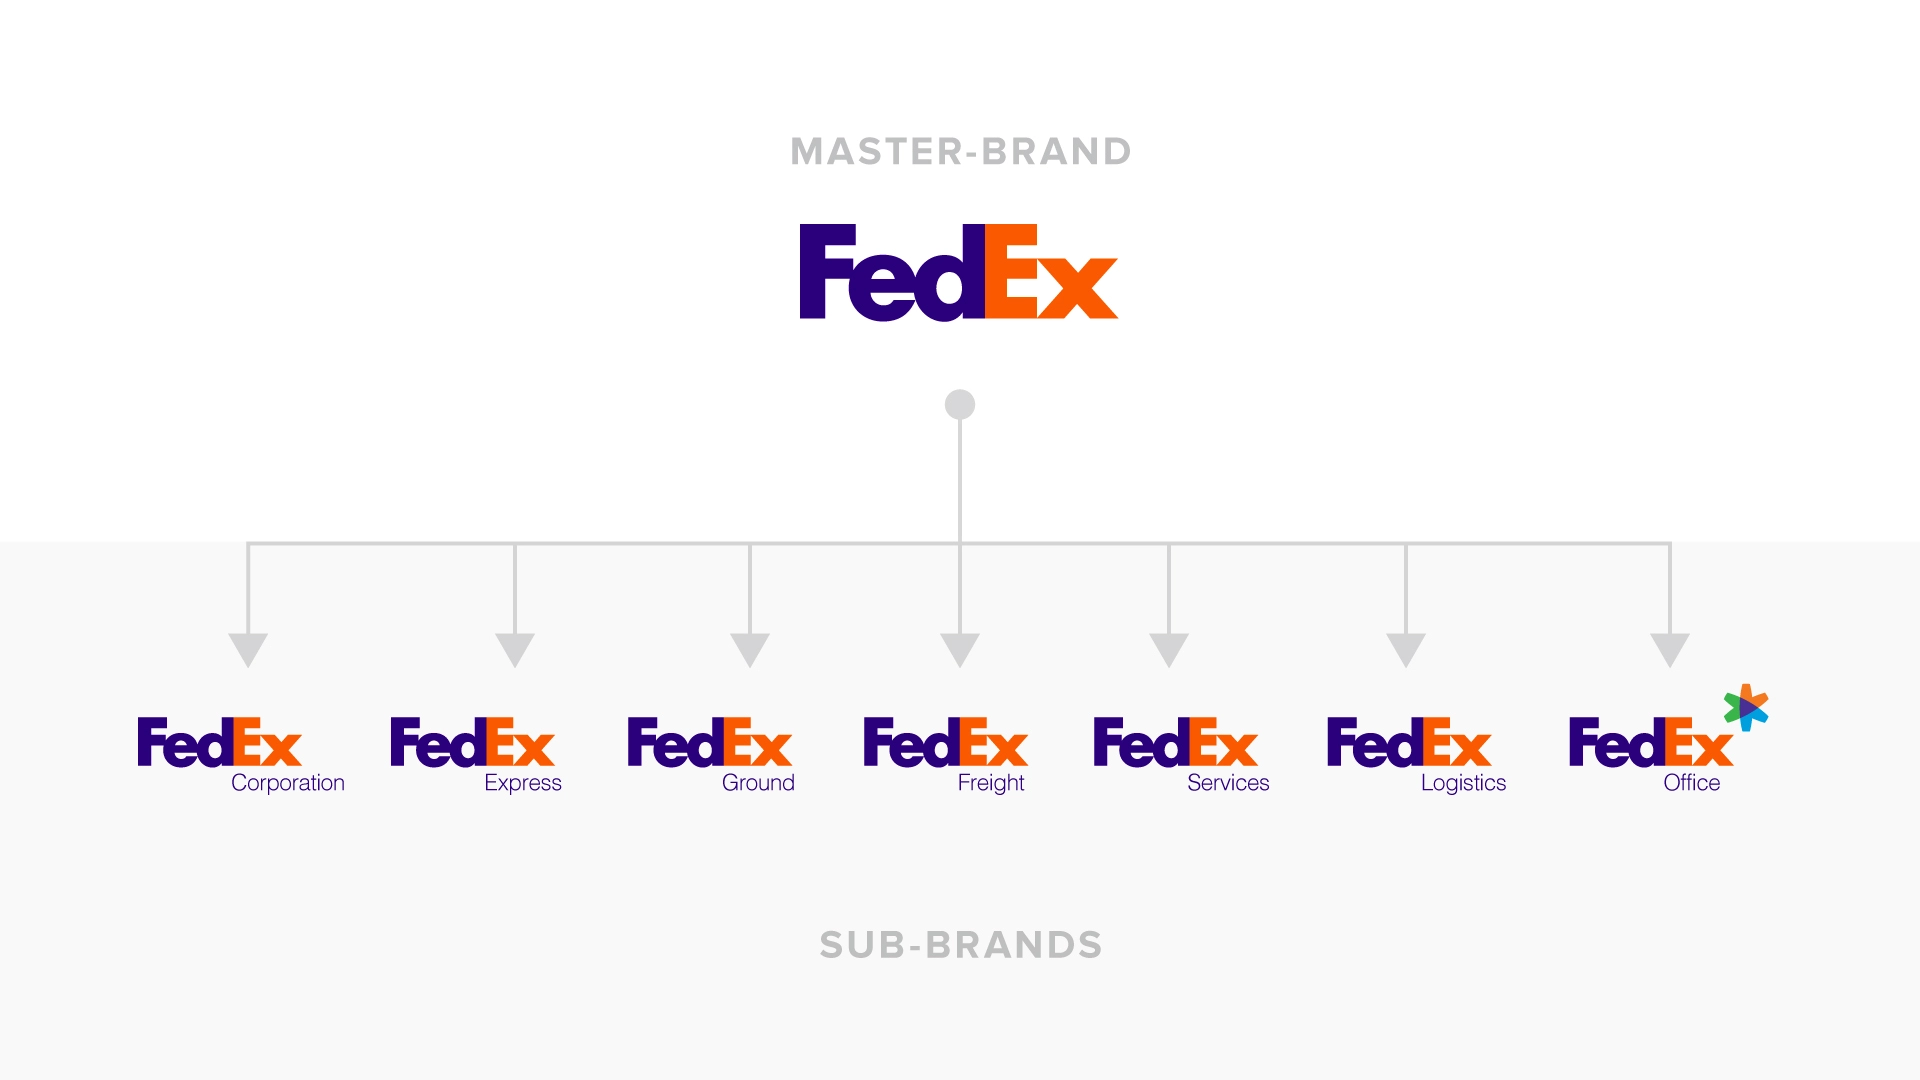
The FedEx Corporation counts with a Sub-Brand for each of its business divisions. All easily identified as part of the FedEx family.
Endorsed Brand Architecture
Characterised by marketing synergy between the product or division, and the parent. The product or division has a clearly defined market presence, and benefits from the association, endorsement, and visibility of the parent. — Alina Wheeler, “Designing Brand Identity”
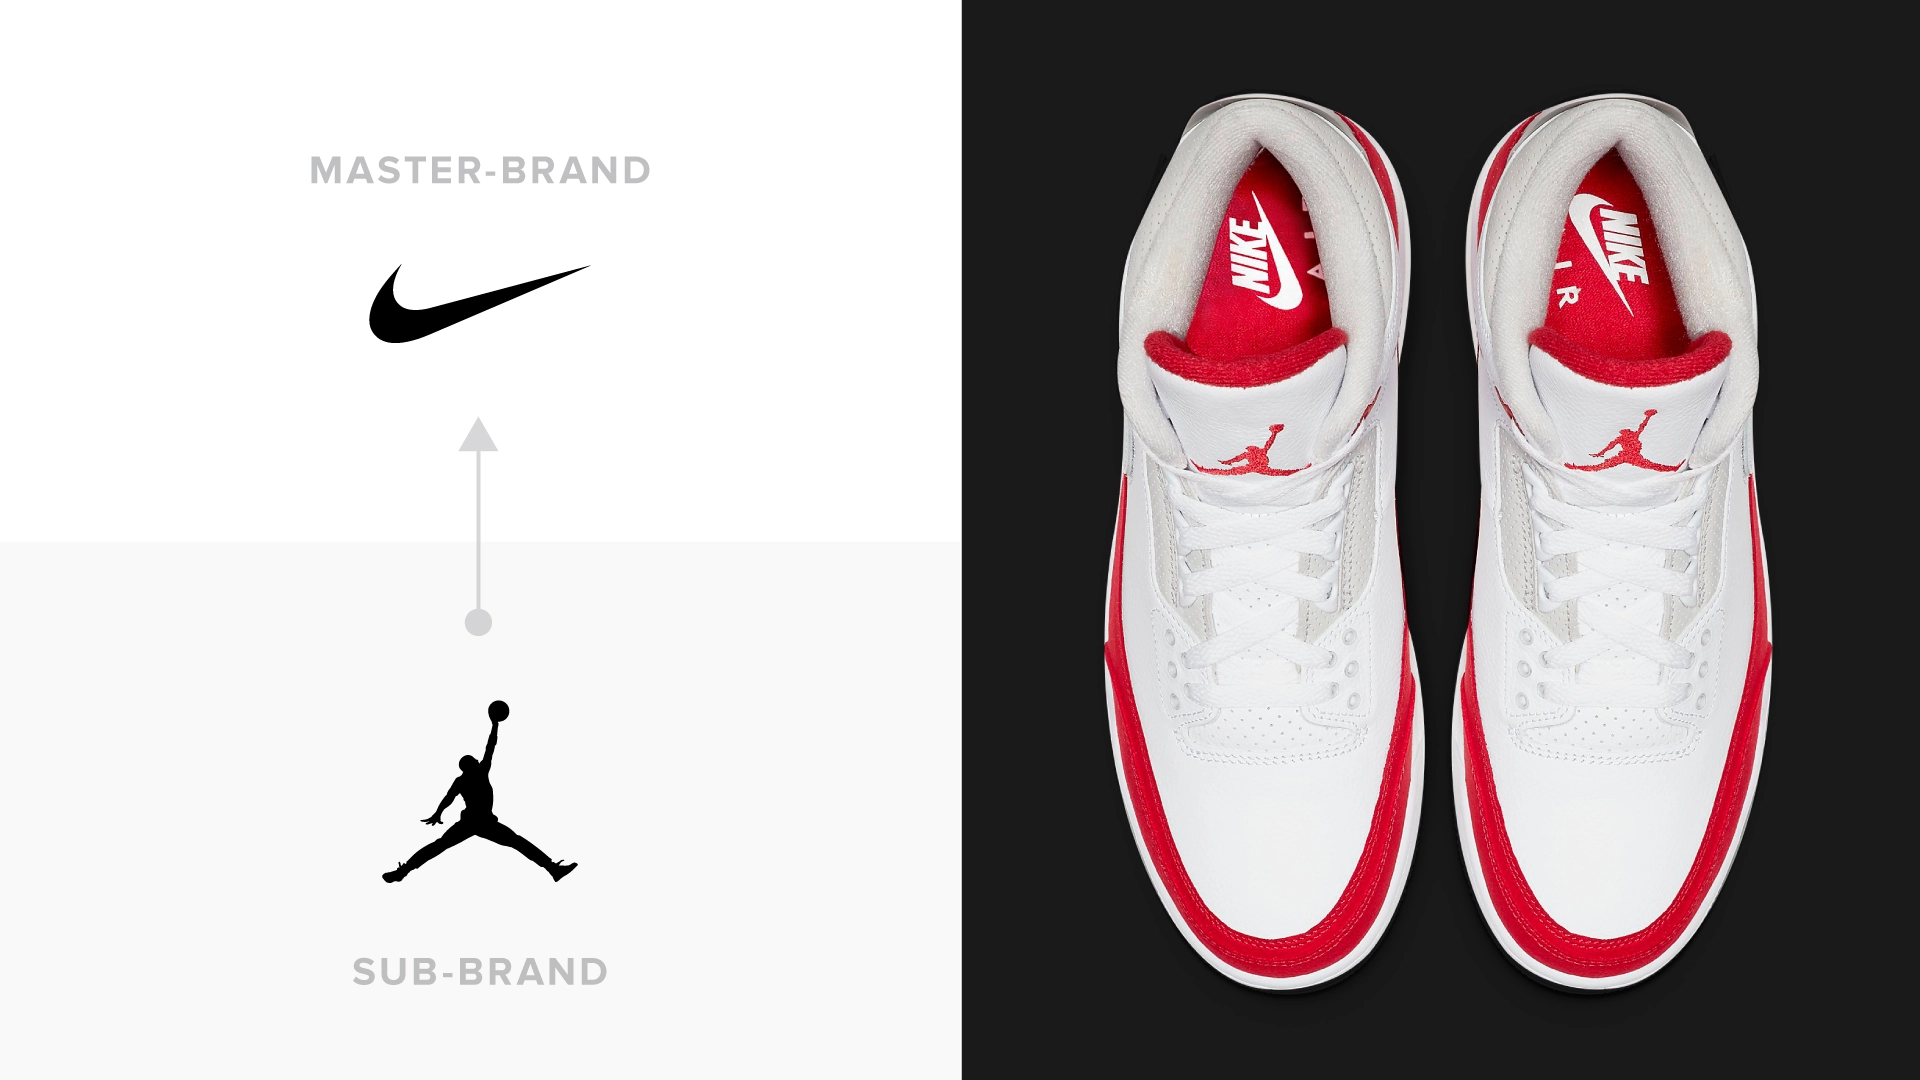
Nike counts with a line of products inspired by the famous basketball player Michael Jordan; the iconic shoes and apparel belonging to the “Jordan” collection can be identified with its own logo as belonging to a separate Brand from Nike. However, on most Jordan products, the Nike logo is also prominently displayed.
Pluralistic Brand Architecture
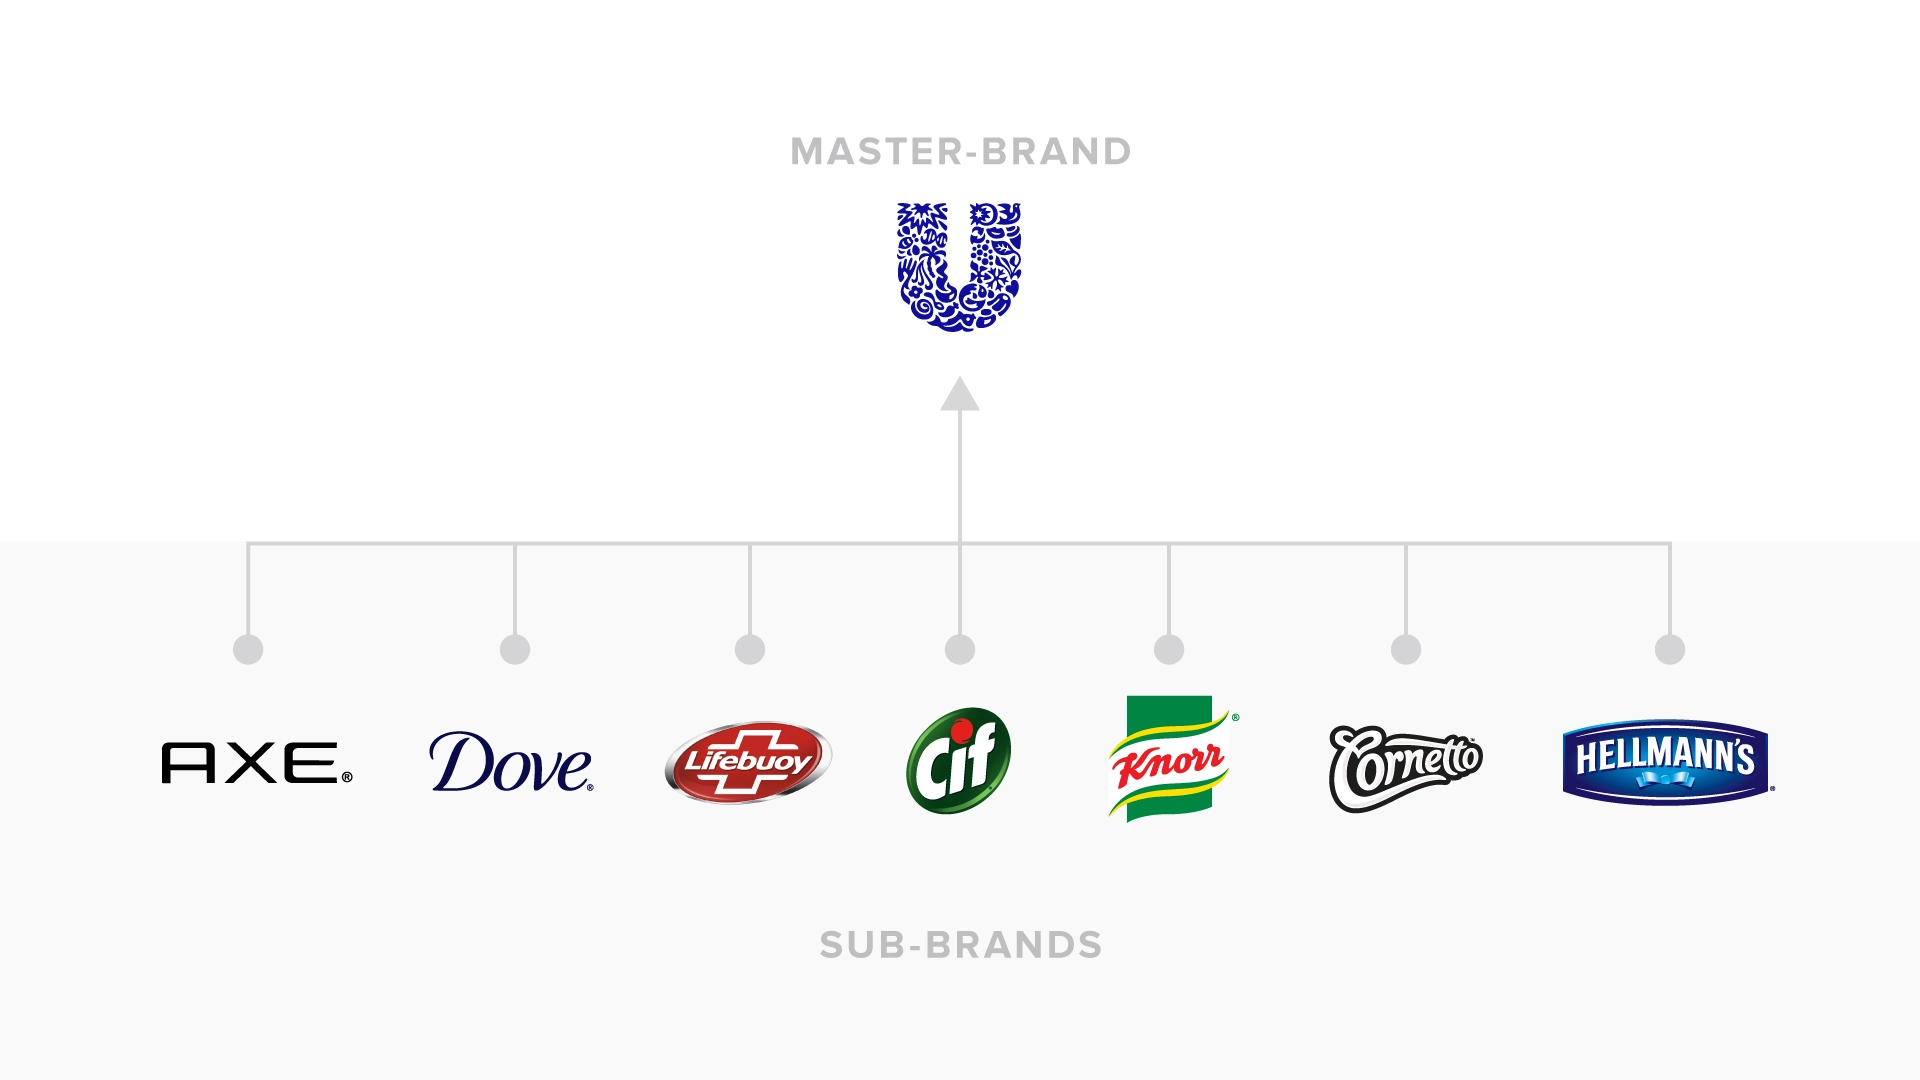
Characterised by a series of well-known consumer Brands. The name of the parent may be either invisible or inconsequential to the consumer, and known only to the investment community. Many parent companies develop a system for corporate endorsement that is tertiary. — Alina Wheeler, “Designing Brand Identity”
Even though Unilever’s Sub-Brands are publicly endorsed by their parent company, each Sub-Brand is marketed strongly so the consumers will identify them independently of Unilever.
Colab brand architecture
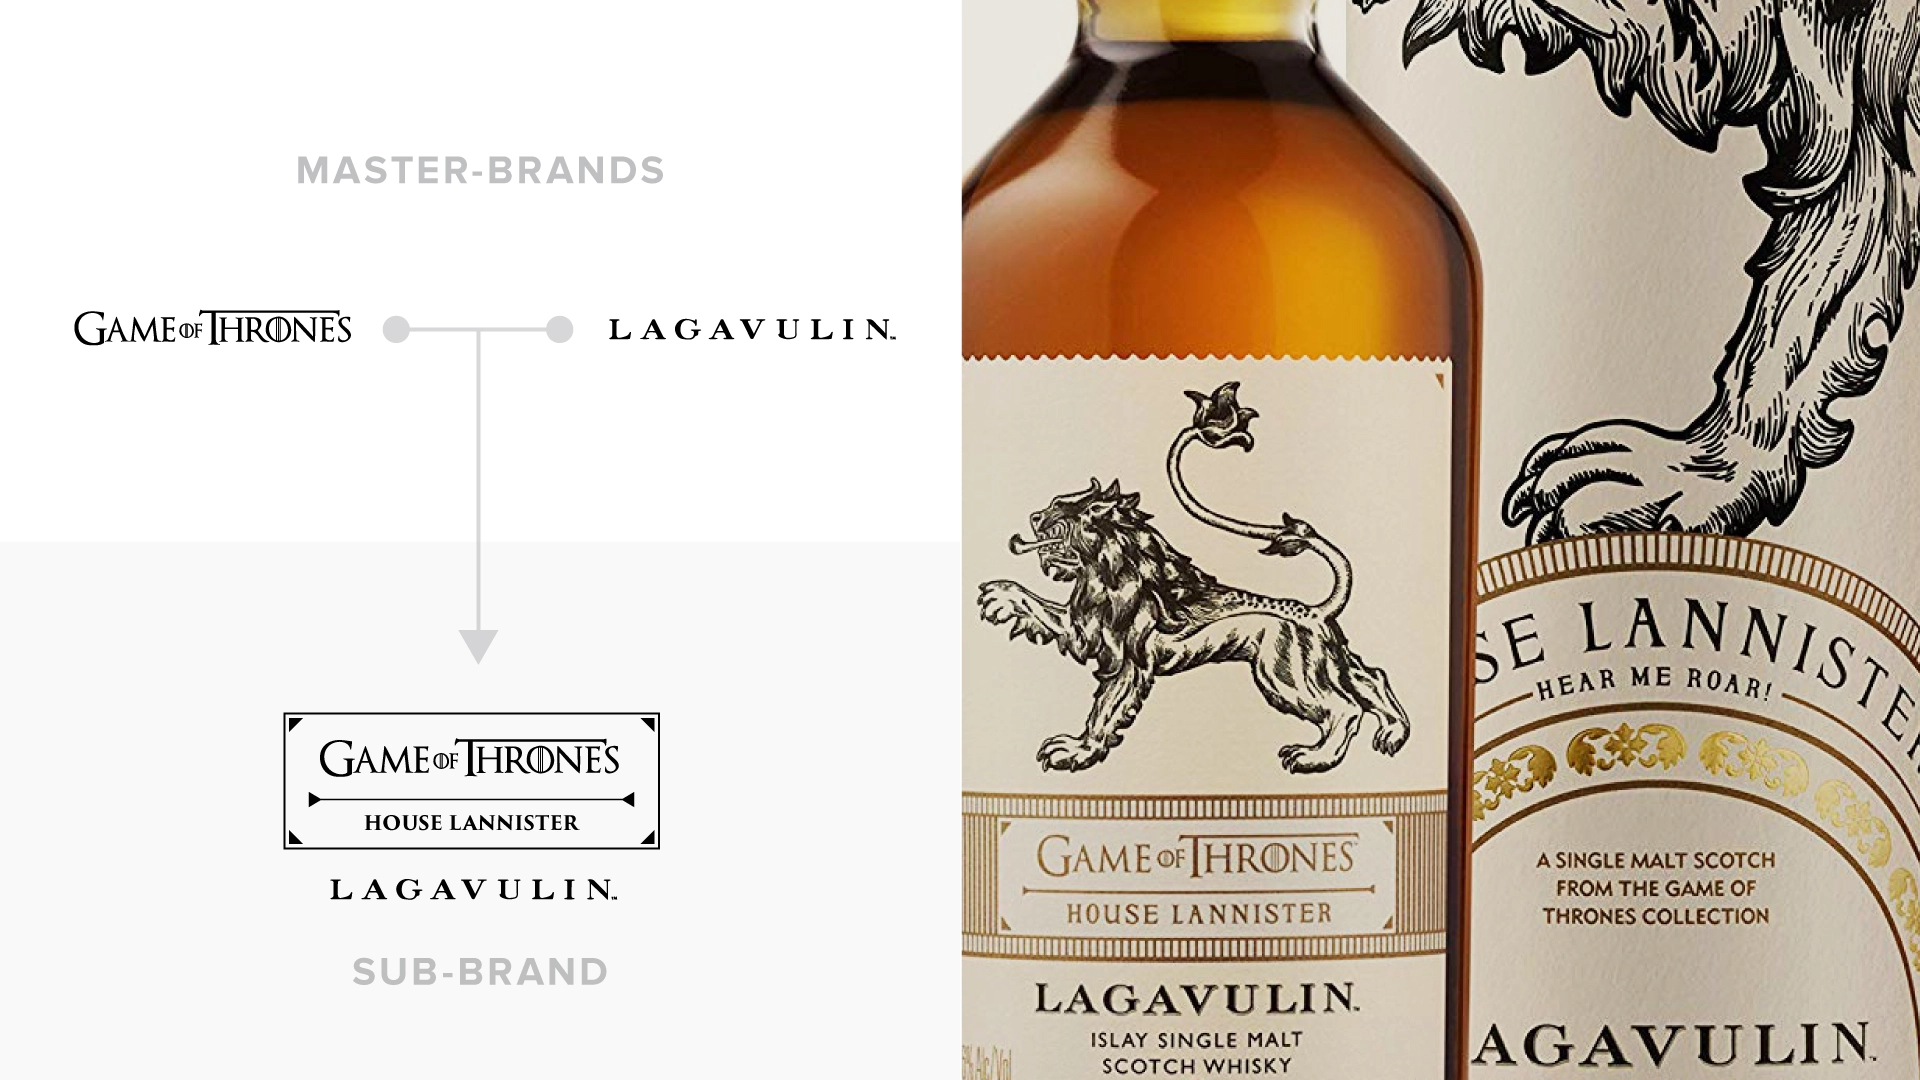
On special occasions, Brands which are not necessarily owned by a single corporation decide to team up to develop a unique product or service; More commonly, a limited-edition product or a novelty collector’s item.
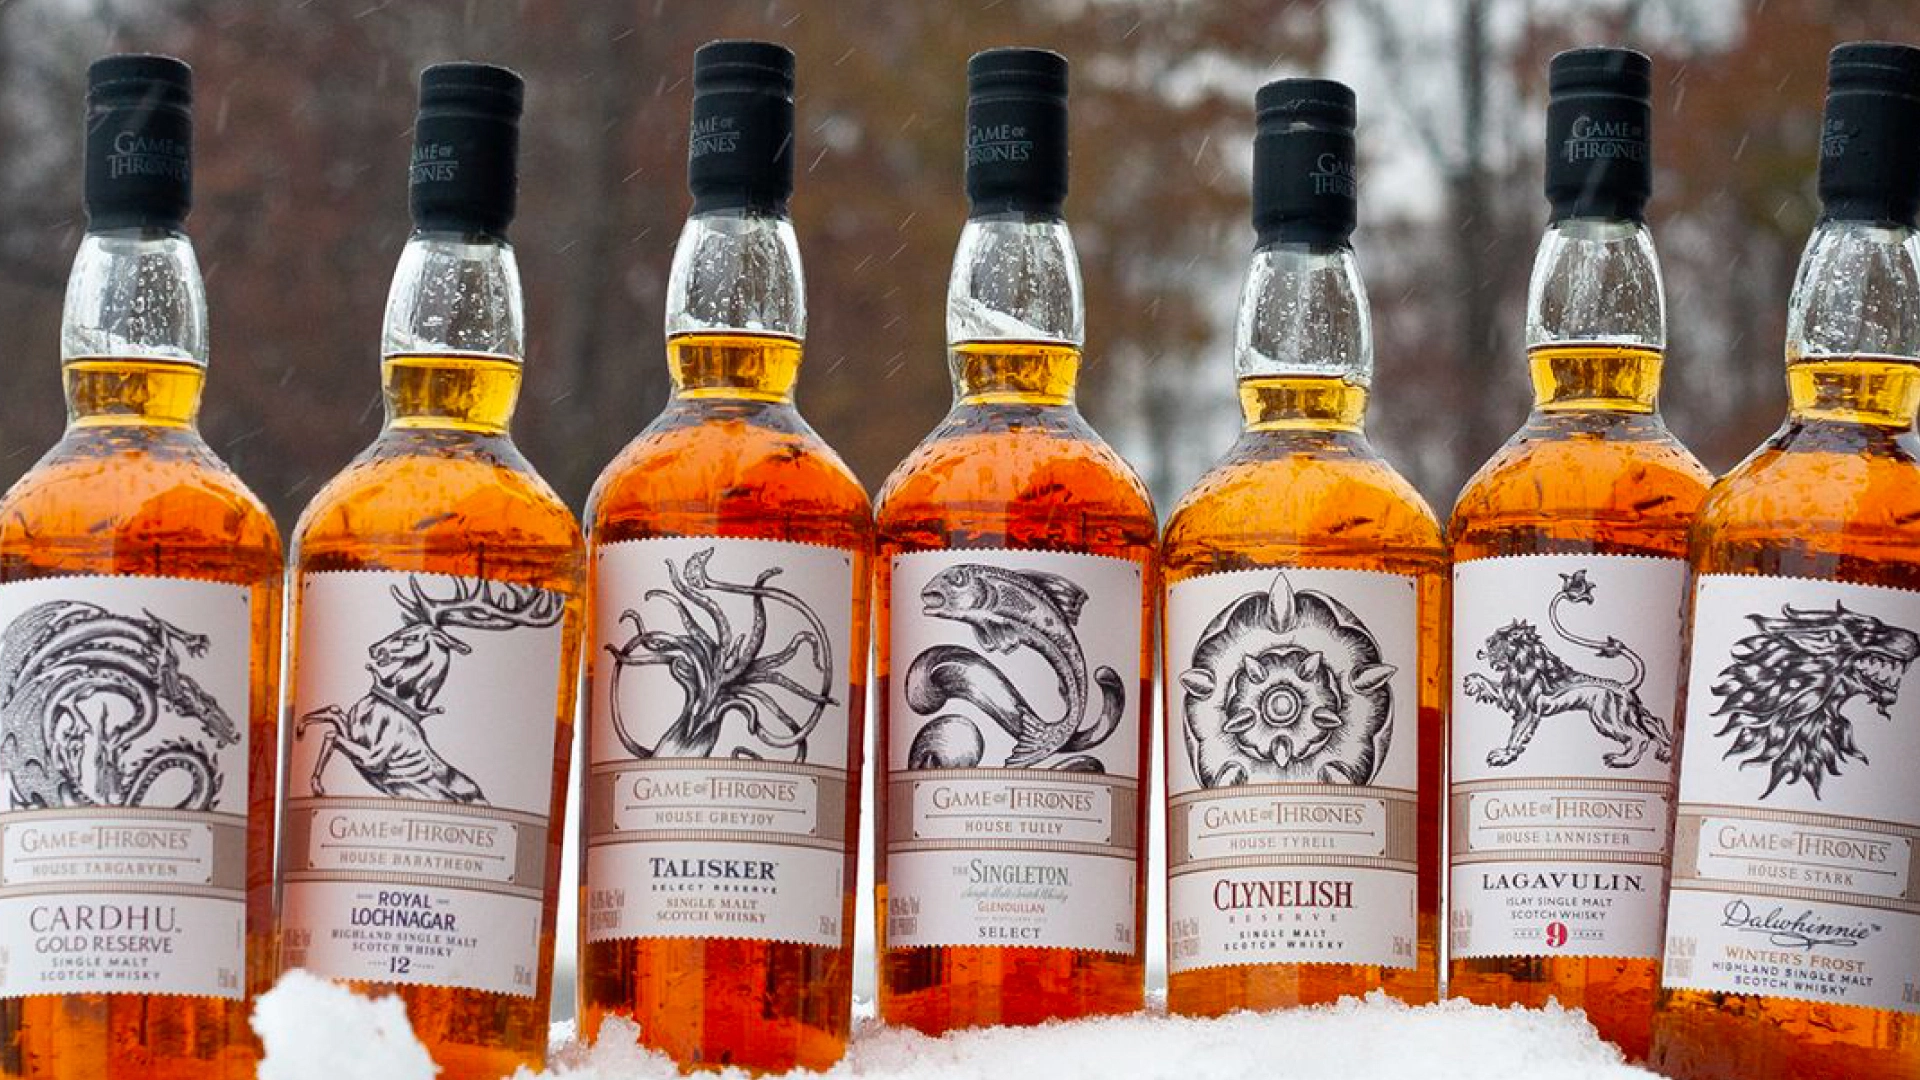
On the eve of HBO airing the last season of Game of Thrones, the TV series production company teamed up with multiple whisky producers to distill a series of single malt scotches each one inspired in a different house or faction from the series.
Composite Brand Architecture
Brand Architecture is not always black or white. It is common for business to adopt a more flexible approach combining multiple types of architecture. Most often in larger corporations one would find that the Master-Brand has sub-brands which, in turn, are parents to further Sub-Brands. Within the whole family/portfolio of brands belonging to a business, some of the Brands might be better identified as Monolithic, while others as Endorsed, or Pluralistic.
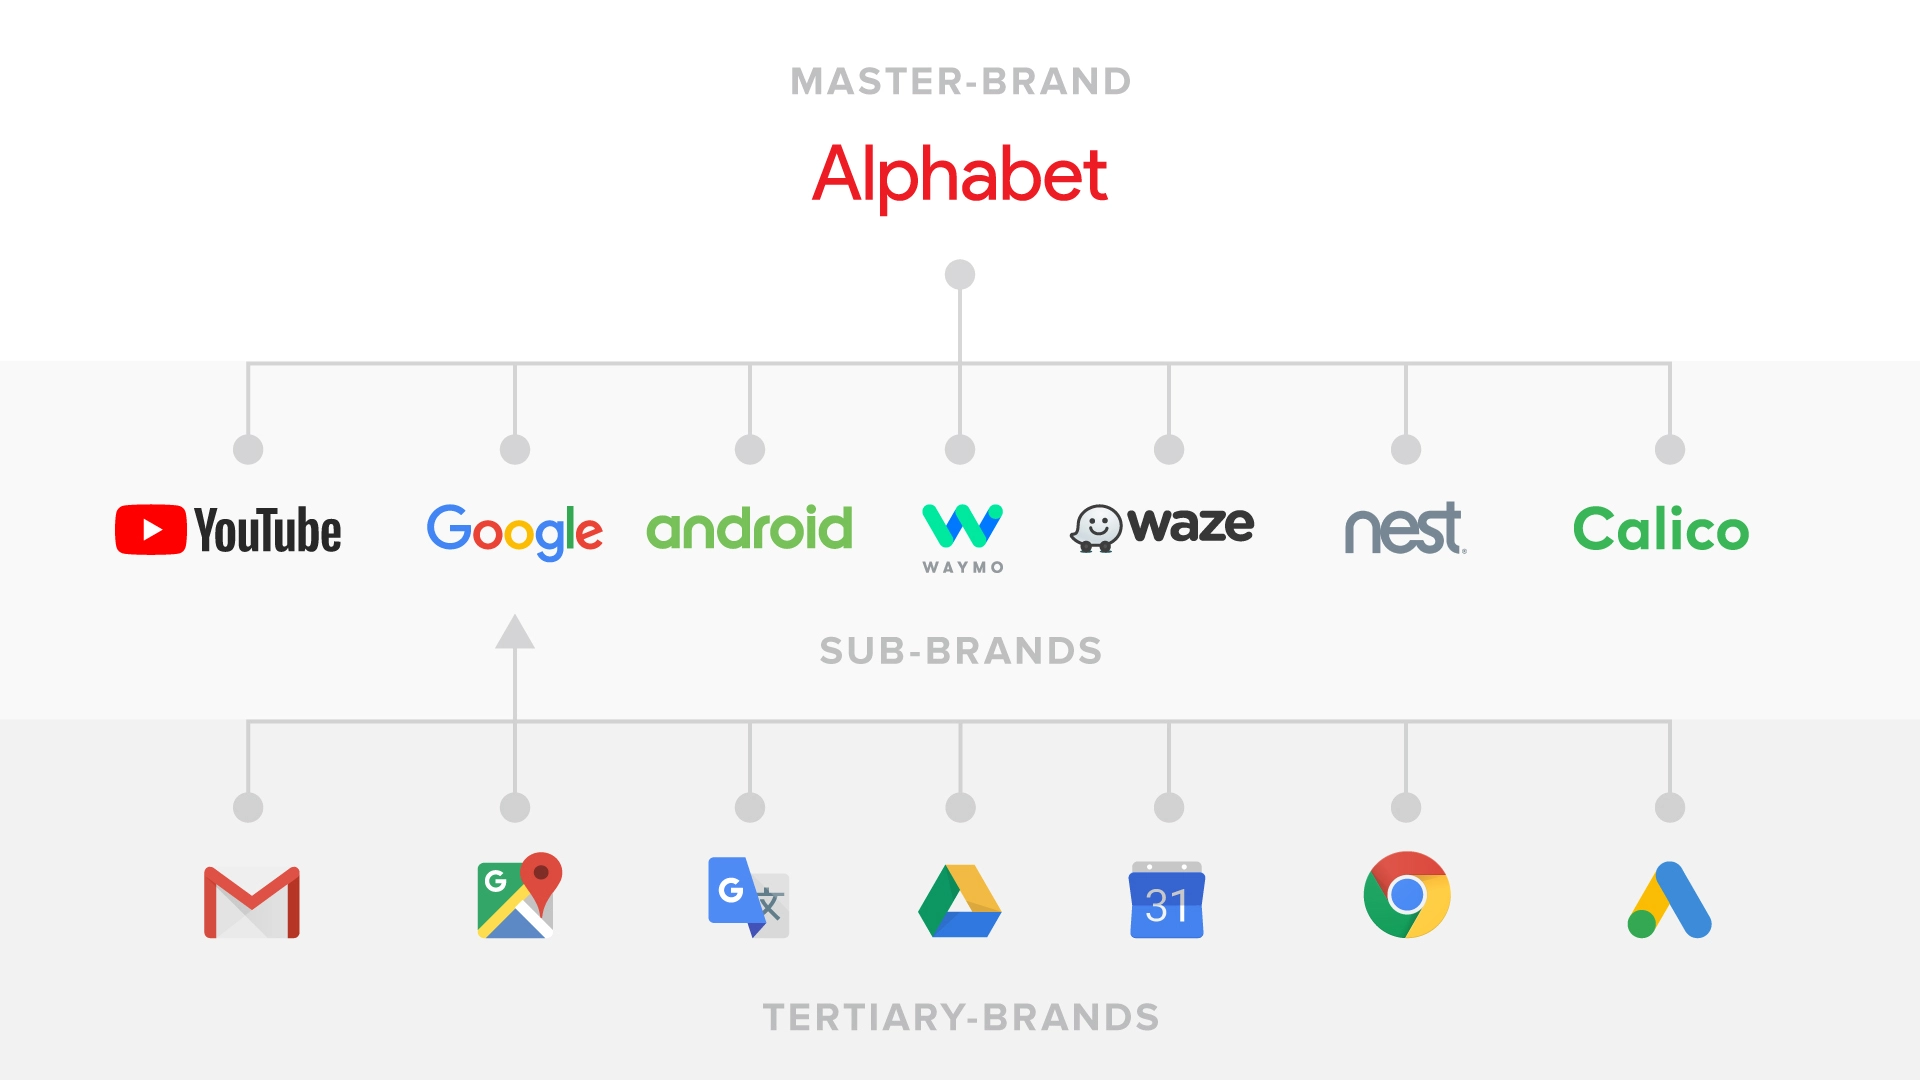
"Alphabet, Inc" is the business facing Master-Brand of multiple pluralistic Sub-Brands, which include Youtube, Google, Android, Waymo, Nest, Waze, Calico, and a few others. Of these, the most notable is Google, which is parent to a wide range of Monolithic products, including Gmail, Google Maps, Google Translate, Google Drive, Google Calendar, Google Chrome, Google Ads, and many more.
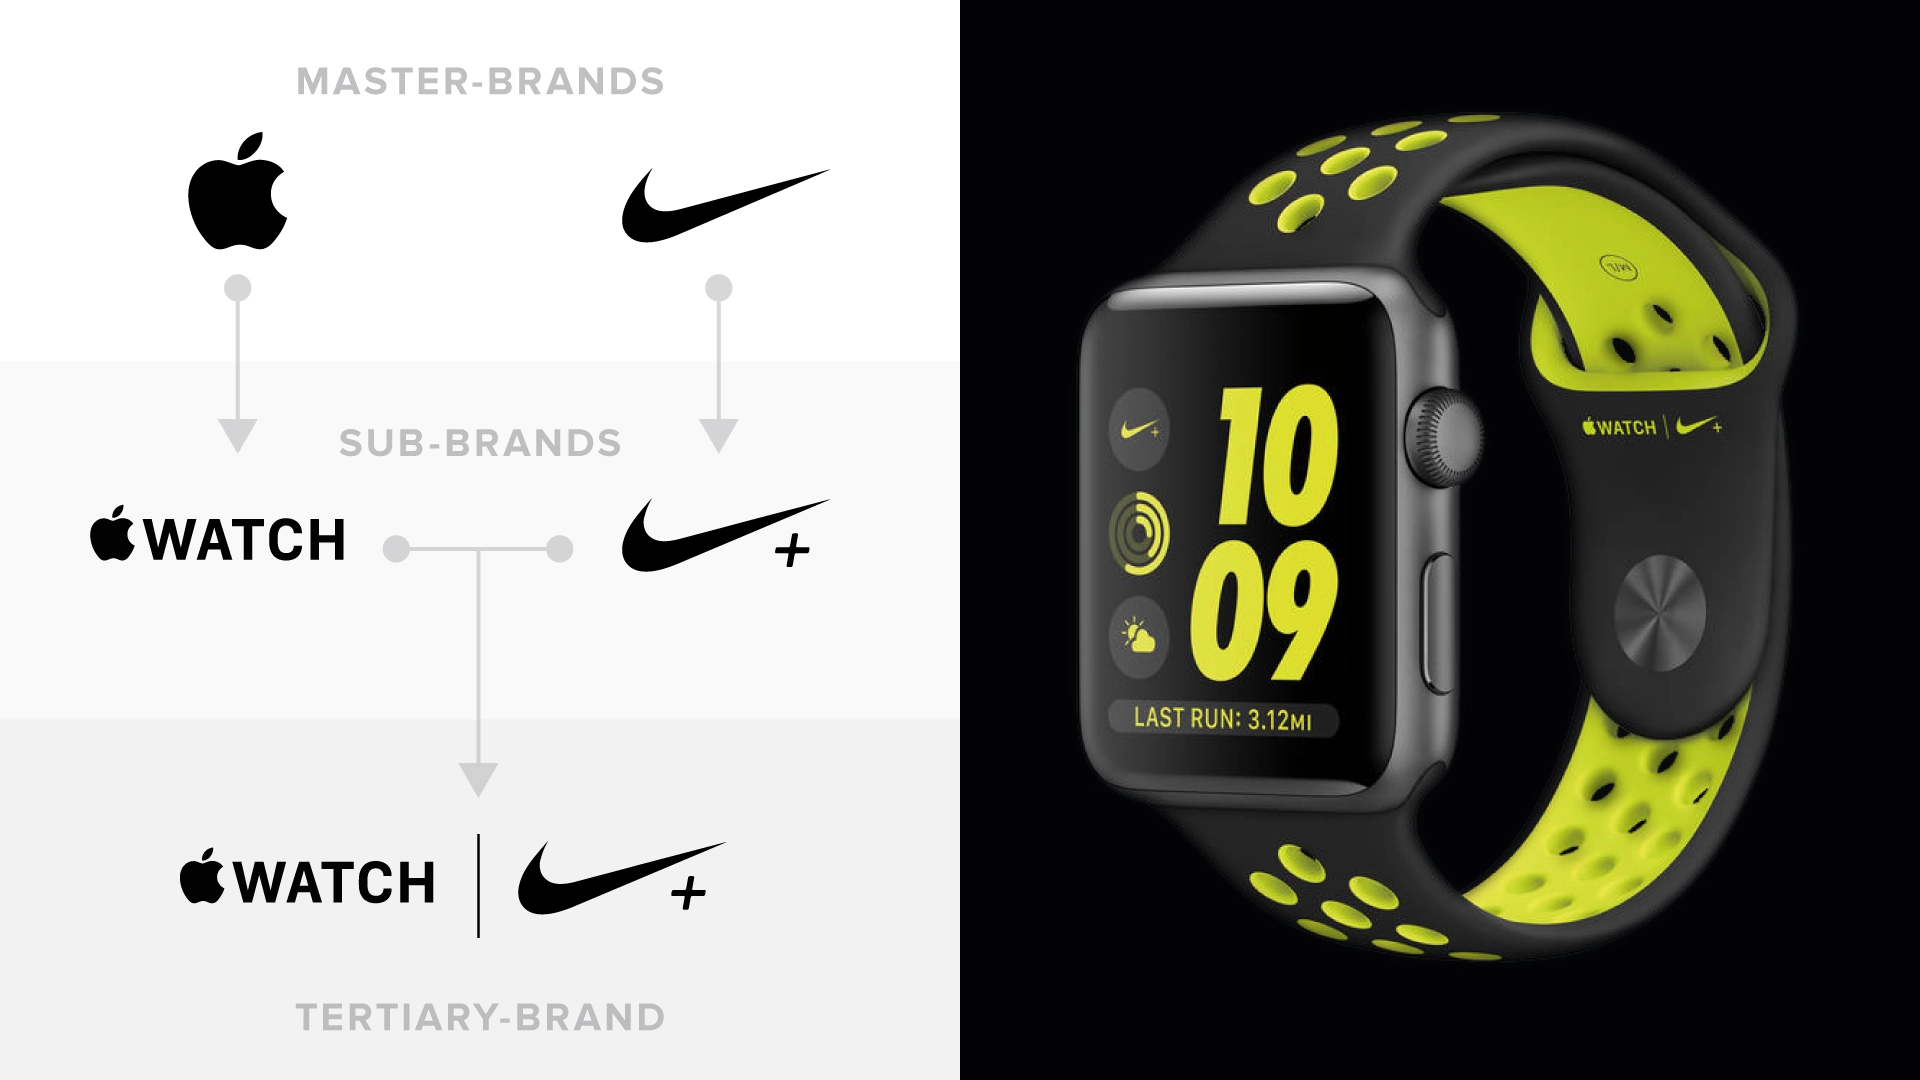
The Apple Watch - NikePlus edition is an example of two big Brands partnering up to develop a unique product. Note that in this case, the colab Brand Architecture type happens to connect two Monolithic Brand-Architecture Sub-Brands.
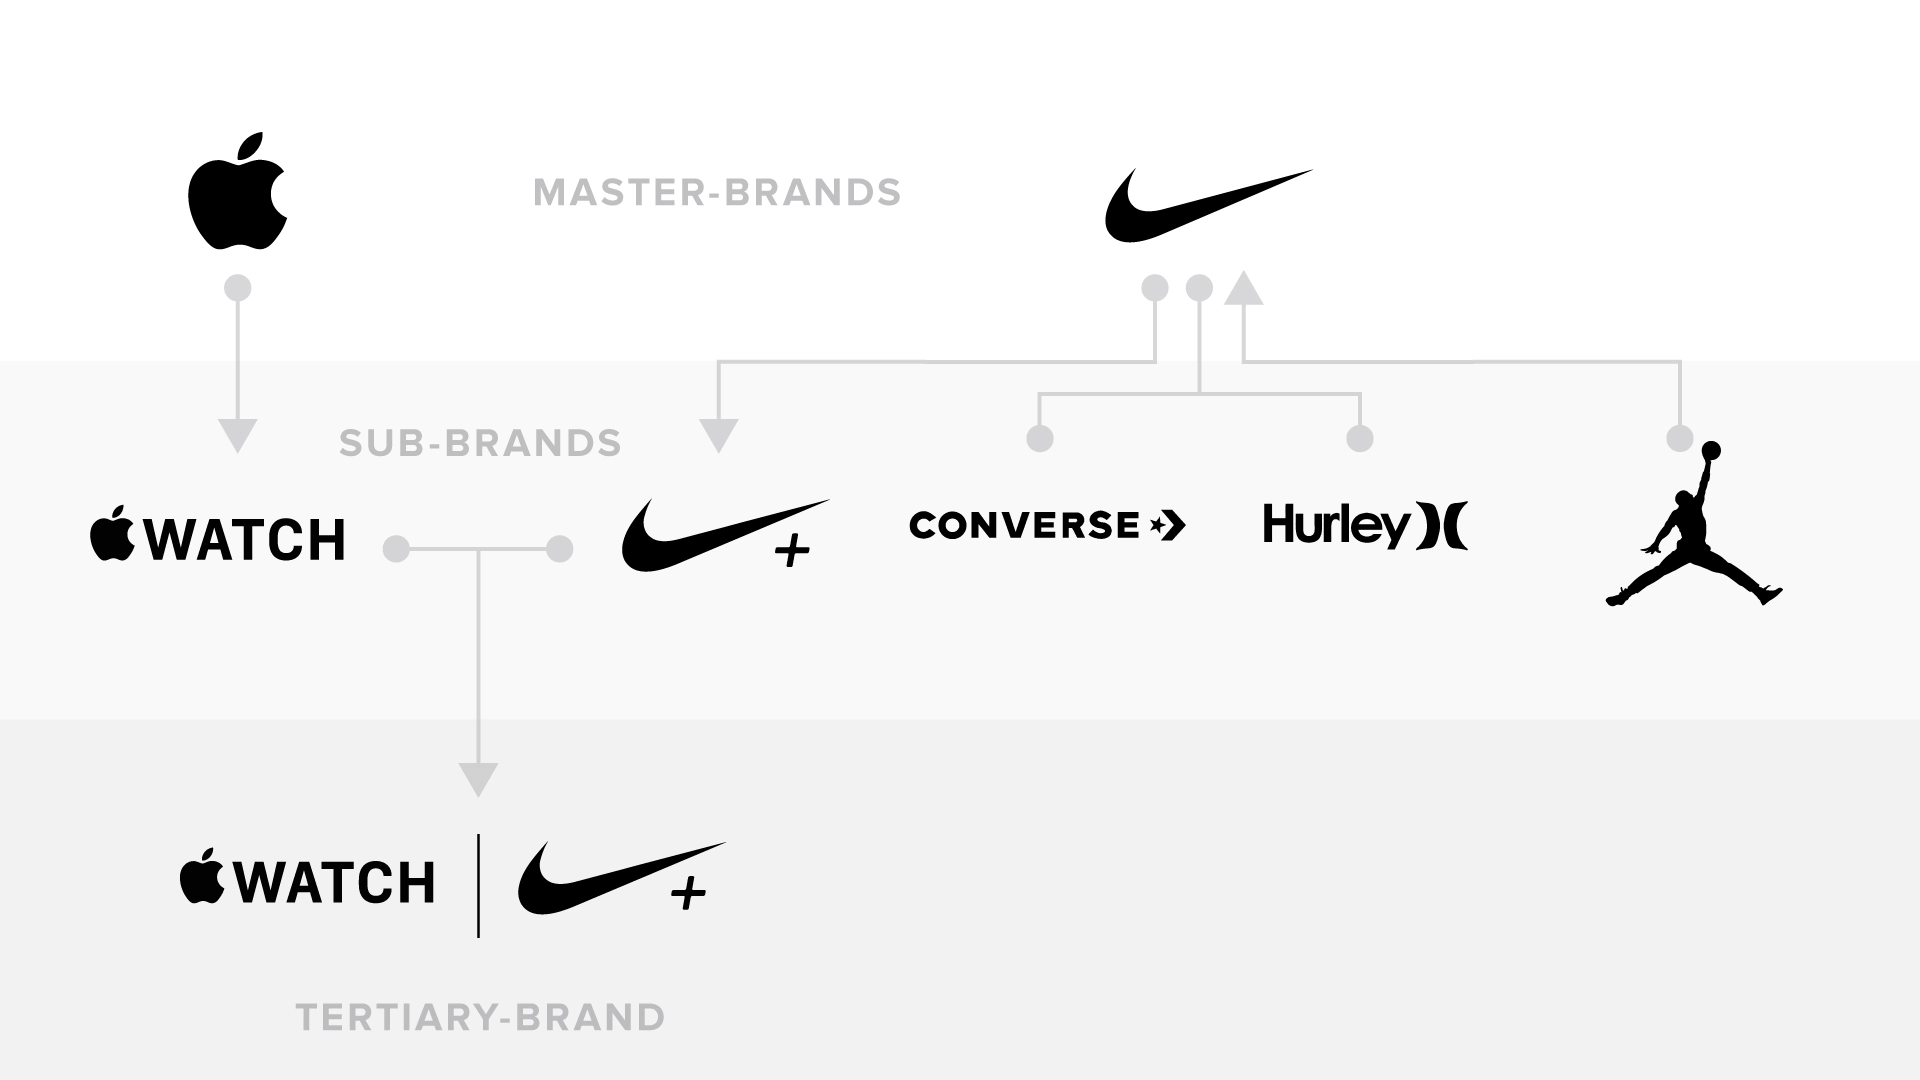
Furthermore, if we take a closer look into Nike’s full Brand Architecture, we can see that it counts with (1) a Monolithic Sub-Brand (NikePlus), (2) an Endorsed Sub-Brand (Jordan), (3) Pluralistic Sub-Brands (Hurley and Converse), and lastly, (4) a Colab Second-Sub-Brand (Apple Watch, NikePlus edition).
On a tangent, consider that the business structure and the Brand Architecture of an enterprise is not necessary diagrammed in the same way.
The business should be structured as it’s more suitable for the internal business operations, whereas the Brand Identity Architecture should be diagrammed as it’s more suitable for the public.
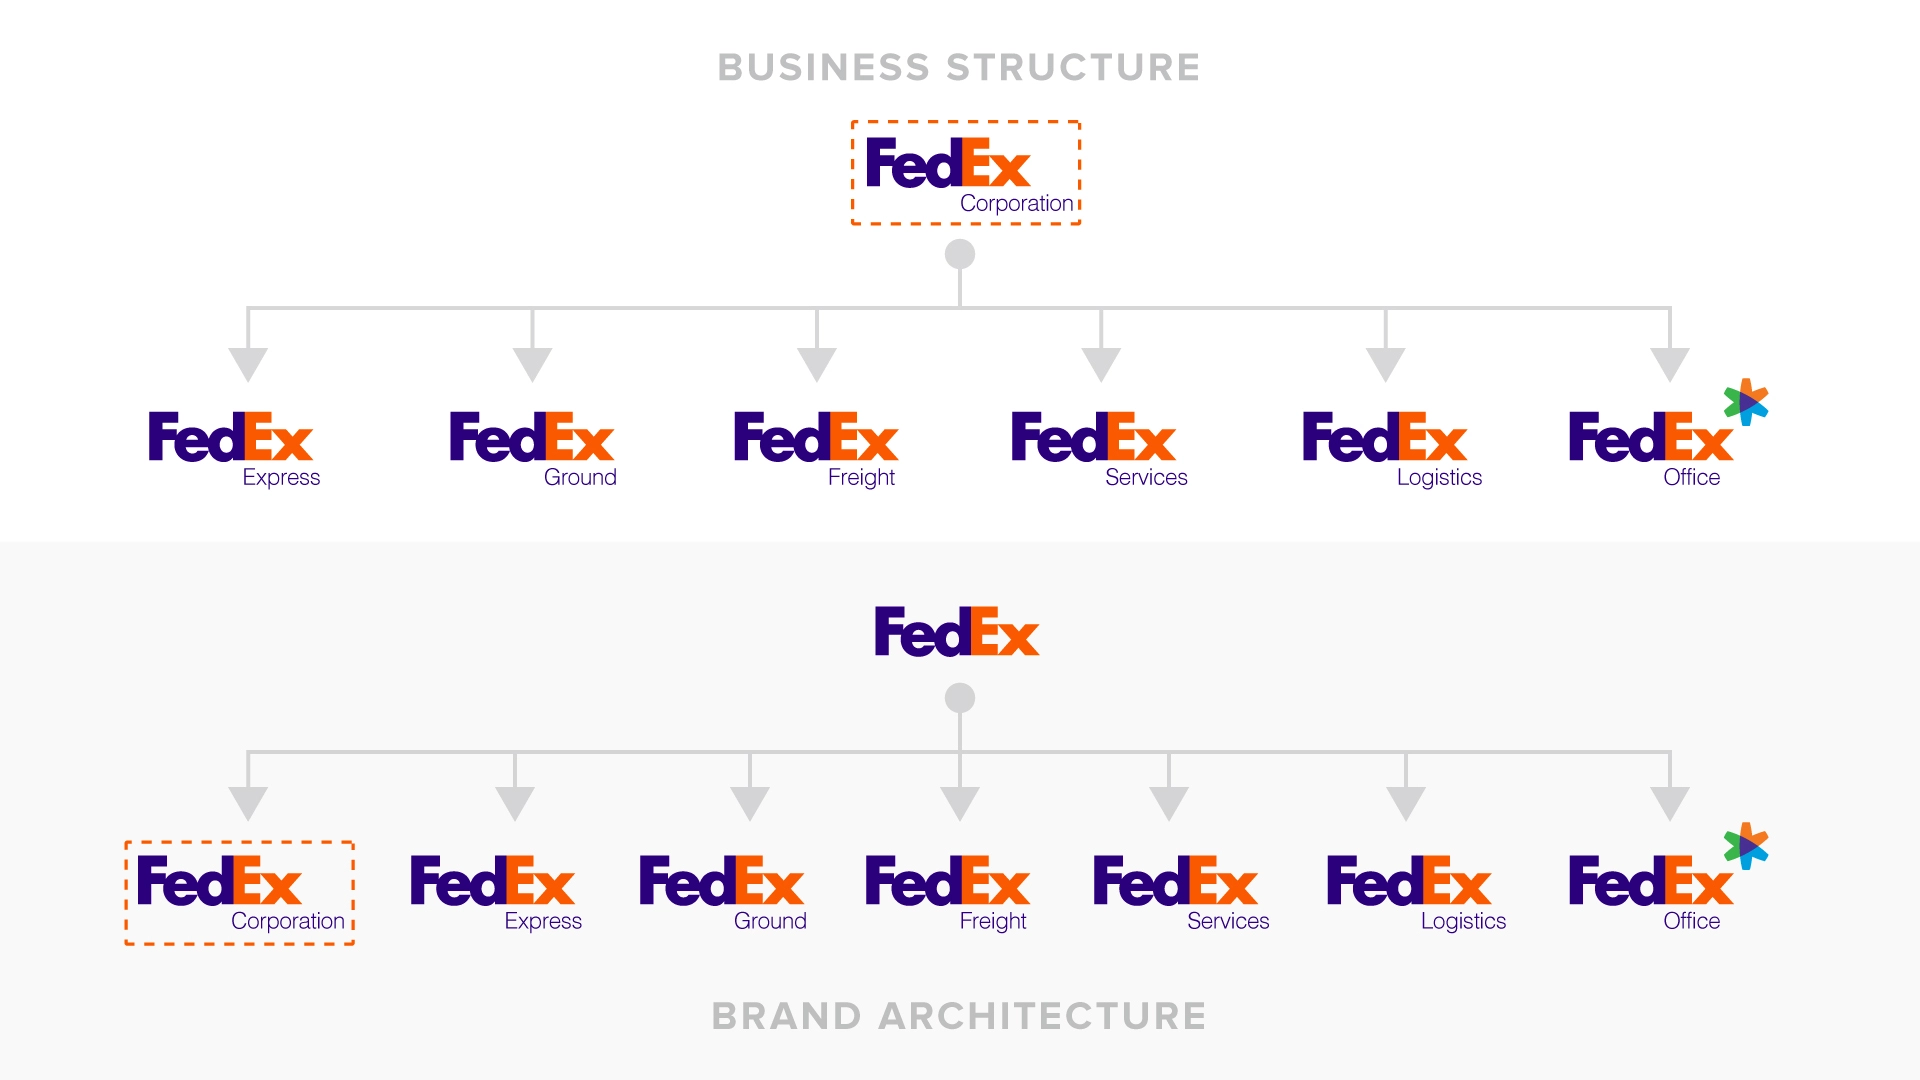
The business operating as the FedEx Corporation is responsible for managing seven subsidiary divisions. While the business structure positions the corporate division on top, for the tar get public, the Brand Identity places the Sub-Brand on the same level as the subsidiaries, all under the umbrella of the FedEx Master-Brand.
The Polyfen Group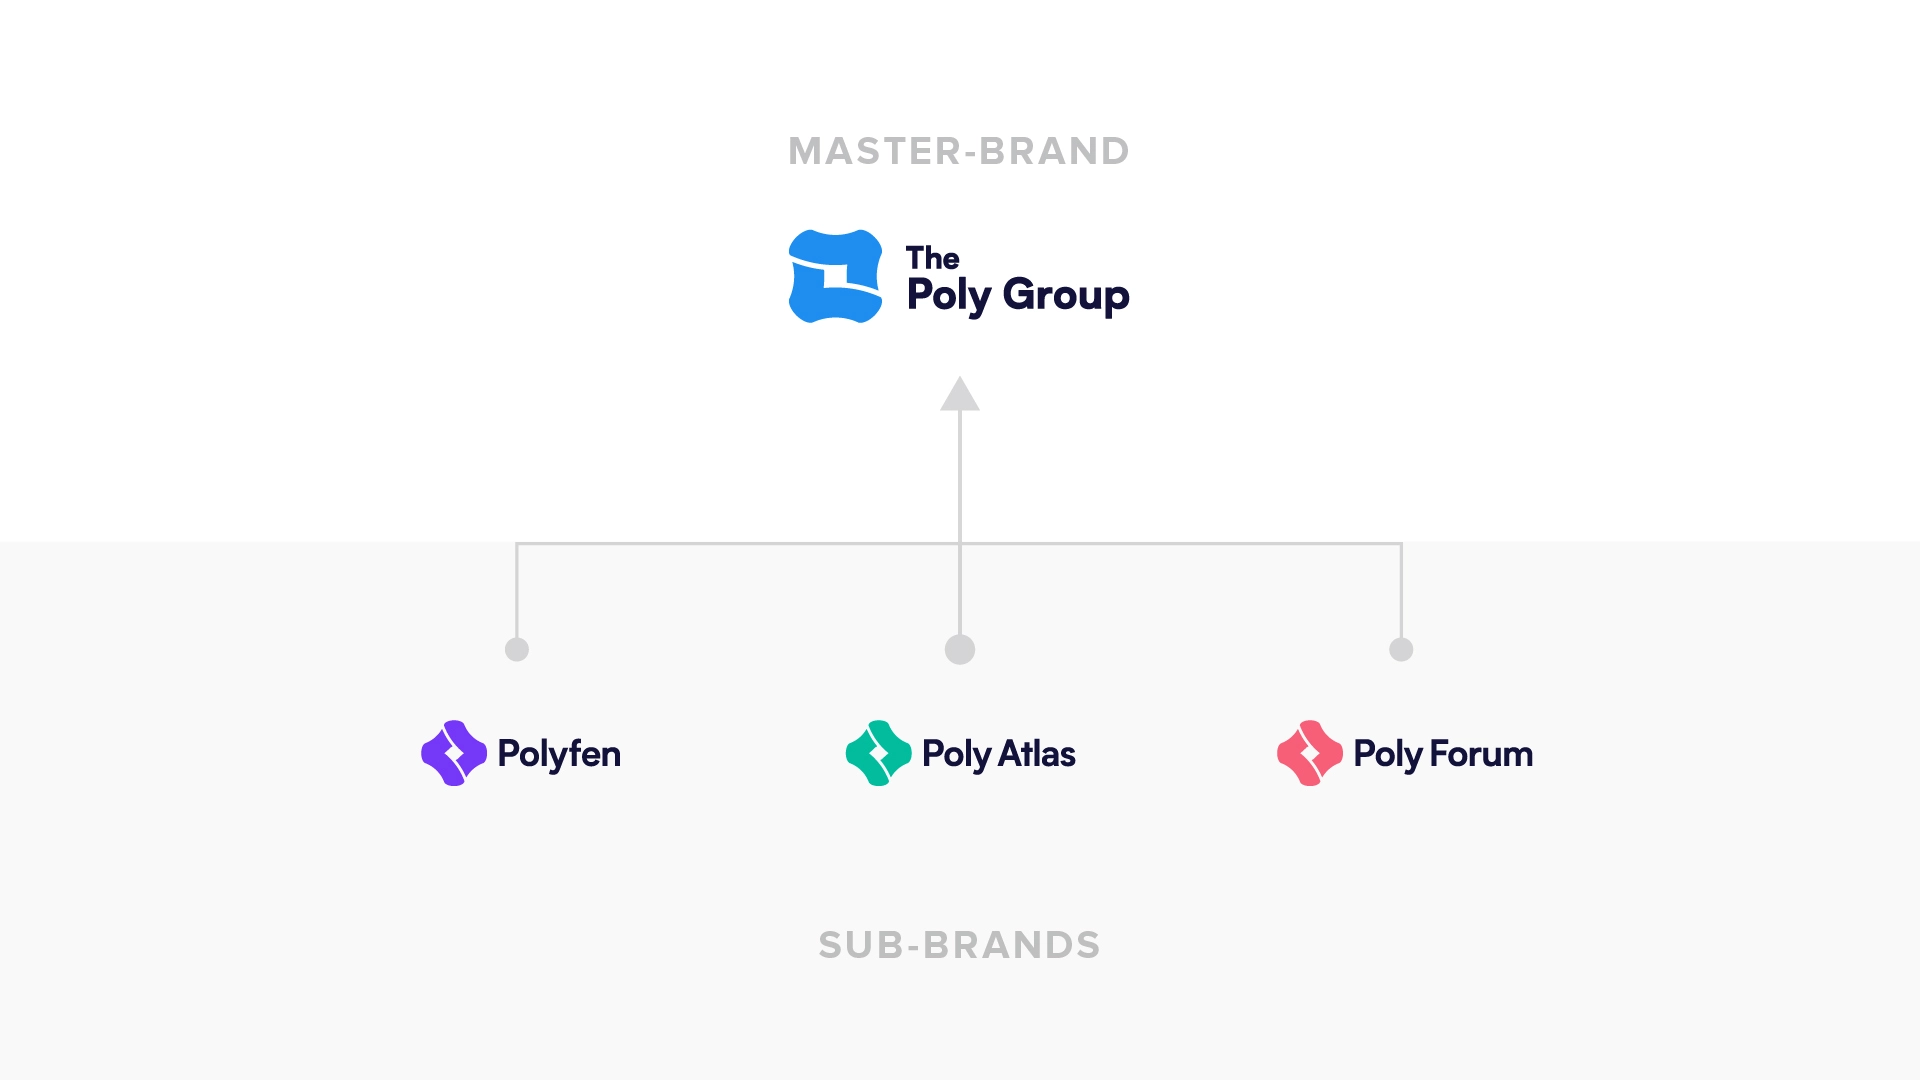
Our Brand Architecture is defined as an “Endorsed Brand Architecture”; However, there is an evident relationship between the family of Brands both in their Brand Names and Logo Systems. This aspect, often found in “Monolithic Brand Architecture”, aims to bind the family of Brands together and leverage our Brand Awareness.
1.8. Key Messages
The goal of the Key Messages is to narrow down the Brand's Voice and Tone into concise paragraphs focusing on expressing different aspects of the Brand. These paragraphs can be used across different Brand Communications including the Brand's Facebook page, Website, and Social media profiles.
TaskWrite an About paragraph
RoleMarketing Analyst
Estimated workload0.5 – 1.5 hours
DescriptionThe first paragraph of the Key Messages should concisely describe the purpose and the people behind the business; How many people work in the business? Is it a new business or an established business? Where is it geographically based? What service / product does the business offer? What's the vision / mission of the business? What do the members of the business have in common, what brought them together?
This paragraph should be particularly useful for an "About" section of a website, and for the "About" section of the business' Facebook page.
The Polyfen GroupThe Polyfen Group is a location-independent team with HQ in Mar del Plata, Argentina. Our team is small, but efficient and experienced. Additionally, we count with a vast network of expert consultants in Business Development, Creative services, Sociology, and IT. Our team works remotely, distributed in Argentina, Europe, the USA, and Australia; We are highly organised for seamless remote work.
Task
Write a Services / Products paragraph
RoleMarketing Analyst
Estimated workload0.5 – 1.5 hours
DescriptionBreakdown the business offer and list the most appealing features of the business offer; What problem does the business solve for its target public?
The Polyfen GroupThe Polyfen Group offers integral Branding solutions for emerging businesses worldwide; Namely, Polyfen offers Brand Identity Design. Additionally, we count with a digital product, Poly Atlas, a free guide to the Branding process; and a non-profit organization, Poly Forum, dedicated to promoting free and open education and networking in the creative industry.
Task
Write a Differential paragraph
RoleMarketing Analyst
Estimated workload0.5 – 1.5 hours
DescriptionHow does the business stand out over its competition? What its USP (Unique Selling Proposition)?
The Polyfen Group’s business model with segmented Sub-Brands allow us to provide holistic solutions to our customers while ensuring that each part of the Branding process is taken care of by a team which specialises on each service we offer. Additionally, our location-independent business model allows us to offer high-quality services at competitive prices.
Task
Write a Summary paragraph
RoleMarketing Analyst
Estimated workload0.5 – 1.5 hours
DescriptionSummarise the previous three paragraphs (About, Services Products, Differential) into a single, concise paragraph.
The Polyfen GroupThe Polyfen Group is a small, efficient location-independent business incorporating different organisations, services, and products centred on the Branding process offering high-quality work at competitive prices.
Task
Write an Bio sentence
RoleMarketing Analyst
Estimated workload0.5 – 1.5 hours
DescriptionNarrow down the Summary paragraph into a single, short sentence.
This sentence is particularly useful as a Bio line for Twitter and Instagram profiles.
The Polyfen Group.5 hoursThe Polyfen Group incorporates a suite of organisations, services, and products centred on the Branding process.
2. Visual Identity
The Visual Identity includes all the graphic Trademarks of the Brand, such as the Logo System, Typeface Selection, Colour Scheme, and Visual Language.
2.1. Visual Exploration
The Visual Exploration and Discovery is the cornerstone of the Visual Identity and probably one of the hardest stages of the Brand Identity Design process.
This stage involves multiple iterations and a back-and-forth with incorporating the client's feedback.
TaskSurvey potential typefaces for the wordmark logo
RoleBrand Designer
Estimated Workload1 – 2.5 hours
DescriptionThe best way to start is by setting the visual tone for the Brand with the right typeface for the logo.
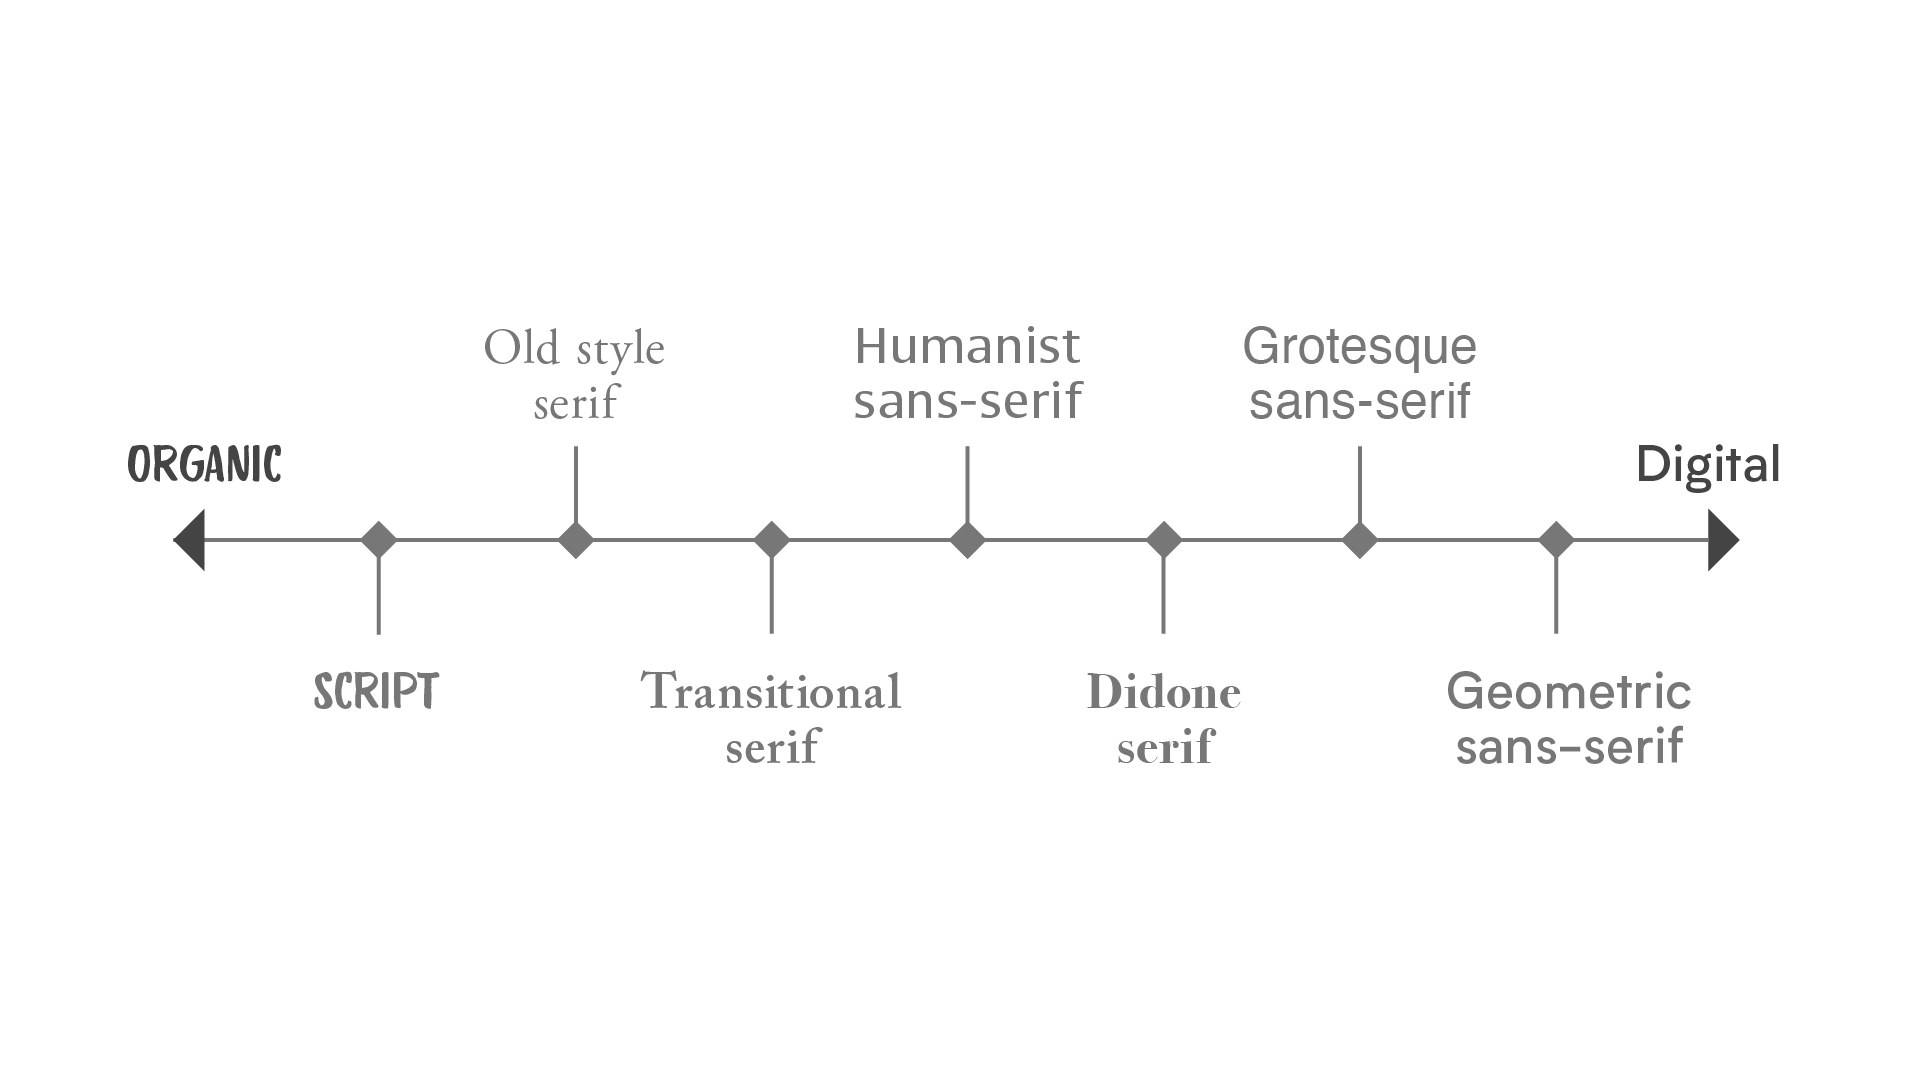
Decide how you would place the Brand in a range from more organic, humanistic, hand-written to more modern, digital, mechanical. If a Brand leans towards a more organic feel, a humanistic typeface with a penmanship look-and-feel would be more suitable, perhaps a serif typeface or a sans-serif with high contrast between thick and thin strokes. On the other hand, if your Brand leans towards a more modern, digital tone, then perhaps a more angular typeface would be in order, like a geometric sans-serif or a contemporary, stylised serif typeface would be suitable.
Keep in mind that some typefaces are free; However, in order to set a premium tone for the look-and-feel of the Brand Identity, it would be advisable to purchase a paid typeface license. This is a good time to discuss with the client their budget and find a typeface accordingly.
Browse font distributors and foundries and list potential typefaces suitable for the Brand's Wordmark.
Task
Explore multiple Ideogram drafts
RoleBrand Designer
Estimated Workload2 – 12 hours
DescriptionOnce the Tone for the Visual Identity is set with a type Wordmark, you can start exploring different Ideogram drafts surveying different directions. You can try abstract geometry, pictorial marks, and lettermarks.
This is also a good time to try out different colour schemes on the logo drafts. However, something to consider if we're prioritising functionality for a utilitarian Brand, it's good to start with a monochrome Ideogram that works on black and white. This allows you to first focus on an optimal morphology and prioritise shape over colour.
Task
Put the selected drafts to a test
RoleBrand Designer
Estimated Workload1 – 3 hours
DescriptionSelect the most suitable typefaces, Ideograms, and colour schemes, and put them to a test by quickly designing the cover/above-the-fold section of the website.
You can also test the different directions of the Visual Exploration on mockups.
The final goal of the Visual Exploration is to narrow down the single, most suitable direction for the Logo System, Typeface Selection, and Colour Scheme.
2.2. Logo System
TaskGrid and fine-tune the selected Ideogram
RoleBrand Designer
Estimated Workload1.5 – 3 hours
DescriptionConstruct a grid, place the selected Ideogram, and fine-tune it as necessary.
Task
Develop all the corresponding alternatives of the Logo System
RoleBrand Designer
Estimated Workload2 – 4 hours
DescriptionUsing the fine-tuned Ideogram, set a grid and develop all other alternatives of the Logo System including the Wordmark, Emblem, and Signature in all corresponding variations of colour and composition.
The colour variations of the Logo System would include each type of Logo in Monochrome (only 1 colour) in positive (for instance, in black for use over light backgrounds) and negative (for instance, on white for use over dark backgrounds), and in Full-colour.
The composition variations could include a version of the Emblem which (1) displays the Ideogram on vertically top of the Wordmark, or (2) displays the Ideogram horizontally to the left of the Ideogram.
2.3. Typeface Selection
TaskSelect a typeface for headings
RoleBrand Designer
Estimated Workload0.5 – 1.5 hours
DescriptionNot necessarily, but typically, the typeface selected for the Wordmark can be the Brand's primary typeface for use on headings for the website and other mediums.
Task
Select a typeface for body text
RoleBrand Designer
Estimated Workload0.5 – 1.5 hours
DescriptionIn some cases, the body text can be set with the same typeface which is used for the Wordmark logo and headings. However, it's usually recommended to use a second typeface for body text in order to create more contrast between the headings and the body text.
At this point, we must ensure that the two typefaces pair harmoniously together. The goal is to use two typefaces that are different enough so it would create a distinctive contrast, but at the same time both typefaces should complement each other with some common traits.
Overall, if you've chosen a geometric sans-serif typeface for the Logo, headings, and captions; then you should choose a clean, modern serif typeface for the body text.
Task
Select a secondary type selection
RoleBrand Designer
Estimated Workload0.5 – 1.5 hours
DescriptionGenerally, you would aim to use a premium, paid-license typeface for the Logo, headings, and body text. You can use those typefaces on the business' website and other mediums. However, not all mediums are able to use premium typefaces.
For instance, the Branding team may choose to use premium typefaces on the website. However, imagine the business' employees use Google Docs for text editing. In that case, Google Docs does not allow to use custom typefaces, but you can use free typefaces available in Google Fonts.
In summary, you must select a secondary set of typefaces as a fallback for when premium typefaces are not available.
Task
Select a tertiary type selection
RoleBrand Designer
Estimated Workload0.5 – 1.5 hours
DescriptionWorst case scenario, some mediums does not allow the use of custom premium typefaces, nor free Google Fonts typefaces. For instance, emails only support "system fonts" which are readily available in all computers and devices. Namely:
- Arial
- Verdana
- Times New Roman
- Calibri
- Courier
- Gill Sans
- Georgia
- Garamond
- Trebuche
- Tahoma
- Cambria
Overall, Verdana is generally the most suitable tertiary typeface.
2.4. Colour Scheme
TaskChoose an accent colour
RoleBrand Designer
Estimated Workload0.5 – 1 hours
DescriptionSome Brands may choose to go with a monochrome black and white colour scheme. However, to create more contrast on the Brand Touchpoints such as the buttons on the business' website, it's suggested to pick an accent colour.

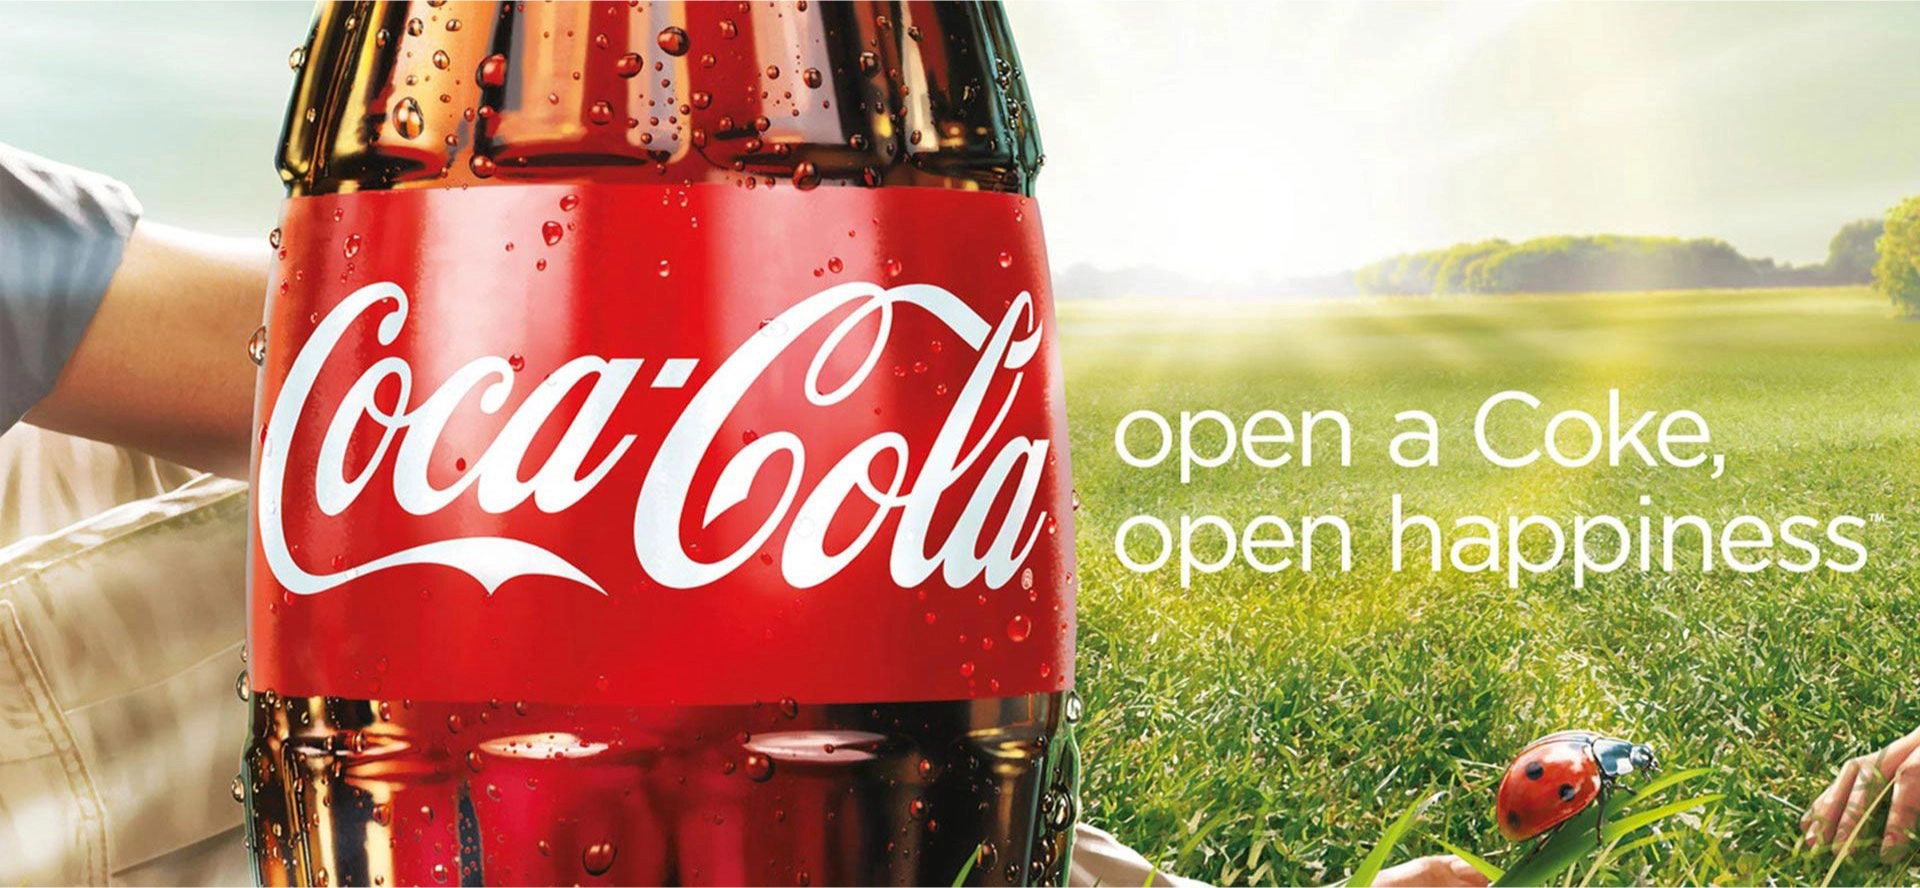
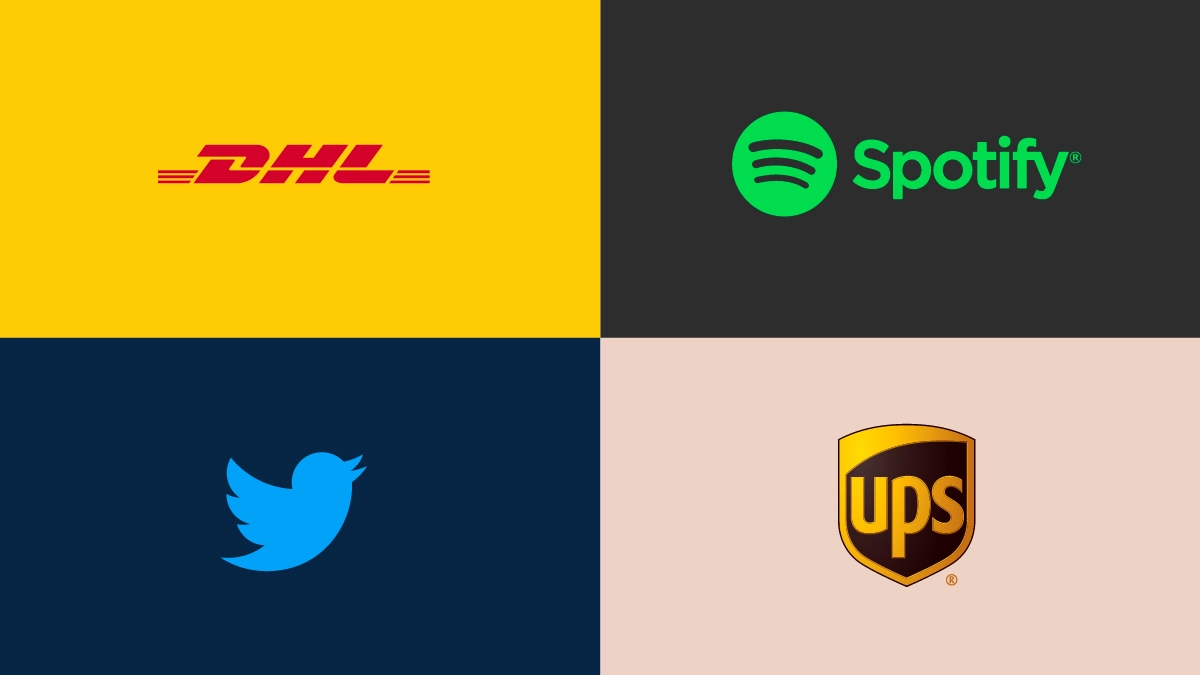
The accent colour should be distinctive enough so that the Brand can be identified just by its colour and differentiate itself from its competitors, like Coca-Cola's red, Cadbury's purple, Facebook's blue, or Tiffany's teal.
Ideally, the accent colour should have enough contrast to work well over both light backgrounds and dark backgrounds.
Task
Choose support colours
RoleBrand Designer
Estimated Workload0.5 – 1 hours
DescriptionSupport colours can be used for backgrounds, illustrations, buttons, and other secondary elements. Like DHL's yellow, Spotify's dark grey, Twitter's dark blue, or UPS' beige.
2.5. Visual Language
TaskDecide which backgrounds you're going to have
RoleBrand Designer
Estimated Workload0.5 – 1.5 hours
DescriptionWill your Brand Touchpoints have plain solid backgrounds? Or is it going to have a particular pattern? In which case, you can design a custom pattern, or you can rely on web resources, like SubtlePatterns.com or GraphicBurger.
Task
Define the Brand's Iconography set
RoleBrand Designer
Estimated Workload0.5 – 1.5 hours
DescriptionAgain with the Icons, you can choose to design your own custom set of icons for use on the Brand's website and other touchpoints, or you can purchase a license for already designed icons.
Icon sets can be purchase in:
Otherwise, if there's no budget for these assets, you can use a free set of icons, like FontAwesome.
Task
Define the Brand's illustration style
RoleBrand Designer
Estimated Workload0.5 – 1.5 hours
DescriptionYou can either design custom illustrations, or, alternatively, you can purchase stock illustrations and edit them as needed. Undraw has a collection of free illustrations which you can edit as needed and use for your projects; so it does also DrawKit, or you can purchase premium illustrations on UI8, Envato Elements
3. Brand Guidelines
TaskDevelop Brand Guidelines
RoleBrand Designer
Estimated Workload4 – 6 hours
DescriptionConsistency is essential for a memorable brand.
The Guidelines document makes your Brand accessible to all members of your organization as well as external partners and vendors. It also provides a convenient framework for updating the Guidelines as the company grows and the brand evolves.
The Brand Guidelines could be presented as a digital slideshow, or in a PDF document, you might also want to print the manual; However, having the Brand Guidelines in a web platform would have significant more accessibility.
Frontify and Lingo offer a paid web platform to manage you Brand's Guidelines and Assets. Alternatively, a custom web page could be developed for the document.
The Brand Guidelines document can include the key insights from the Brand Research and Strategy; However, mind that making your research openly available online would give an advantage to your competitor's research.
Case Studies

We can't discuss Brand Guidelines without mentioning this gem of iconic Swiss design 1975 Nasa Graphics Standards Manual.

Mailchimp's Content Style Guide focuses on Brand Strategy, especially on Copywriting themes and Tone.

Spotify's Branding Guidelines focus on the Visual Identity and Brand Touchpoints, straight to the point, concise yet informative.
4. Brand Touchpoints
This comprehends all the basic applications of the Brand Identity including social media profiles, parking page, email signature, business cards, letterhead, and presentation slides.
4.1. Social Media
TaskDesign profile picture
RoleBrand Designer
Estimated Workload0.5 – 1 hours
DescriptionSet the Ideogram on an square canvas for Screen (RGB). Considering that social media profile pictures are displayed at small sizes and amid a stream of content, it's advisable to use the distinctive, contrasting Accent Hue as background and set the Ideogram on negative (white). This should be suitable for Twitter, Facebook, Instagram, LinkedIn, and more.
Mind that on some cases the social media platform could crop the image into a circle. Beware that no content is left cropped out and that the Ideogram is centred well within the circle.
Deliverables- Dimensions: 800px × 800px
- Colour Mode: RGB
- File Format: PNG (24)
Task
Design profile cover
RoleBrand Designer
Estimated Workload1 – 2.5 hours
DescriptionUse the Brand's Visual Language or Photography (preferably without text) to create an appealing cover image.
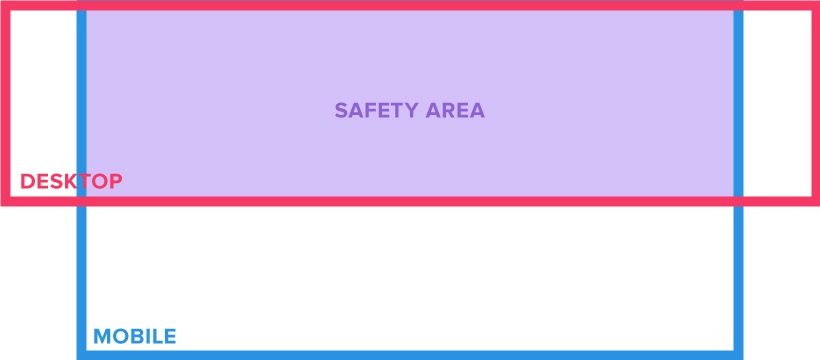
Mind that the cover image resolution will be cropped differently depending on your screen resolution. For instance, the recommended dimensions for Facebook covers are 820px × 360px; However, the image is displayed at 823px × 312px on Desktop and at approximately 515px × 260px on Mobile, depending on the screen size. So the Safety Area is actually 670px × 210px.
If you don't want your cover image to crop out any important information, then consider the safety area that's visualised both on Desktop and Mobile devices.
 Deliverables
- Dimensions: 820px × 360px
- Colour Mode: RGB
- File Format: PNG (24)
- Dimensions: 1500px × 500px
- Colour Mode: RGB
- File Format: PNG (24)
- Dimensions: 1536px × 768px
- Colour Mode: RGB
- File Format: PNG (24)
4.2. Parking Page
A "Parking Page" is a webpage which tells the users that your website is under construction and will be coming soon.
Parking Pages are especially useful for long-term web projects which might take a long time to go public.
A Parking Page shouldn't just say "Coming Soon", but it should also include ways to get in touch with the business, wether by including links to the social media profiles or also by adding an email address.
4.3. Email Signature
An email signature should be concise, unintrusive, mobile-friendly, and include only relevant information. Particularly, the design of the email signature should not distract the reader from the content of the actual email.
Here are some things to look our for:
- Avoid using images. Your logo is not necessary.
- Avoid displaying links to all your social media channels. However, LinkedIn is a professional network, you LinkedIn profile is like your professional coverletter, so in the case of a business email, that could be relevant.
- For the love of God, don't write your email address on your email signature. The recipient knows which email address is the sender.
4.4. Business Cards
Business Cards are a key element of networking and giving a professional impression to prospective clients, partners, service providers, and strategic alliances.
Different formats of Business Cards are acceptable; However, be sure to design a canvas that has a maximum of 90mm × 55mm so they fit comfortably in a standard wallet.
Furthermore, if you're printing Business Cards, you should probably set a bleed margin to ensure the Cards are cut properly.
Deliverables- Dimensions: 85mm × 55mm
- Colour Mode: CMYK
- File Format: PDF
4.5. Letterhead
The Letterhead template as well as the Presentation Slides template might vary depending on the software used for text editing and presentation making. Some tools like Microsoft Office or Apple's Pages and Keynote may offer a more customisable platform; However, for the purposes of this framework we will be focusing on Google Suite which offer less customisation but are free to use and have better collaborative features. However, consider that Google Docs, Slides, and Sheets allow only the use of Google Fonts, no custom fonts; Hence, this would be the appropriate place to use the Secondary Typeface Selection.
There are two types of Letterhead templates. First is a Letterhead template for the cover page of documents and possibly for Invoices; This should feature the Brand's logo prominently as well as contact information. Secondly, there should be an alternative design, more subtle for the pages within the document.
4.6. Presentation slides
Presentation slide formats can follow different formats. The minimum slides format variations are (1) the opening slide, (2) the content slides, and (3) the closing slide.
5. Product Development
Wether you're planning to develop a simple institutional website, an e-commerce or blog, a web app, or a mobile app, the User Experience Design process is essentially the same.
The Polyfen Group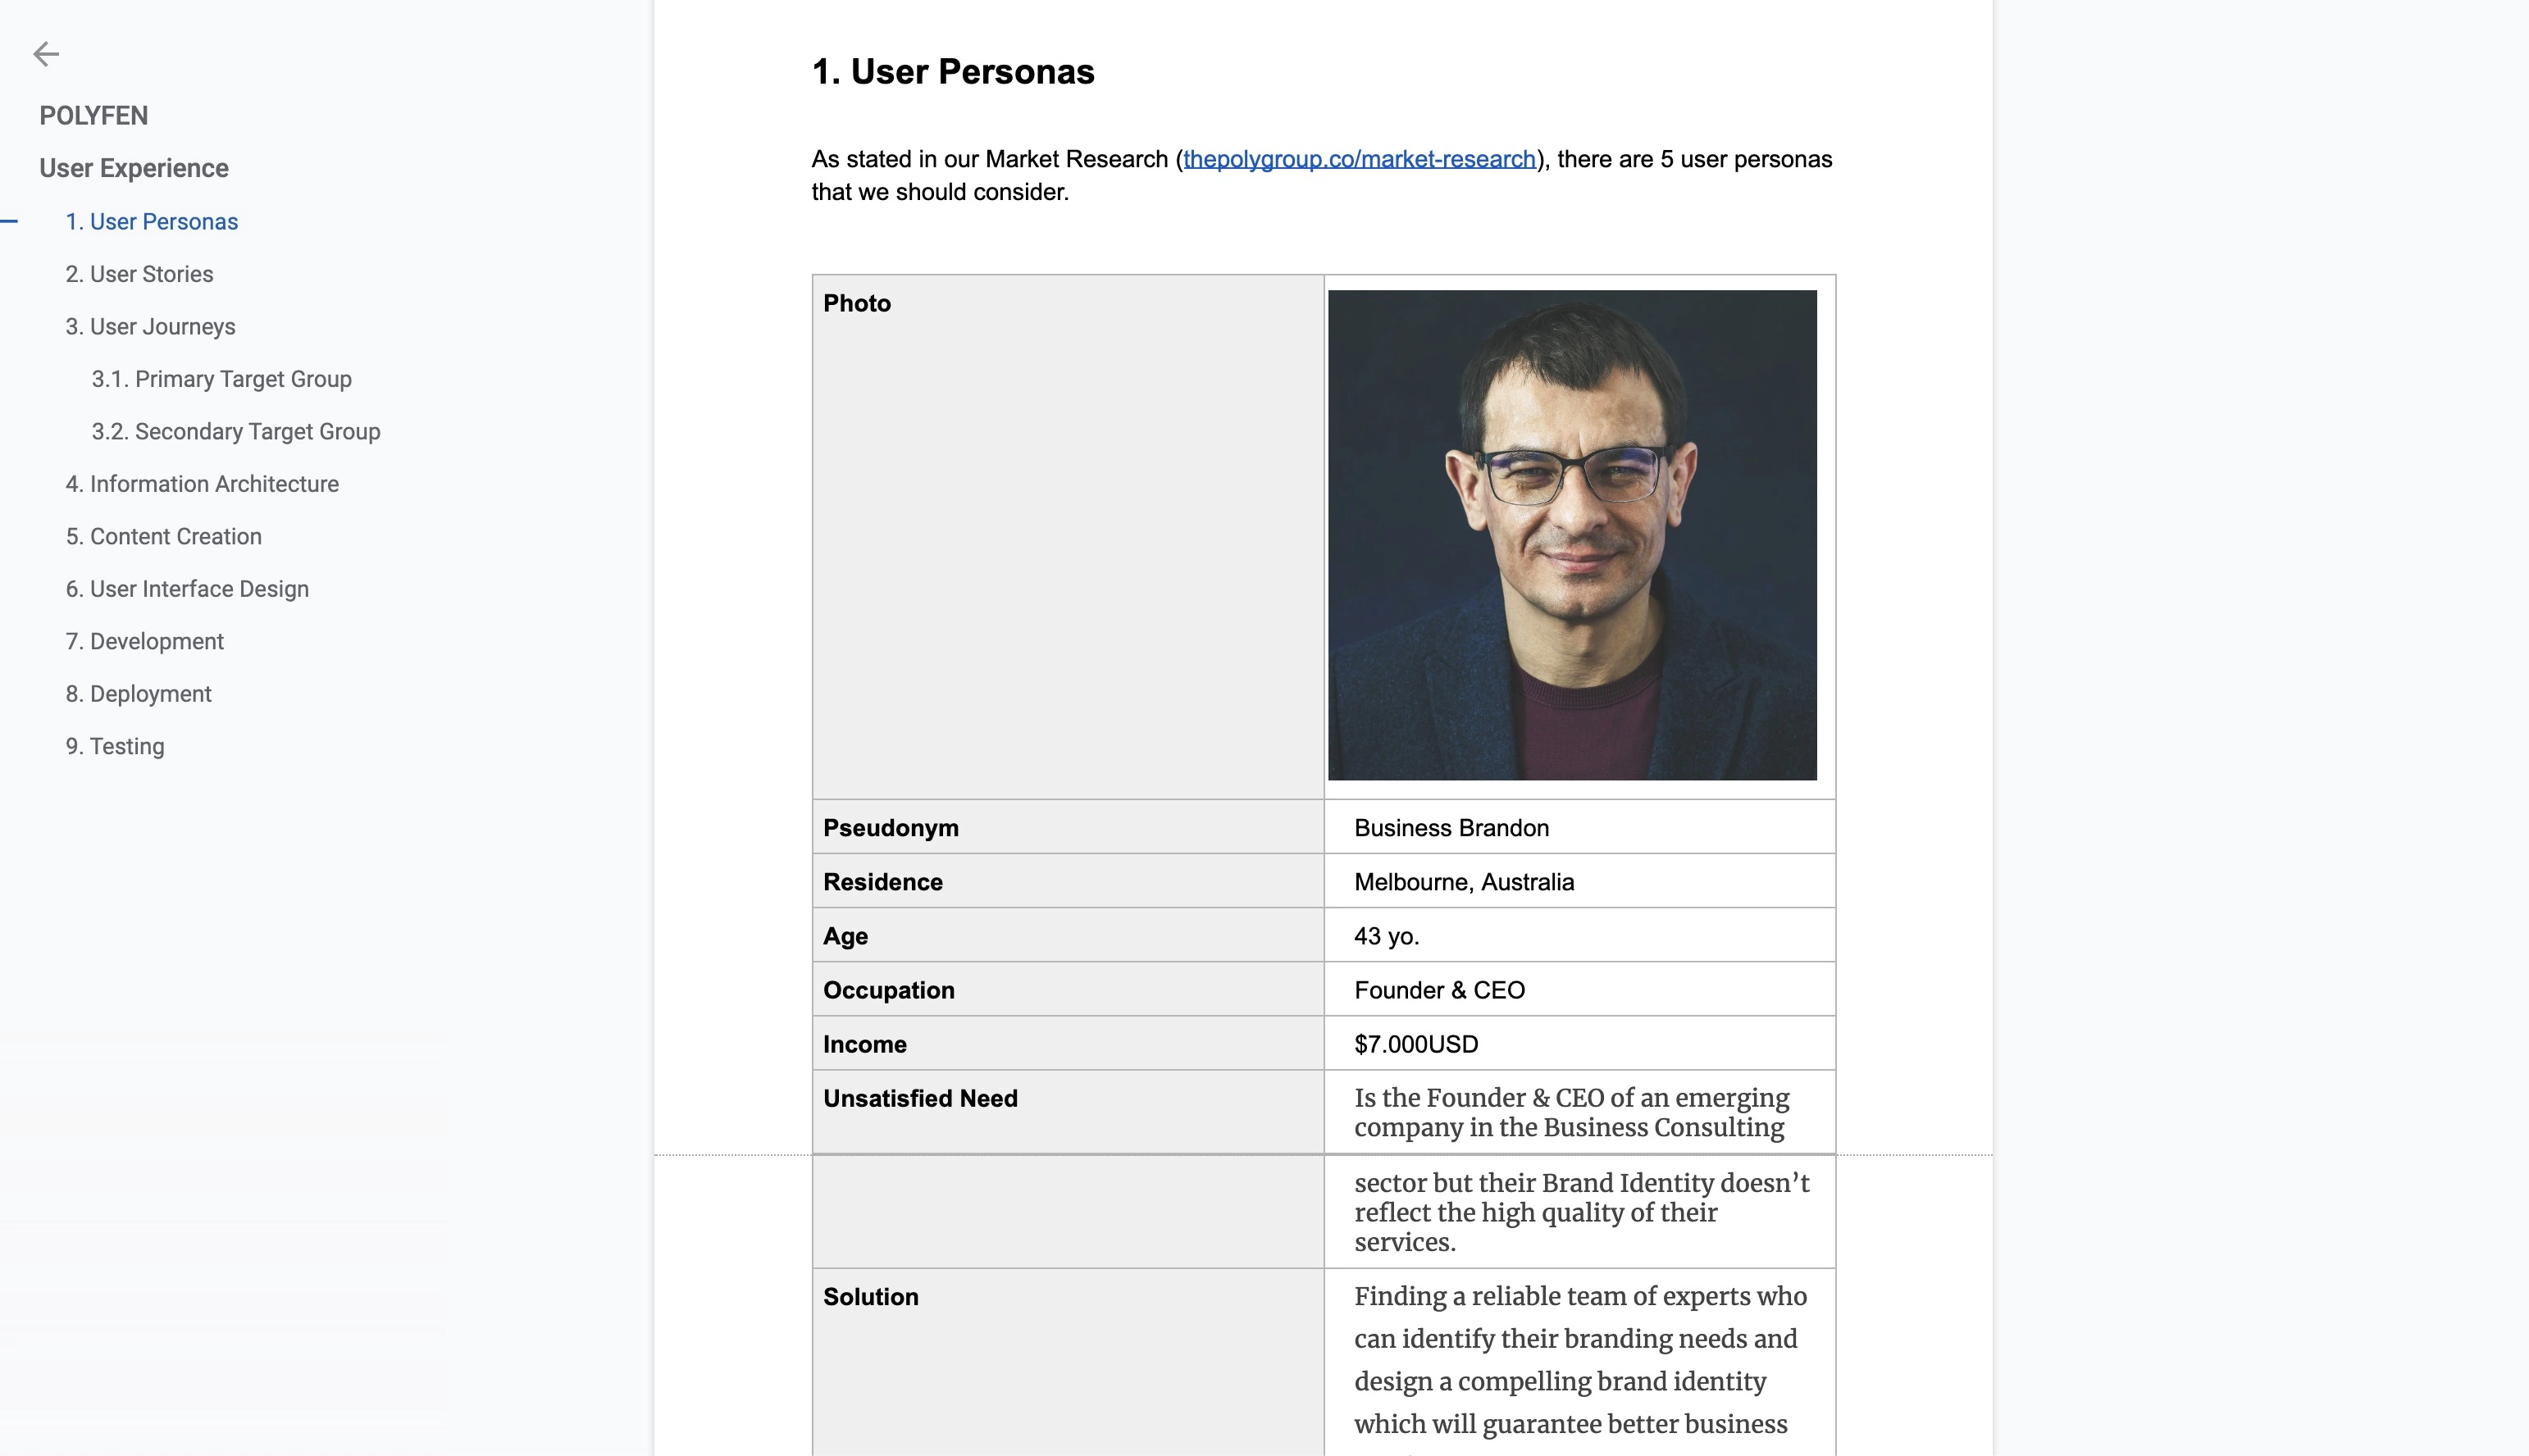
For reference, you can browse the UX documentation we did for Polyfen's website at polyfen.com/ux.
5.1. User Stories
TaskList the User Stories
RoleUX Designer
Estimated Workload0.5 – 2 hours
DescriptionThe first step is to consider the needs of you Brand's User Personas, as we've defined here in the section 3.1. Target public analysis of the Business Development process. Especially, consider their (1) Occupation, (2) Unsatisfied need, and (3) Solution offered by the business.
Then list those specification following the format "As a [Occupation], I need [Solution], so that I can [Unsatisfied need]."
Keep in mind that a single User Persona may have more than one User Story based on their Unsatisfied needs. Additionally, one same User Story might apply to more than one Persona.
The Polyfen GroupYou might find it useful to start with the User Story that is most closely related to your Business goals. For instance, for us at Polyfen would be to get our prospective clients to contact us through a contact form. And then, you can consider all the secondary information and features they would need.
| Personas | Business Brandon & Recruiter Mary | ||||
|---|---|---|---|---|---|
| User Stories |
|
5.2. User Journey
TaskList the User Journey steps
RoleUX Designer
Estimated Workload0.5 – 2 hours
DescriptionTaking the User Stories into consideration, list the necessary steps that a User would have to perform in order to complete his / her final goal.
The User Journey is pretty straight-forward for a simple institutional website, for instance: (1) Awareness, the first contact with your Brand and considering entering the website. Think of the context. Where is the user most likely to find your brand? is it on social media, a Google search, other?, (2) Consideration, entering and browsing the website. Think of which information would take to convince the user to fulfil his / her goal. and (3) Conversion, completing the desired goal, i.e., filling out the website's contact form.
However, for a more elaborate application we must consider the steps necessary for the User to Sign-up and use the app's features. In the case of developing an app, we can differentiate two types of User Journeys. (1) Critical User Journeys, including downloading the app, signing-up, on-boarding, etc; and (2) Toothbrush User Journeys, the activities and features that a user would use recurrently.
The Polyfen Group1. Awareness
The user finds our Brand on social media. For this we will require to generate social media content and promote it to get not only organic reach, but also paid reach through Instagram and LinkedIn campaigns. The ads for our Primary target group should attract prospective consumers by enticing our services and showing how they can benefit from our services with the aim of leading them to enter our website.
2. Consideration
Enticed by our social media content, the user enters our website with the aim of learning more about our service offer. For this our website must have an informative About section, Case Studies of our work, a breakdown of our Services offer, a Contact Form, and links to our Social Media channels. Additionally, considering the traffic belonging to the Instagram and LinkedIn marketing campaigns, the website should include a bespoke Landing Page offering a valuable solution to the personas, such as a Free Brand Audit by completing a contact form.
3. Conversion
The Primary personas should be enticed by our services and fill in our contact form to request a quote for a Branding project.
5.3. User Flow
TaskChart the User Flow
RoleUX Designer
Estimated Workload1 – 4 hours
DescriptionHere, once again, there is a critical distinction between a simple institutional website and a more robust digital product with interactive features. A one-page institutional website might not even need a User Flow diagram. On the other hand, if you're developing an e-commerce website or any other kind of web, mobile, or desktop app with interactive features, a User Flow chart would be beneficial.
A User Flow charts all the steps that a User might take to complete the goals of his User Stories and Journey. However, the difference between listing the steps of the User Journey and diagramming a User Flow is that the Flow considers every single possible interaction between the User and the Interface.
For instance, if a User is registered or not on the app, it might take the Flow might lead the User through a different path.
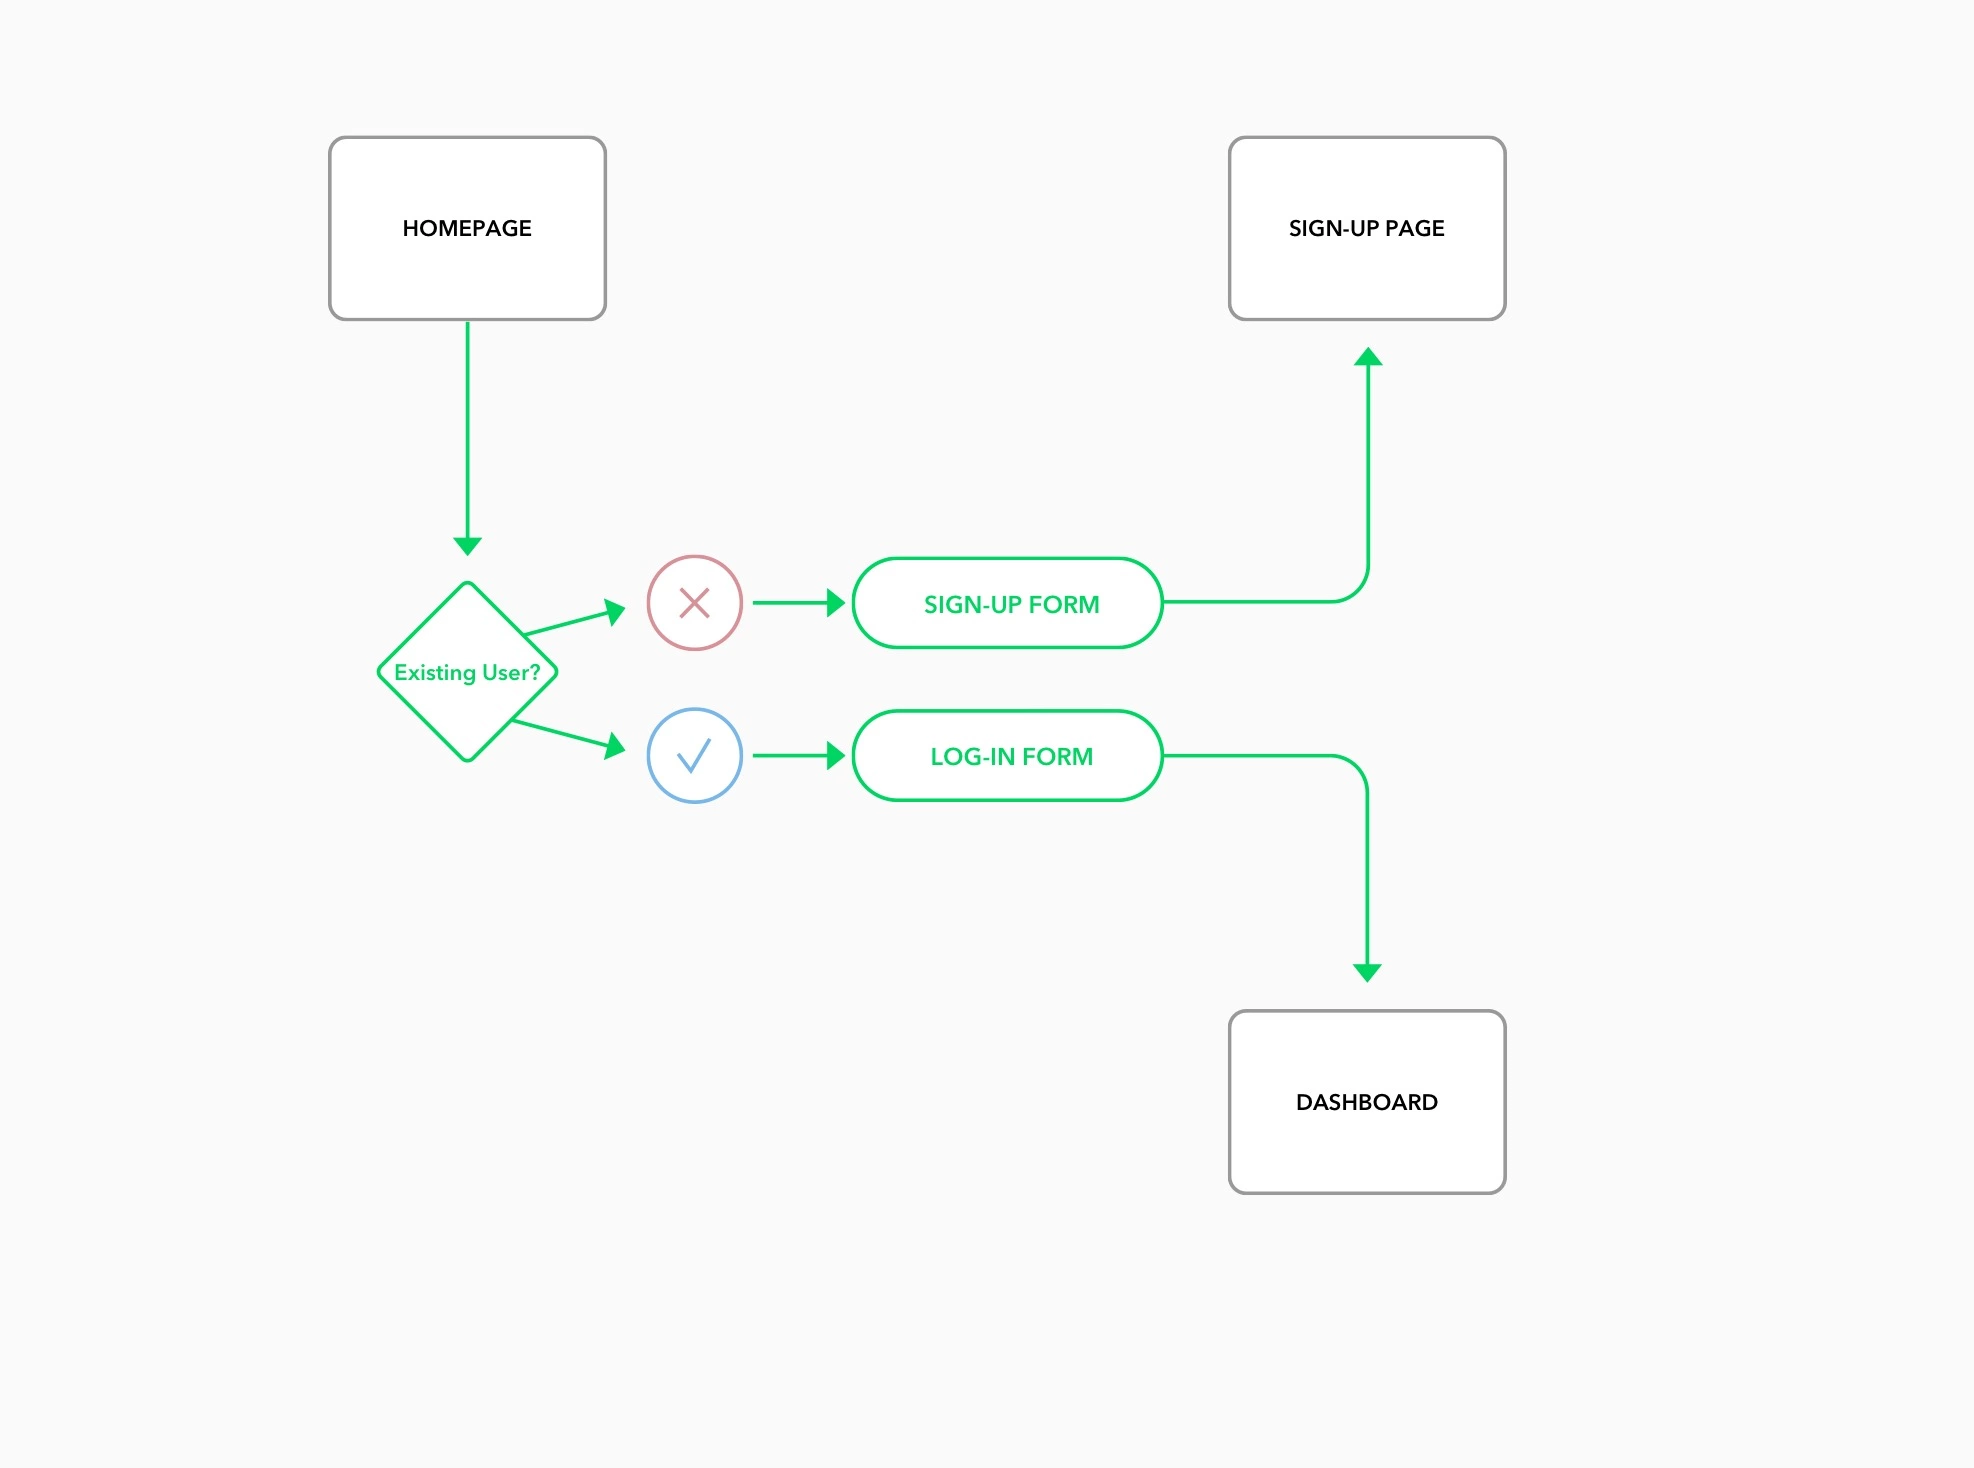
You could easily design your User Flows from scratch, or, if you wanna save some time, you can download User Flow template files such as this paid one ui8.net or some other free alternative.
5.4. Information Architecture
TaskDiagram the Information Architecture
RoleUX Designer
Estimated Workload1 – 4 hours
DescriptionBased on the User Stories, Journey, and Flow we can infer which information the web users would require, in which order of priority, and how would that information be organised.
Think of it as a detailed sitemap. Which pages should the website or app have? Which sections should each page have? Which type of content would each section have, a Heading, a Paragraph, an Image, a Button?
Again, you can design your Information Architecture diagram from easily scratch, or you can rely on diagram components template files, there are some free options which you can find online, there are also paid alternatives such as this one published on ui8.net.
The Polyfen Group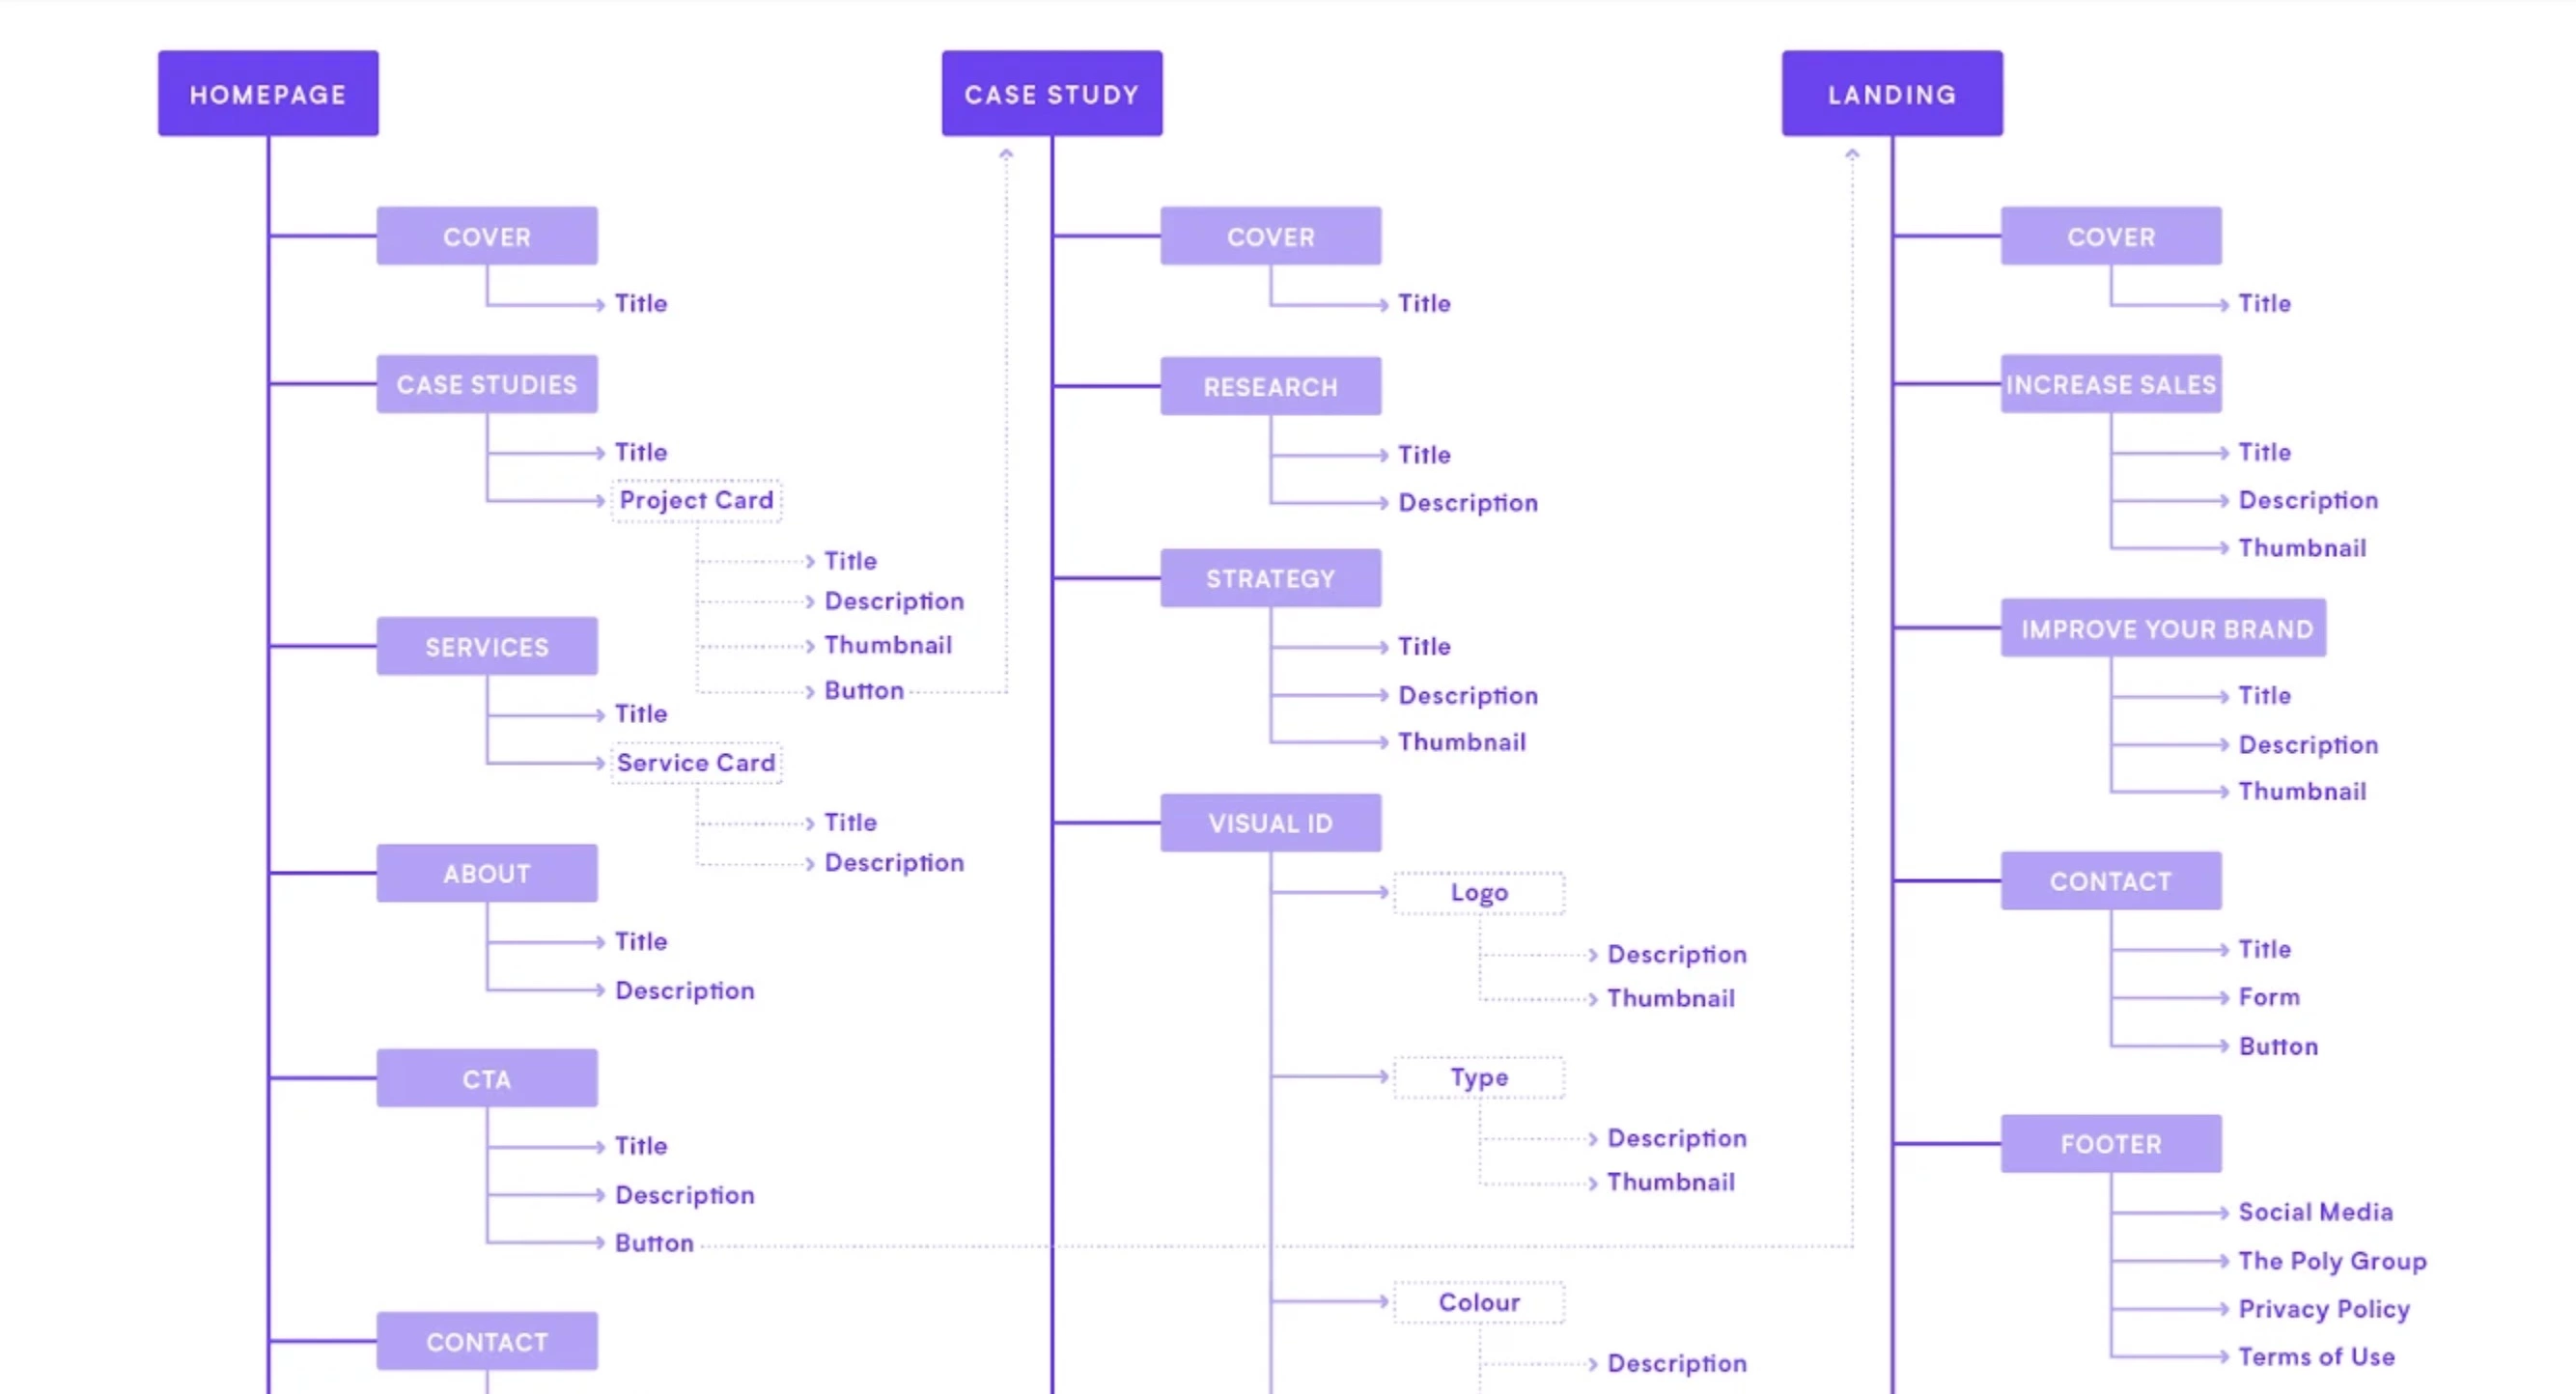
5.5. Content Creation
TaskCopywrite the Content
RoleUX Designer
Estimated Workload2 – 8 hours
DescriptionSome Designers might move in to the Wireframing too early and use fake text ("Lorem ipsum") to design the Wireframe. I would highly advice against that. Waiting until you have the real content can make a huge difference in your Wireframes design, since you would have an accurate amount of text and the design can convey real meaning.
So, once we have the Information Architecture in place, we can understand which headings, paragraphs, and images the digital product will be requiring. Now it's time to copywrite that text and select / design the required images.
This is a good time to refer to the Brand's Voice and Tone.
Pro tip, be sure to keep your texts as concise and straight-forward as possible. Users tend to not read large chunks of text, but rather they just skim it as they scroll down. With the exception of a text-oriented platform such as Wikipedia or this very site.
Additionally, you would want the text to be compelling and enticing to keep the User browsing your site. Offer the User something of value considering the Persona's Unsatisfied Needs and proposed Solutions. As soon as the User lands on your site, they should immediately understand what your site can offer them just by reading the first heading.
Grab the User's attention by speaking directly to him / her.
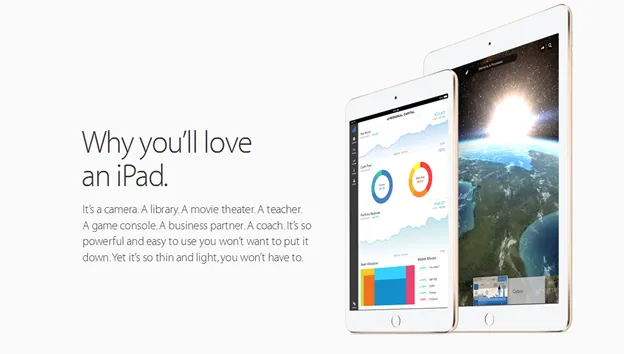
After writing the first iteration of the copy, I suggest you read it aloud, make sure to edit out any redundant or unnecessary copy.
As the last step of the text copywriting, you should revise your copy for spelling and grammatical mistakes. Grammarly is a specially good tool for this.
Lastly, this is a good moment to define, besides the text, which visual images your content will be including. You can find references of free stock images at Unsplash.com. You can also define the requirements for infographics, illustrations, animations, or custom photography at this point for the visual designers to use as a starting brief.
The Polyfen Group
You can browse the Content Creation document for Polyfen's homepage here: DOC_PLFN_Copy_Homepage
5.6. Wireframing
TaskHand-draw Wireframes
RoleUX Designer
Estimated Workload0.5 – 2.5 hours
DescriptionThe more abstract and simple the Wireframes are the more "lo-fi" or "low-fidelity" it's said they are; Whereas the more detailed and closer to the final visual design of the UI, the more "hi-fi" or "high-fidelity" it's said they are.
For starters, grab whichever pen and paper you have at hand and get down and dirty testing different lo-fi layouts for your User Interface. Iterate as many variations as possible, without spending too much time on detailing the visuals. Then, select the most suitable sketches.
Considering that your digital product might be used on screens of a wide variety of resolutions, you might consider how your Wireframe would look like on (1) a mobile screen resolution and (2) on a desktop screen.
Task
Set-up a Grid
RoleUX Designer
Estimated Workload0.5 – 1.5 hours
DescriptionNow we start transitioning from a lower-fidelity hand-drawn Wireframe, to a higher-fidelity digital Wireframe designed on your software of choice, like Figma.
This is a good time to point out that the layout of the User Interface should be tied to a typographic grid to make the design consistent and optically harmonious.
In regards to the User Interface layout, me must consider that the majority of web browsing today is statistically substantially larger on mobile devices over desktop devices. Hence, we must ensure that the website is responsive and optimised for different screen sizes, especially for mobile resolutions. This philosophy is known as "mobile-first". Additionally, on the later stage of programming, the website will be likely programmed using a responsive framework such as Bootstrap where the design grid prioritises mobile screens and then moves on gradually to larger screens.
On the other hand, considering the context of use, some websites or apps might prioritise desktop resolutions, but those cases are rare, and mostly seen on content-heavy products such as Wikipedia or this very site. It's important to understand the context in which your Users will be using your product. On a future stage, once the product is deployed, you can take a look at your analytic metrics and see which are the most common devices that your users use.
Using Bootstrap's grid as an industry standard accounts for a 12 column grid with 30px gutters.
The different responsive breakdowns based on Bootstrap's framework include: (XS) 375px wide (the width of an iPhone 6) and wider, (S) 577px (larger phones and small tablets on portrait orientation) and wider, (M) 769px (small tablets on landscape orientation) and wider, (L) 992px (large tablets and small notebooks) and wider, (XL) 1200px (medium sized notebooks) and wider, and —while it's not on the default breakpoints— we can also include a larger resolution which is common, (XXL) 1680px (15.4" notebooks and desktop monitors) and wider.
Lastly, we must consider how much of the UI will be displayed "Above the Fold", that means on the top of the page, what the user sees before having to scroll down. This is important to define what is the most important information that the user should see first. ATF dimensions can vary widely from device to device; However, here are some values that can be taken as reference: (XS) 667px high (the height of an iPhone 6) and higher, (S) 1024px (the height of an iPad mini on portrait orientation) and higher, (M) 1194px (the height of an 11" iPad Pro on portrait orientation) and higher, (L) 834px (the height of an 11" iPad Pro on landscape orientation) and higher, (XL) 768px (the height of an 11" computer) and higher, (XXL) 1050px (the height of a 15.4" computer) and higher.
Template Files
The grid we tend to use is based on Bootstrap's columns but with margins both sides to centre the content in a container with the following proportions: (XS) 10px margin (355px wide), (S) 20px margin (537px wide), (M) 40px margin (689px wide), (L) 60px margin (872px wide), (XL) 80px margin (1040px wide), (XXL) minimum 100px margin (fixed 1480px wide).
Download › UI_PLAT_Bootstrap-Grid.fig
Task
Set-up a Digital Wireframe
RoleUX Designer
Estimated Workload1 – 4 hours
DescriptionThis doesn't mean that you have to take the time to design wireframes for each one of the six individual resolution breakpoints. You can, for instance, Wireframe the smallest resolution (XS) 375px wide and the highest resolution (XXL) 1680px; you can later take care of the remaining resolutions on the Design Comps stage.
I suggest you minimise your workload by using some kind of Wireframe components templates. There are some free templates online, or you can find paid Wireframe Kit templates at websites such as ui8.net.
Alternatively, there are also digital platforms which specialise on Wireframing, such as Balsamiq.com.
5.7. Design Comps
TaskDesign a Styleguide
RoleUX Designer
Estimated Workload1 – 4 hours
DescriptionNow that we have our Wireframe's layouts in place, we must start considering applying our Visual Identity to the Wireframes.
Design a Styleguide including the typographic styles for your headings and body text, think about how your buttons are going to look by default and on hover, what about secondary buttons, input fields, etc.
The Polyfen Group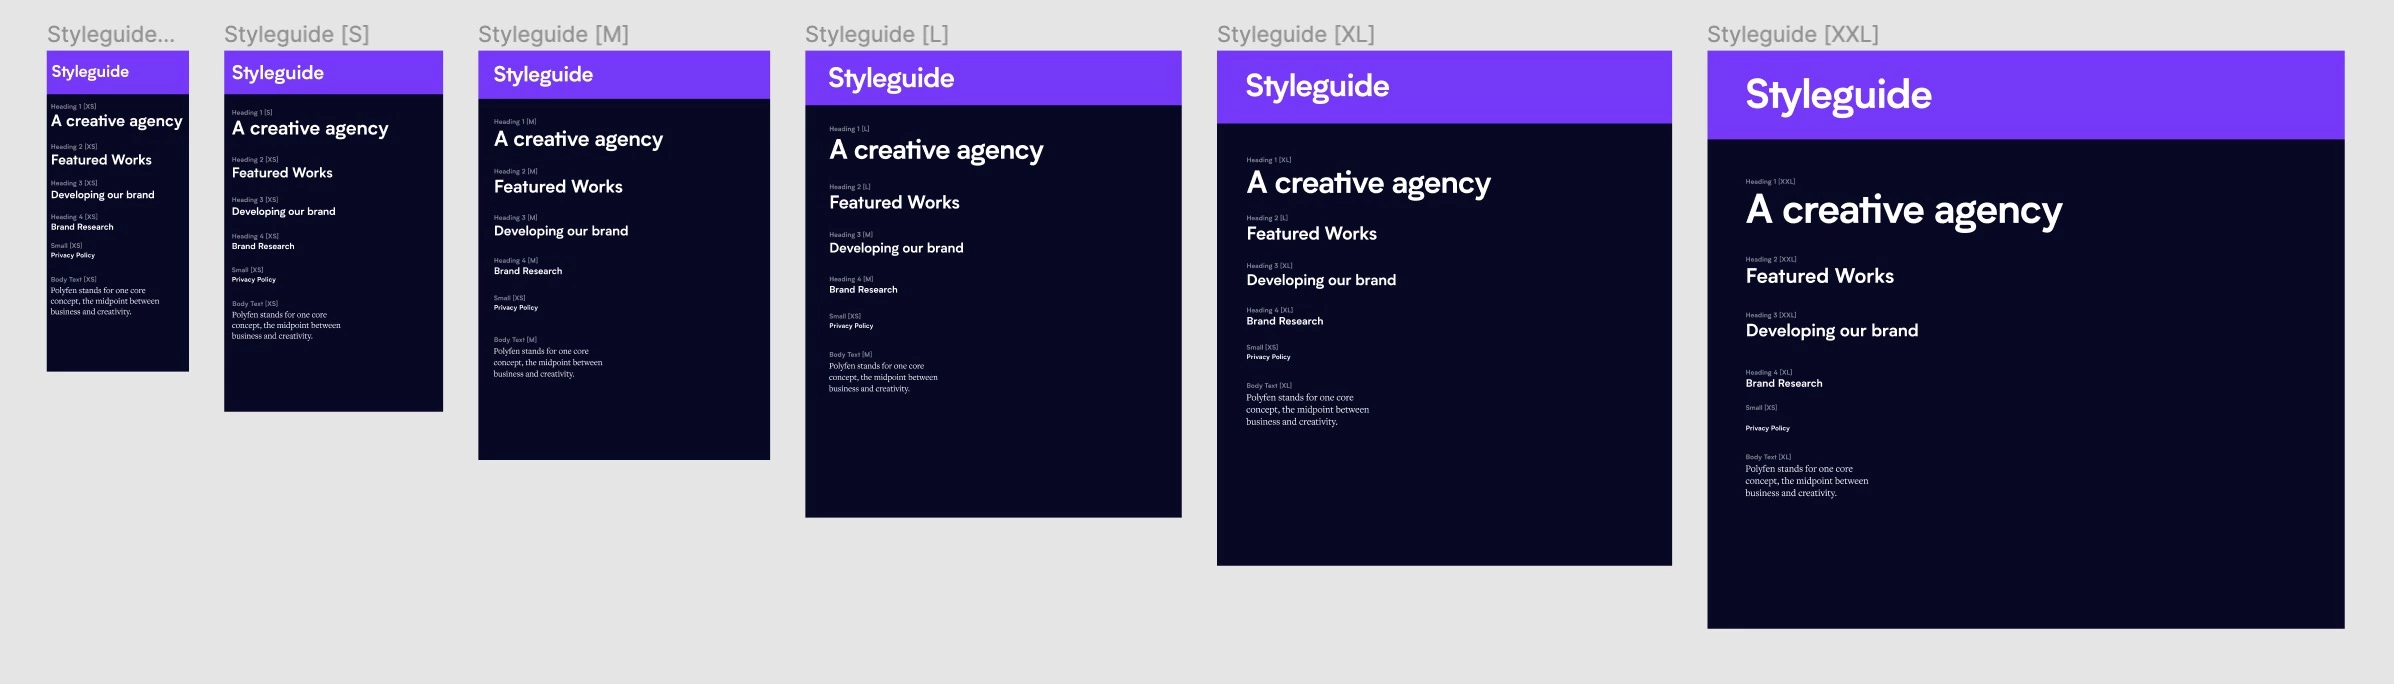
Task
Apply the Styleguide to your Wireframes
RoleUX Designer
Estimated Workload1 – 6 hours
DescriptionWe can now finalise the visual design of our UI by applying the styles define, adding custom photography and illustrations, and finally, fine-tuning the overall design.
If you have only designed a couple of responsive of breakpoints for the Wireframes, like (XS) 375px wide and the highest resolution (XXL) 1680px; Then, now is the time to define how the UI design will look on the remaining breakpoints (S) 577px, (M) 769px, (L) 992px, and (XL) 1200px.
The Polyfen Group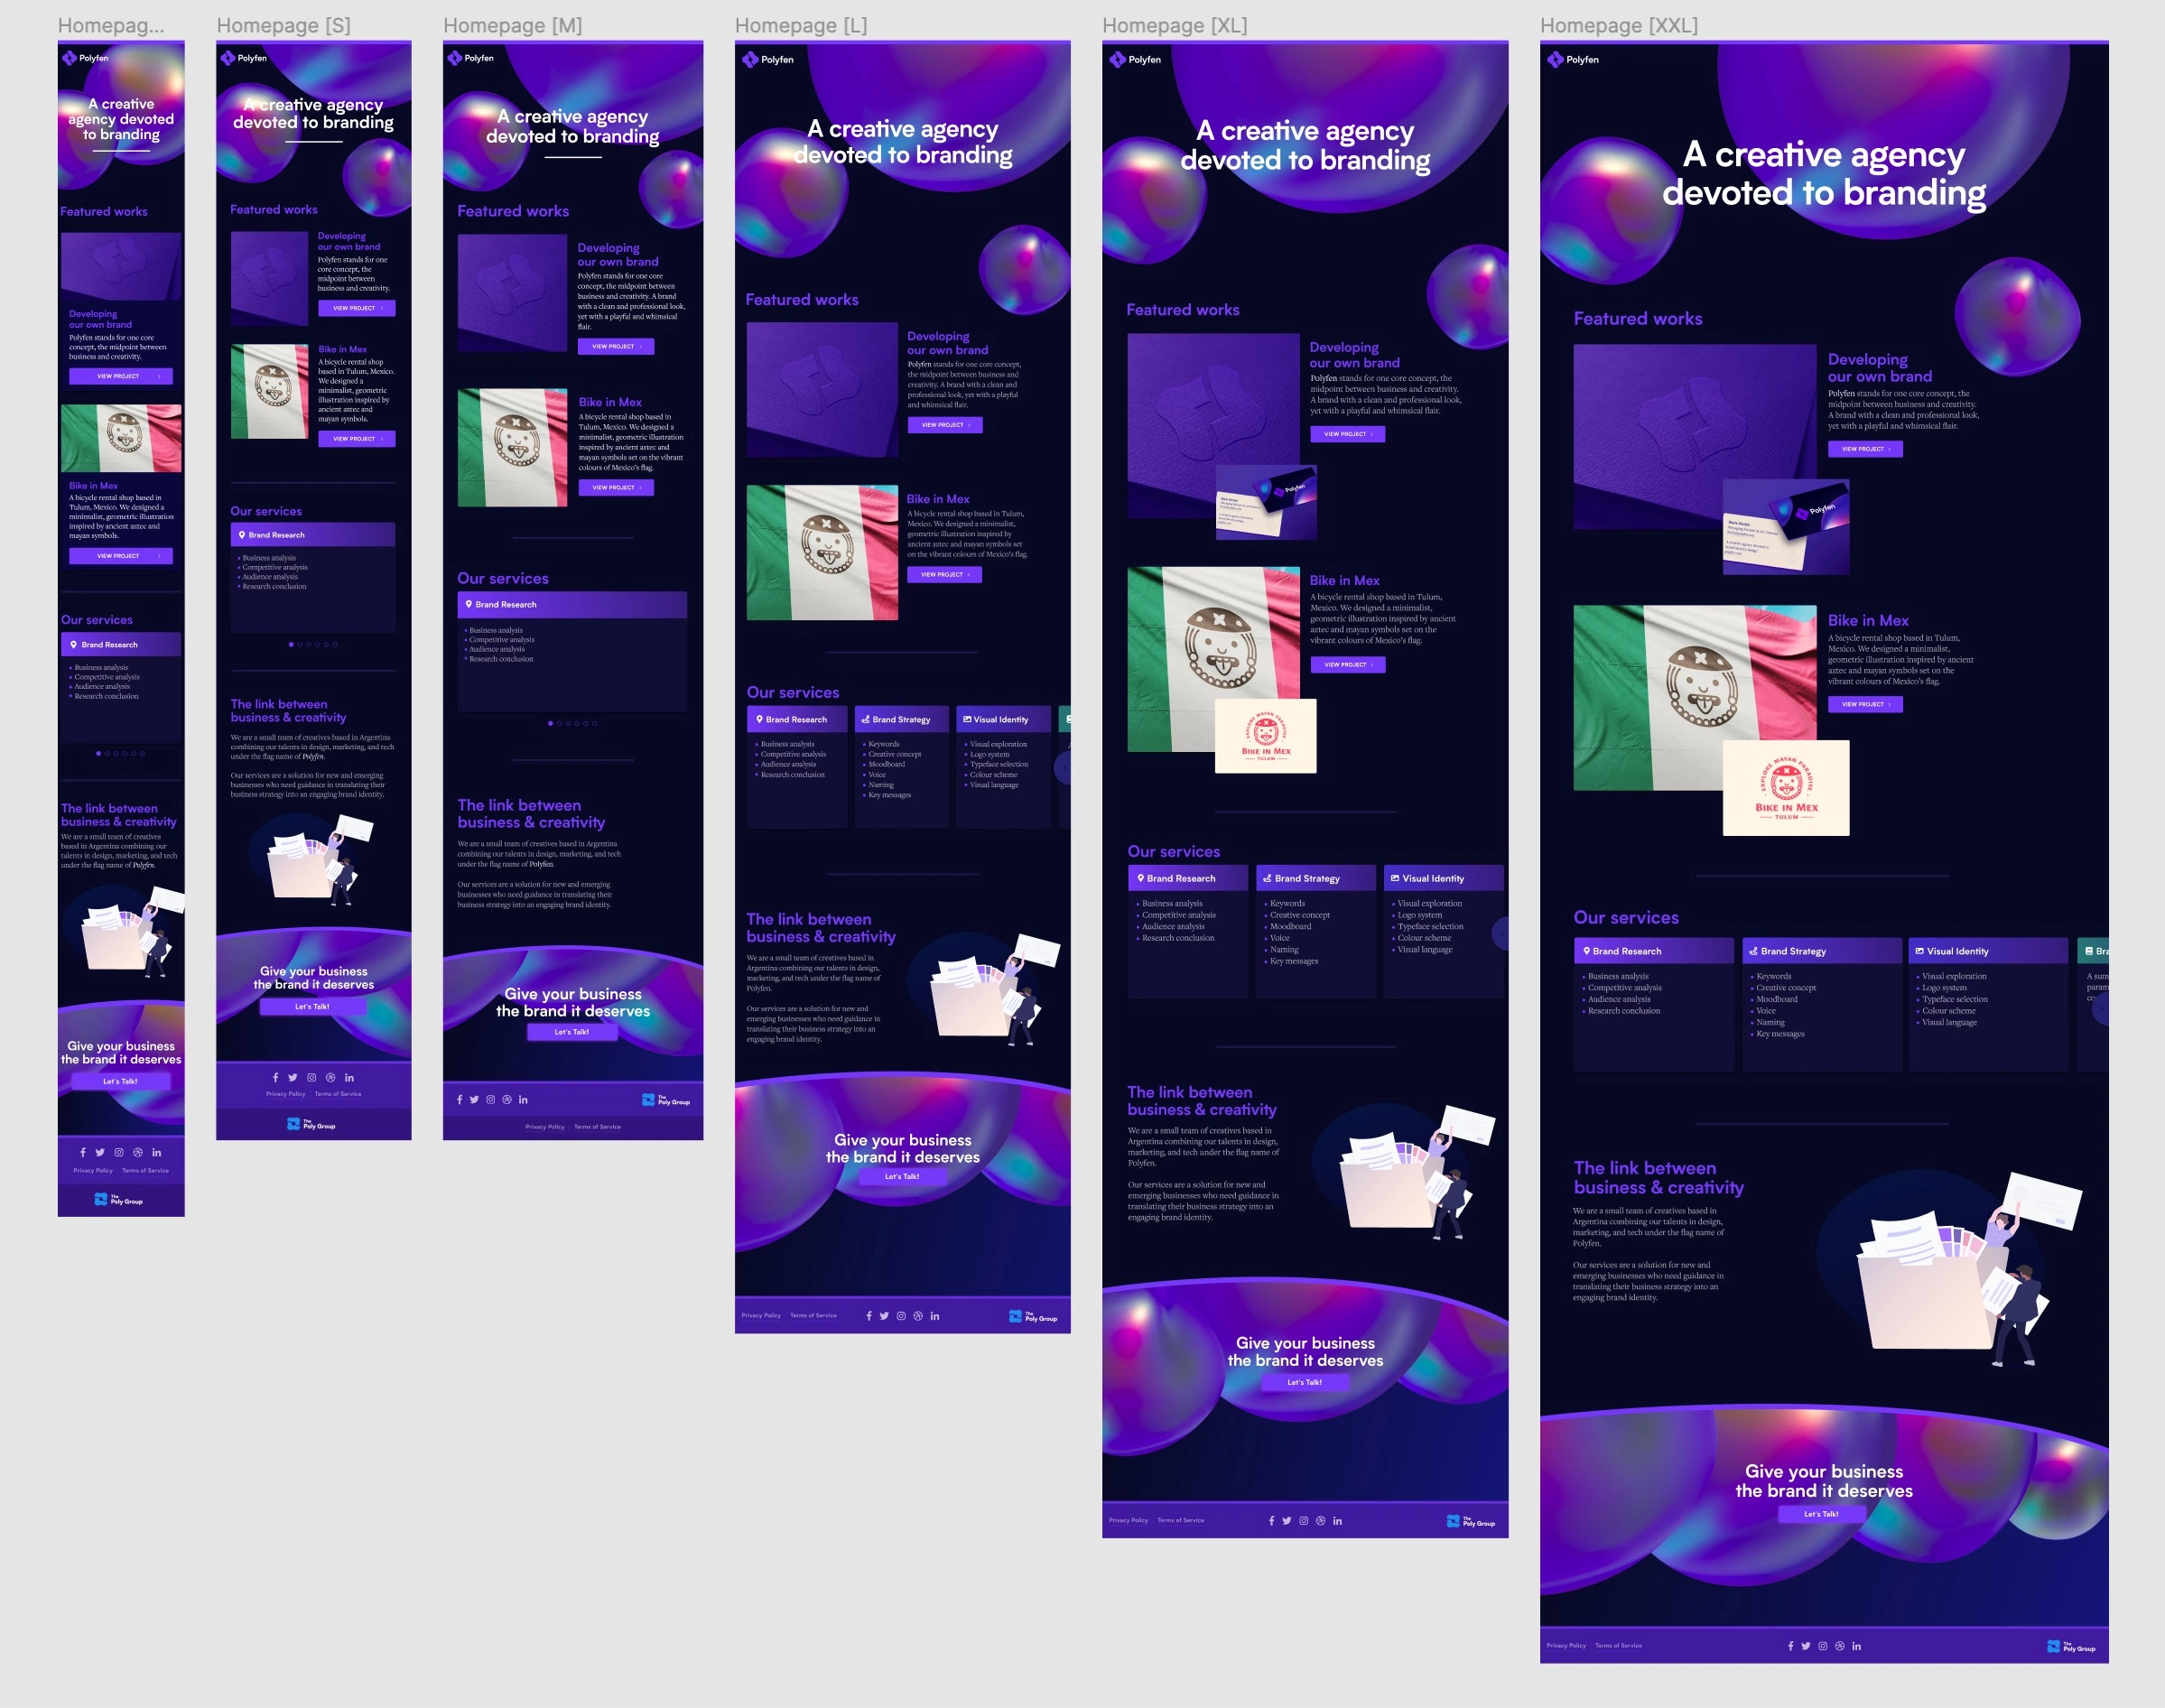
5.8. Prototyping
TaskPrototype the User Interface
RoleUX Designer
Estimated Workload1 – 6 hours
DescriptionPrototyping allows you add some basic interactivity to your static UI Designs and put them to a test and see if there are any pain-points that should be solved. Additionally, it helps the programmers understand how you want your UI to interact with the user.
Some design tools, like Figma, have built-in Prototyping features. Alternatively, you can use a custom Prototyping tool such as InVision or Marvel.
5.9. Usability Testing
TaskChoose a Usability Testing Method
RoleUX Designer
Estimated Workload0.5 – 1.5 hours
DescriptionFirst of all, Testing should be a continuous practice built into the Branding process not only for the Digital Product Development, but also to Test the Brand Perception and improve the perceived value of your Brand Identity. However, at this point we'll be focusing on Testing the Usability of your Digital Product. Also, some UX Designers encourage the Design community to also put the Wireframes to a Test, before moving on to the Design Comps.
There are many different ways to put your designs to a test and validate your User Stories, or if necessary, define which changes need to be made to the design.
An important statistic to keep in mind at this point is that, according to usability experts Jakob Nielsen and Tom Landauer:
By testing with just five users, you can uncover 85% of the usability issues with a product.
Keep in mind however, that the sample of Test Subjects that you use should be directly related to the User Personas you've defined for your product.
Now, in regards to the Testing Method, there are multiple options that can be chosen depending on the scope, timeframe, and budget of the Digital Product Development project. Additionally, some Testing Methods can be performed in-person or remotely, and they can also be either moderated, with more intervention by the Researchers, or unmoderated, with less intervention by the Researches. Namely:
1. Card Sorting
Card Sorting is especially useful for evaluating the Information Architecture of the Product. The Test consist on writing the different topics, features, or sections of your Digital Product and allowing the Users to sort them in different groups.
2. Goal-Driven Session
This technique involves giving the Users a Goal and getting them to use the Product trying to fulfil it. The Goal given to each group of Users can be directly related to the User Stories and User Journey defined for each User Persona. At this time, you would document any problems that the Users might encounter during the Session. Does it take them too long to find the button that they need? Is the Copywriting misleading them somehow? Are there elements of the UI that they find intrusive?
Additionally, a kind of Goal-Driven testing technique is what's known as "The 5 Seconds Test"; Where you show the Users your Digital Product for just 5 seconds and then ask them what do they remember from it. This is particularly useful for Testing the Usability of the Above the Fold section. Do your users immediately understand what your website is about as soon as they land on it? Are they enticed to learn more about your offer or are they inclined to reject your offer?
Note that you don't have to choose between one Testing Method or the other; You can use both, since each Method has its benefits for different purposes.
There are also other Testing Methods that are useful to gauge the Users' perception of your Digital Product. However, there is a distinction between (1) Usability Testing, which ensures that your Users fulfil their goals successfully and identifies potential functionality issues, and (2) Perception Testing, which essentially measure how likely a User is to want to use or buy your offer. Note that some Testing Methods, especially A / B Testing and Heatmaps fall somewhere in between Usability and Perception Testing. Note also that, while Usability Testing can be done with just 5 users, Perception Testing is an aggregate of all your Users.
However, for reference, Perception Testing Methods might include:
3. A/B Testing
Exposing different Users to different versions of your Product (for instance, one with green buttons and another one with red buttons), and measuring which one has the most success.
4. Heatmaps
Heatmaps present Users' behaviour on a website by highlighting the areas where they pay the most attention and pointing out the areas Users ignore more.
5. Analytics
Analytics track your Product's traffic and are a great way to validate your demographic stats (making sure your User Personas represent your actual Users) and evaluate your behaviour stats (which pages on your site are the most visited, how long do users stay on your site before leaving, where are your users coming from, which device they're using, ...).
Analysing your Analytic metrics should be a continuous practice.
6. Interviews, Surveys, and Focus Groups
Interviews and Surveys should be included in the Usability Testing Script during the Testing sessions. However, in regards to the Perception Testing, the Interviews, Surveys, and Focus Groups can inquire more broadly in regards to how your Target Public feels about your Brand Identity or your Digital Product.
Task
Write a Script for your Tests
RoleUX Designer
Estimated Workload1 – 4 hours
DescriptionWhether you decide to use Card Sorting tests, Goal-Driven tests, or both, you should prior define a Script laying out what information you will communicate to the Test Subjects before they start the test, during the test, and after the test.
Task
Perform the Usability Testing & Document your Results
RoleUX Designer
Estimated Workload2 – 8 hours
DescriptionAs stated above, the Testing can be performed remotely or in-person, moderated or unmoderated.
A useful tool for performing remote Tests is UserTesting.com.
Regardless of your chosen Testing Method, you should be as thorough as possible in documenting your results. If possible, record the screen of your Test Subjects, ask them to speak out load their comments, questions, or concerns while they're performing the tests.
Task
Review your Results & Report your Insights
RoleUX Designer
Estimated Workload0.5 – 1.5 hours
DescriptionWhich pain-points did your users found? What can be improved to help them fulfil their goals?
Task
Fine-Tune your UI Designs based on your Reported Insights
RoleUX Designer
Estimated Workload2 – 6 hours
DescriptionBased on your Insights, fine-tune your UI Designs as needed.
5.10. Programming
TaskHand-off your Designs to the Programmers
RoleUX Designer
Estimated Workload0.5 – 2 hours
DescriptionAt this time, it's necessary to gather all your files, assets, and documentation and send it to the programmers. Ensure that they have a clear idea of how your digital product should work and how it should interact with its Users.
Some design tools, like Figma, provide the programmers with the CSS code of your design elements. Otherwise, you might opt for using another tool for the Hand-Off process such as Zeplin or Avocode.
Task
Program your Digital Product
RoleProgrammer
Estimated Workload12 – 60 hours
DescriptionPoly Atlas is a platform aimed particularly to designers and creatives, so odds are your website or Digital Product will be programmed by a professional programmer. However, basic Programming skills are essential for a UX Designer to collaborate better with the programmers, or even to give it a go and program the Digital Product yourself. Perhaps you might not be able to implement any advanced interactive features, but learning HTML (defines what content the website will have), CSS (defines how the UI elements will look), Bootstrap (a responsive framework which adapts your content for different screen sizes), Github (a version control system), cPanel (allows you to control your web hosting server), and FTP (allows you to upload your code to the internet) can empower you as a designer and give you the tools to code a simple institutional website by yourself or even develop a more complex project from end-to-end.
If you're new to the world of Programming, the basic idea that you'd have to first understand is that there are essentially two types of Programming. Front-End Programming is basically translating the visual design of your UI into code for a web browser or device to display it visually. On the other hand, Back-End Programming involves the development of interactive features such as a database or other CMS (Content Management System) features. While there are Programmers who specialise on Front-End or Back-End, those Programmers who are fluent in both disciplines are known as "Full-Stack Programmers".
If you're a UX Designer you will likely find Front-End Programming much more easy and useful, while you can leave Back-End to the pros.
Here are some sources where you can learn the basics of Front-End Programming:
Bibliography
A collection of educational resources and practical resources related to the Branding process and all its individual areas.
Books
- Start with Why by Simon Sinek
- The Infinite Game by Simon Sinek
- Drive by Daniel H. Pink
- Free: The Future of a Radical Price by Chris Anderson
- The Lean Startup by Eric Ries
- The Effective Executive by Peter F. Drucker
- Good to Great by James C. Collins
- Giants of Enterprise by Richard S. Tedlow
- True North: Discover Your Authentic Leadership by Bill George
- Ignore Everybody by Hugh MacLeod
- Leadership and Self-Deception by The Arbinger Institute
- The Manager's Path by Camille Fournier
- Thinking, Fast and Slow by Daniel Kahneman
- The Power of Habit by Charles Duhigg
- The Wisdom of Failure by Laurence G. Weinzimmer & Jim McConoughey
- Company of One by Paul Jarvis
- The Making of a Manager by Julie Zhuo
- The Hard Thing About Hard Things by Ben Horowitz
- Zero to One by Peter Thiel
- Creativity Inc. by Ed Catmull & Amy Wallace
- The Business of Design by Keith Granet
- The Design of Everyday Things by Donald A. Norman
- Designing Brand Identity by Alina Wheeler
- The Brand Gap by Marty Neumeier
- Principles of Two-Dimensional Design by Wucius Wong
- Principles of Color Design by Wucius Wong
- Principles of Form and Design by Wucius Wong
- Principles of Three-Dimensional Design by Wucius Wong
- Thinking with Type by Ellen Lupton
- Just My Type by Simon Garfield
- The Geometry of Type by Stephen Coles & Erik Spiekermann
- Typography for Lawyers by Matthew Butterick
- Making and Breaking the Grid by Timothy Samara
- Type. A Visual History of Typefaces & Graphic Styles by Cees W. de Jong, Alston W. Purvis, Jan Tholenaar
- Symbol by Steven Bateman & Angus Hyland
- Los Logos No. 7 by Robert Klanten, George Popov, Anna Sinofzik, Nina C. Müller
- Logo Design Love by David Airey
- UX Team of One by Liao Boi
- Sprint by Jake Knapp
- Scrum by Jeff Sutherland
- Lean UX by Jeff Gothelf
- Lean Analytics by Alistair Croll
Blogs & Sources
- Typewolf
- Mirador
- Abduzeedo
- Design Week
- Adobe Create
- Creative Review
- The Dieline
- Identity Designed
- Brand New
- Inspo Finds
- The Design Blog
- BP & O
- Fonts in Use
- Aisle One
- Tobias Van Schneider
- Mindsparkle Mag
- It's Nice That
- Logo Design Love
- The Inspiration Grid
- Creative Boom
- Eye on Design
- Jessica Hische
- Seth's Blog
- The Futur
- Creativerly
- AJ & Smart
Tools & Resources
- Asana
- Trello
- Toggl
- Clockify
- Dropbox
- Slack
- Spark
- Gsuite (Google Drive, Docs, Sheets, Slides, ...)
- Apple Pages, Numbers, and Keynote
- Microsoft Office
- Open Office
- Bear
- Adobe CC
- Figma
- Flawless Typography Checklist
- UI8
- Envato Elements
- GraphicBurger
- Undraw
- DrawKit
- Unblast
- Unsplash
- Frontify
- Lingo
- Hubspot
- SimilarWeb
- Ahrefs
- Alexa
- Quantcast
- Github
- Atom
- FileZilla
Colophon
All non-authored content within this document is presented solely for educational purposes and does not intent any infringement of intellectual property.
All authored content within this document is distributed for free by Boris Hrncic & The Polyfen Group under a Creative Commons Attribution 4.0 International License.